Mentioned earlier in the User Guide when creating document agreements, you had to choose the Document Type, based on whether the direction of the agreement was Inbound or Outbound
The default configuration will populate Inbound and Outbound Document Types which are used for transferring EDI messages, there are standardised set of document types that are used for Clever EDI.
To get to the Document Types pages, you can use the Search to either navigate to Inbound Document Types or Outbound Document Types.

NB: You can navigate through the document agreement to get to these two pages as well.
Against each Document Type code there is a description relating to the Microsoft Dynamics 365 Business Central Sales or Purchase documents.
Although most fields are similar between the Document Types for Inbound and Outbound there are few subtle differences.
Inbound Document Types
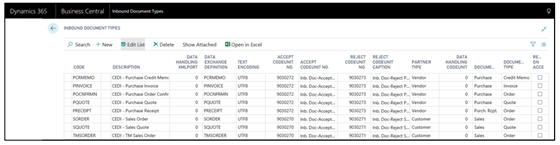
Each document type has the field Data Exchange Definition populated which is used for mapping the file to fields on the different Sales Documents created on accepting the Inbound Document.
The Partner Type, Document and Document Type fields indicate where the message will be sent to i.e. a Vendor or Customer and whether it is an order, quote, credit memo etc.
There is a field called Release on Accept. If flagged against the document type it will set the Status of the Sales Document to be Released. If not flagged then the Status will remain Open once the inbound document has been accepted.
The Accept and Reject Codeunits are populated for each document type. These are required fields so that when you action to either accept or reject a pending document from the Inbound Documents List the requested function is carried out.
Outbound Document Types
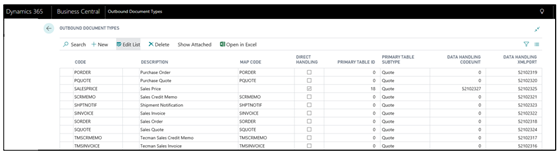
Like the Inbound Document Types the Outbound Documents Types also have a mapping fields in place. For outbound it is called Map Code. Each map code links to an Outbound Map Card, mapping the fields between your destination fields and your source fields, this is something that will be explained further on in the User Guide.