The Attachments FastTab is where you will be able to store the settings for the report you are editing on the Document Type. Here you can also add additional attachments alongside the standard report (i.e. attaching a Terms and Conditions document to the back of your Sales Order Confirmation report).

The Sequence No field refers to the order in which the attachments in this section are included in the email, for example, Sequence No 1 will be the first attachment in the email.
The Attachment Type at this stage should be set to Report and the Report ID will be defaulted to show the correct report number for the Document Type you are in. Once you have chosen your report you will notice both the Attachment Name and the Batch Attachment Name will automatically populate with text written in the Report Name field. These 2 additional fields can be overwritten as this is the description that the document will appear with in the email.
The Attachment Code can be populated if you wish to add another document to be emailed out alongside the report. This is covered in the next page.
The option to Store Documents should be used with caution and only really used on posted documents. Storing a document holds a record in the "Doc. Delivery Document Store" page, at that point in time of how the document was. Having this option only ticked means that if you edited a Document such as a "Sales Order" and wished to re-send it to the Customer, Business Central would use the stored (and therefore incorrect) document to forward on. To overcome this, the Generate New Attachment field can be ticked which would mean in this same example, a new (and correct) sales order confirmation would be issued to the Customer and the new and the old versions of the document would be stored.
Retention Period defines the period that the document should be kept in the "Doc. Delivery Document Store" for. The Store Until field on the Document Store table will be populated when the report is created.
Each attachment can be set as a Watermark or Merge (added as additional pages to the back) or added as a separate attachment to the email. This is set in the field File Processing Type selecting an option from the dropdown.

Against the attachments there are several actions which can alter an attachment and the way it is presented as part of that document type.
New Line and Delete Line will either allow you to create a new attachment record against the document type or delete an attachment line you are no longer using.
Doc. Type Attachment Card will open a detailed attachment card based on the attachment record you have highlighted to view. The Doc. Type Attachment Card is explained more here.
Clicking on Edit Request Page will open the reports request page. This is a set of filter options to run that report. For example, running the request page for Posted Sales Invoices you may what to filter out all invoices to not include Customers with location White.
NB: If not done then the first time you process a record for a document type which hasn’t had the request page flagged as run, then it will prompt you to set those options or filters as part of the process before it can send the document out. After the first time it will keep those settings and not ask again.

If at any point you need to modify the request page the action Clear Request Page, will remove all report filters for that document type and unflag the attachment line as having no request page.
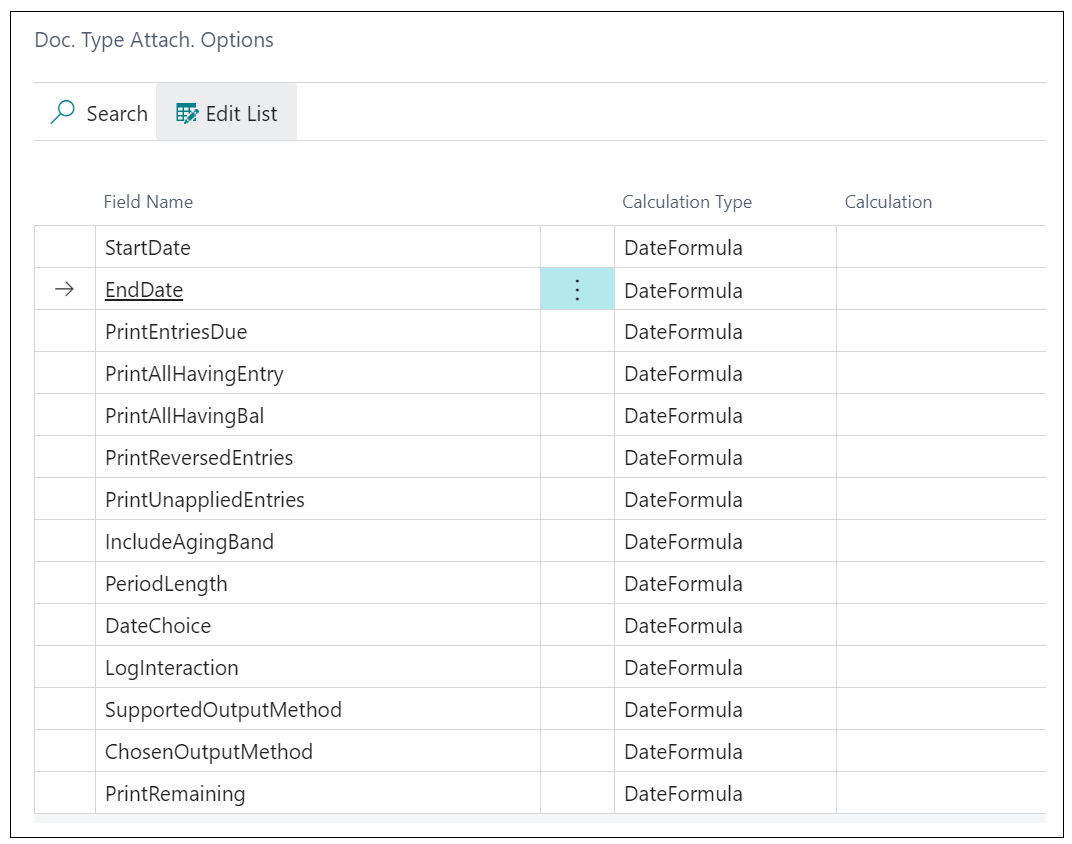
Choosing the action Options allows you to set a calculation against any of the date fields on the attachments request page. This is mainly used on the Statement (STMNT) Document Type. You set the calculations against the fields StartDate and End Date so that every month when the statement is run it is running for the correct date criteria.
NB: In order for the date fields to show on the Options page you must Edit Request Page first and this will populate the fields.
If the calculations weren’t set in here, a user would need to go into this document type every month and change the request page. If they didn’t, the statements would be set out using the previous months date range.
In order to automatically produce statements for the current month you can use the calculation formulas as shown below, this will return statements for the first to the last day of the current month.

To change the order in which attachments are displayed on your emails being sent out use the Move Up or Move Down actions.