After installation of the Clever PrintNode application you can configure the application by accessing the "PrintNode Setup" screen from the Business Central search functionality.
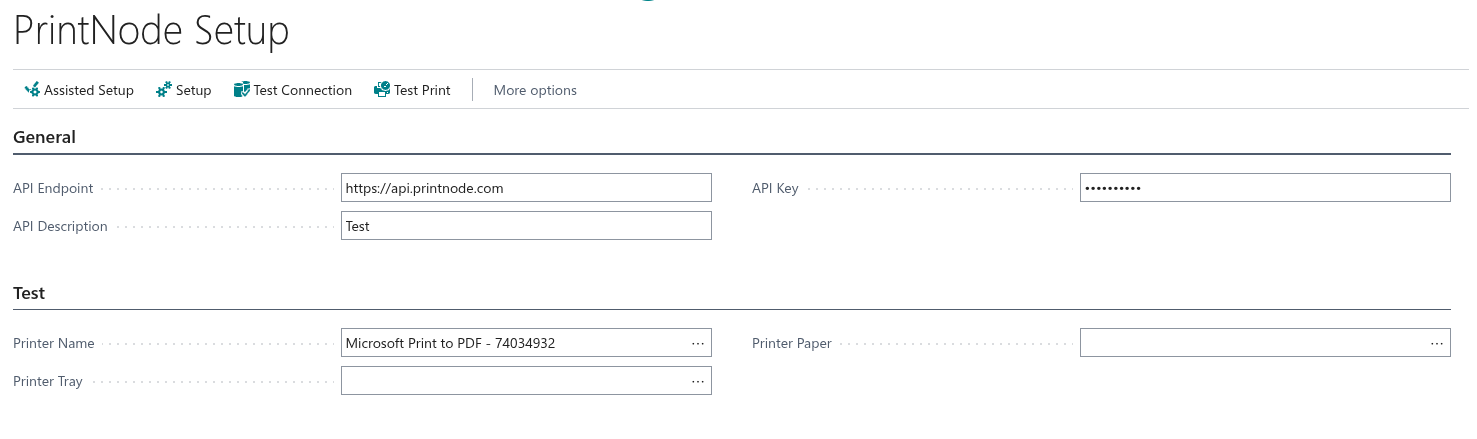
The following information must be setup for PrintNode to be configured successfully.
| API Endpoint | This attribute is automatically populated when the application is installed and allows Business Central to communicate with the PrintNode platform |
| API Key | The API Key is used for authentication and should be obtained either by signing up to PrintNode with your own account or (as stated below) can be obtained by contacting the Clever Dynamics support team |
| API Description | Is a simple description that you can enter manually if required and should match the Description setup in PrintNode for ease of identification |
Note: to obtain your API key you will need to email
Note: If you change your API key in the future you will need to end the current BC session and log back in for the changes to take effect.
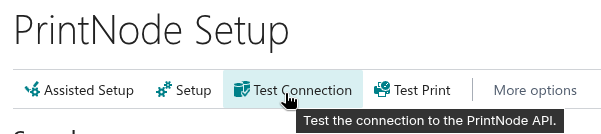
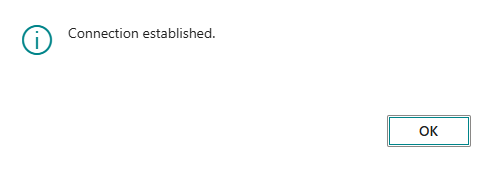
At this point you may choose to Test the connection, making sure that the API Key you populated is correct and that you can use the services provided. To do this select the button Test Connection on the Action tab. If successful, the following message will show.
Once the General FastTab has been complete you can then move onto filling in the Test FastTab section. Filling in the Printer Name and Printer Tray, allows you to then print a test page to those chosen credentials.
To fill in the Printer Name you can either type in the printer name if you know it or use the assist (three little dots) next to the field.
This will display a list of all the printers you have available to you that you can select form.


Note: there is no requirement for you to fill out the Test FastTab fields you can simply leave the fields blank.
By populating the fields, you can then run the Test Print action to make sure that the printer you want to send your documents to through use the app connects correctly to your Microsoft Dynamics 365 Business Central.
Setup Options: Printers and Scales
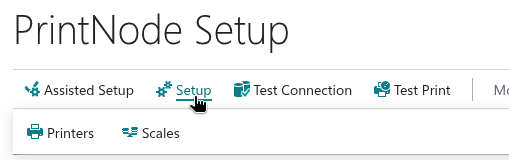
Within the PrintNode Setup Screen, in the Setup action in the ribbon menu, there are two configuration areas available:
Printers – Used to configure your available printer devices.
Scales – Used to integrate weigh scales for capturing consumption or output weights within Business Central.
For detailed guidance on setting up and using weigh scales, see the Weighing Scales Integration page.