Creating Item Tracking Attributes
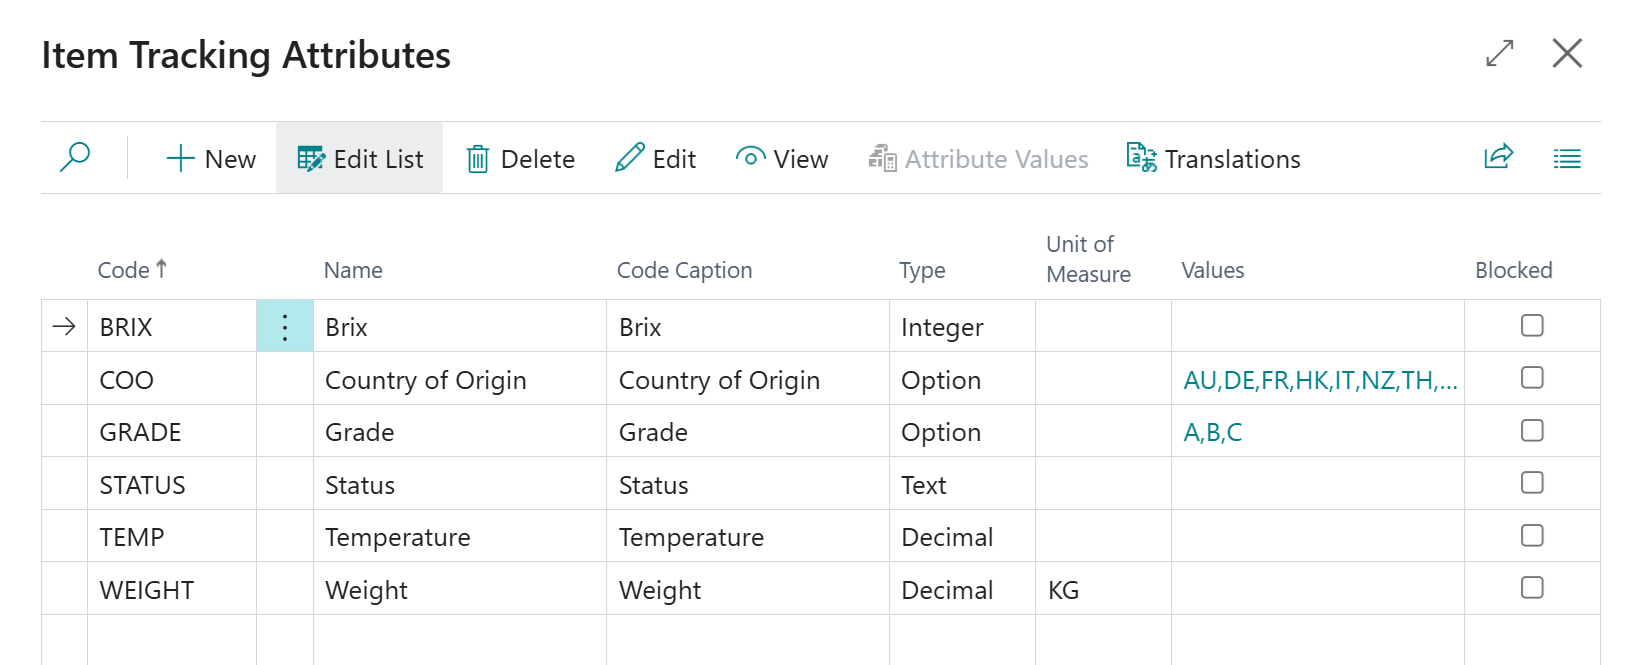
The Item Tracking Attributes screen is where you will need to define all of the different types Attributes that you would like use.
|
Code |
In this field, you should enter in the Code value for this Attribute you are creating. |
|
Name |
In this field, you should enter in a Name for the Attribute you are creating. |
|
Code Caption |
In this field, you should define the Caption that you would like to use for the Attribute. This value will then be used as the Field Name where ever the Attribute is displayed. For example, on Routing Lines and on the MES Screen. |
|
Type |
Item Tracking Attributes can hold different data types. Here you can select Option, Text, Integer, Decimal, Date. Depending on this setting the system will allow/enforce Attribute Values to be entered only according to this setting. |
|
Unit of Measure |
This can be specified to inform the user of the Unit Of Measure that is associated to the Item Tracking Attribute |
|
Values |
Is relevant when the Type is set to Option and will show the list of available values that have been setup for the specific Attribute, further detail is defined below. |
|
Blocked |
Set this field to restrict the use of the Attribute. |
Defining Item Tracking Attribute Values
Once you have creating a Item Tracking Attribute entry, the next step would be to define all the associated Attribute Values. This should be completed by selecting Attribute Values option on the Ribbon.
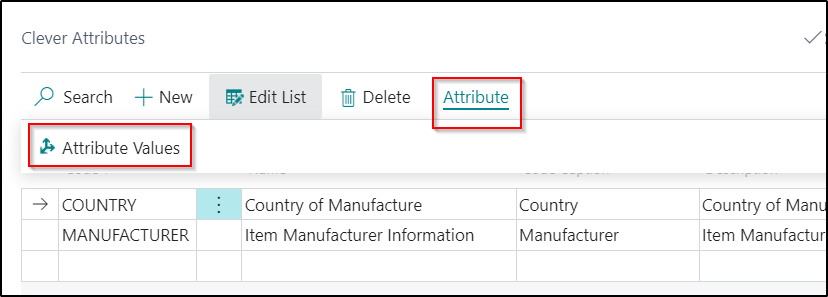
The below Page will then be displayed:

You will need to create an entry for each individual Attribute value by defining a Code and a Description for each one.
Once you have started to process transactions which include "Clever Attribute Values" the Where Used option on the Ribbon can then be utilised to display a list of Lot No. Information records where that particular value has been defined.