Using Power Automate, when documents are credit held (either due to exceeding their Credit Limit or due to them having an Overdue Status), you can set up a flow connected to your Teams account that will send you an adaptive card in Teams with details of the Credit Held document along with options to release and comment against the document directly from Teams.
To set this up, first of all, you need to ensure in the "User Setup" page, the E-Mail field must be populated with the email address connected to your Teams account. This User must be the associated Clever Controller so that whatever User is set to be the Credit Controller on either the "Clever Credit Setup" page or the "Customer Card", Business Central will then look to find that User in the "User Setup" page and use that email address stored to connect to Teams. Your Clever Credit Setup as detailed earlier in this module should also be completed.
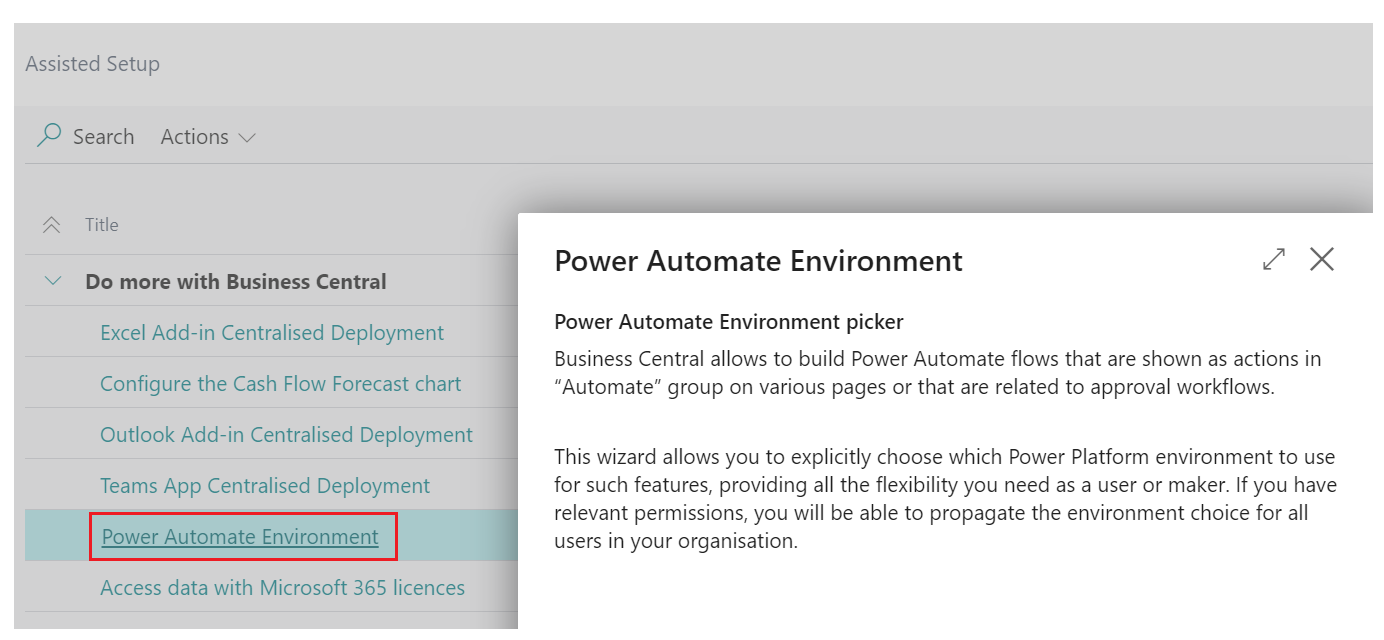
Next, search for "Assisted Setup" in Business Central and find the Power Automate Environment option. Clicking into this will open up an assisted setup box which must be completed. This will then mark the Power Automate Environment as Completed.
Access Github (https://github.com/CleverDynamics/CleverCreditSamples) and download the file for the "Flow Release Credit Held Sales Documents" from the ExternalBusinessEvents/src file. This does not need to be extracted from the zip folder.
Open the "Clever Credit Setup" page, in the ribbon, select the Automate option and click into the options, selecting the Manage Flows.

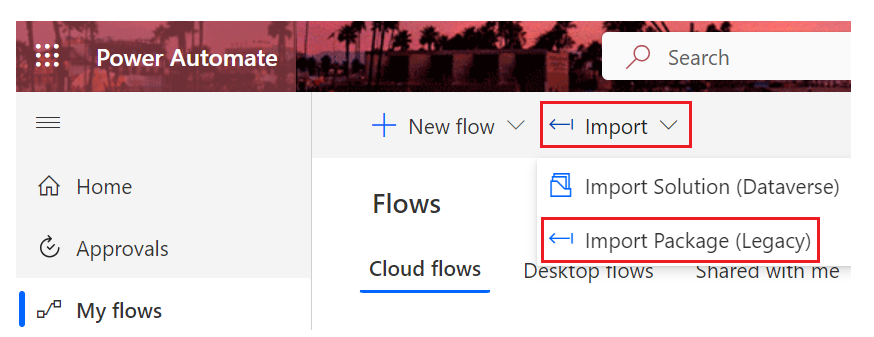
Once Power Automate is open and you're in the "My Flows" screen, click on Import and then choose Import Package (Legacy).
Click Upload and select the downloaded file from Github and press Import at the bottom of the screen.
A page similar to the below will open. The 3 boxes areas highlighted in red below require action. Clicking into the Create as New for the "Release Credit Held Sales Documents" will open up a screen to the right. Press SAVE on this screen to store this choice for the setup.
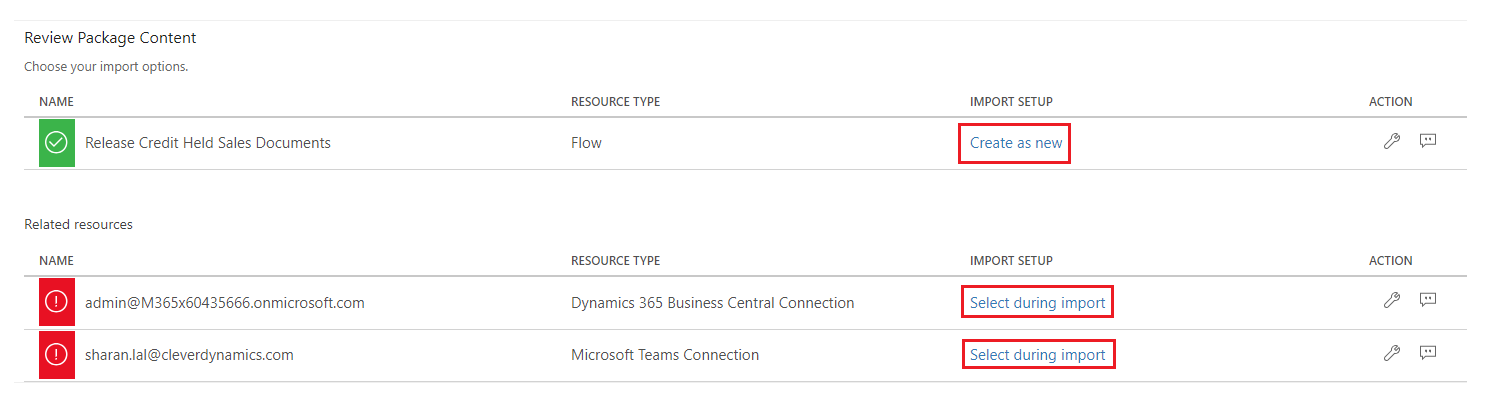
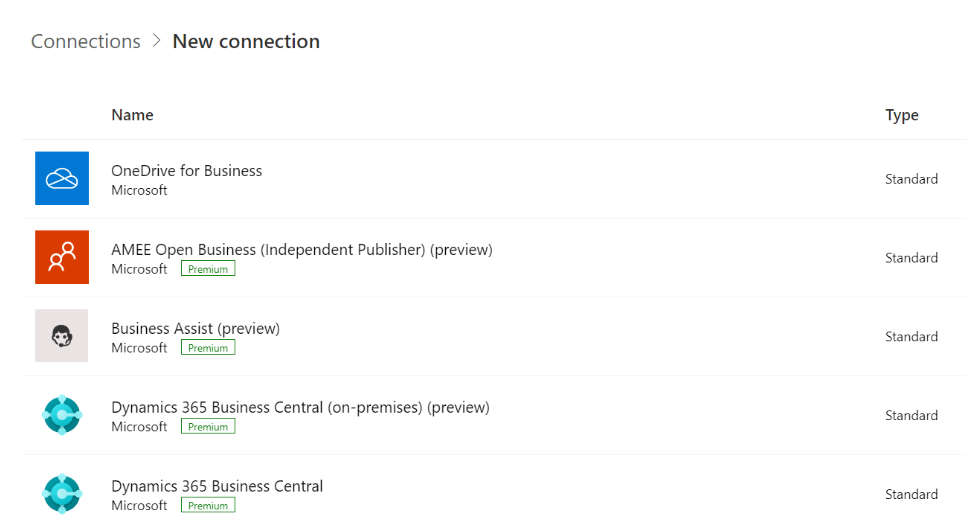
Clicking into the Select During Import against the Resource Type Dynamics 365 Business Central Connection will bring up a similar box. Here, select your Tenant User email address and press SAVE. If you do not see your Tenant User Email address, click into the +Create New option, select New Connections for Business Central and then login as your User.
Finally, clicking into the Select During Import option against the Resource Type Microsoft Teams Connection will open up a similar screen. Select your Teams user and press SAVE.
Click into Import at the bottom of the screen. Once this is imported, it'll take you to a new screen where you can Turn On your flow (If you don't see this, click into the My Flows on the menu and select the Release Credit Held Sales Documents).
The Comment boxes on this page, highlighted in red on the image below, give extra clarification for the action required. if you are unsure.

Now, every time you process a sales document that is credit held, the Teams user will get notifications such as the below, showing all the details and giving them the ability to release and comment on the document from Teams.
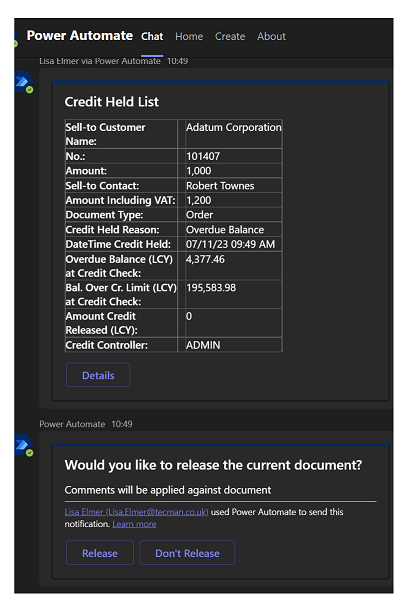
Comments are added when the Release or Don't Release option is chosen where a Comment Box will appear. Once populated, press Submit.

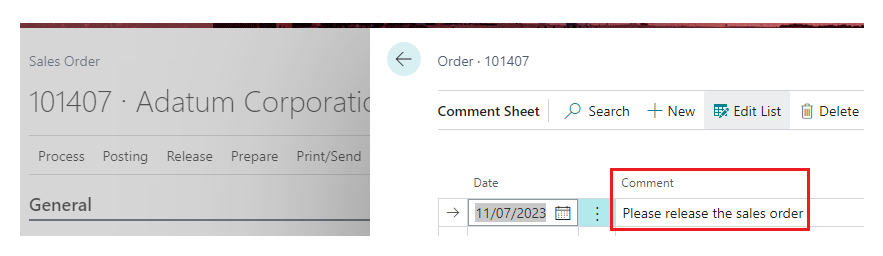
If you now open the related "Sales Order" document, there are 2 things updated. Firstly, the Credit Status now shows as Credit released. Secondly, in the ribbon, the Comment is now shown in the "Comment Sheet".
Note: This only works for Customers whose Business Central license is Premium. You can check this within the "Company Information" table, within the User Experience FastTab. In order to successfully import the package, your environment must be a Sandbox environment, called "Sandbox". Once imported, this can be adjusted accordingly to your own environment and environment name.