We can support having a different custom layout code per customer, but not a custom report ID per customer. If all customers share the same report ID, then we can configure the Document Type like this:
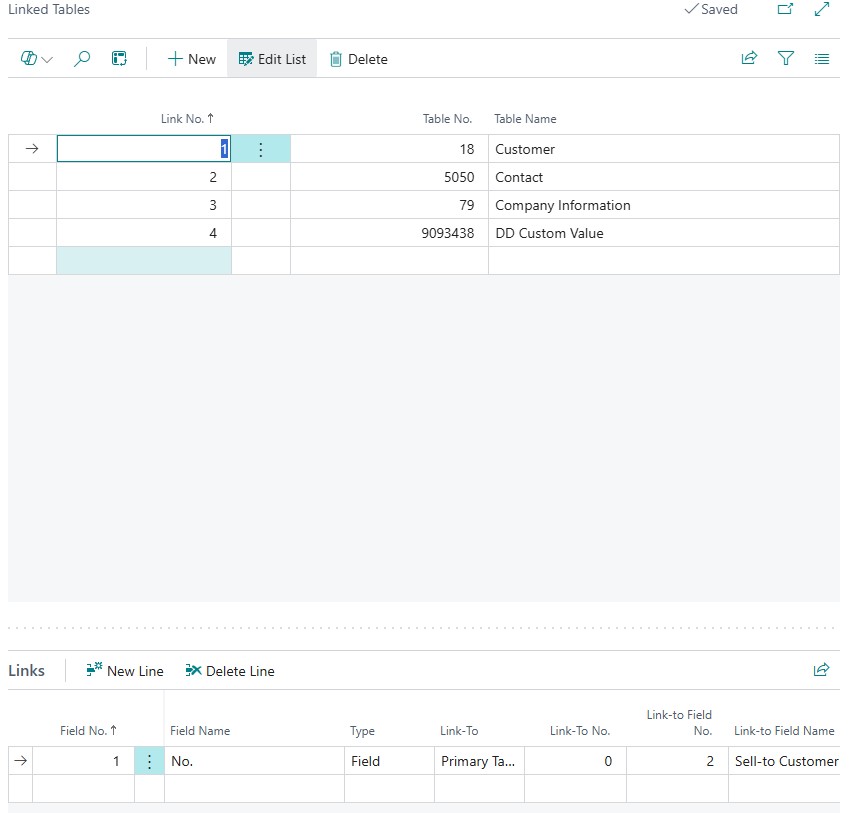
Create a new Linked Table in the Doc. Delivery Document Type. This will find a record (if one exists) in the Document Layouts table for the Sell-to Customer No. for the same report ID that has been specified on the Document Type attachment.
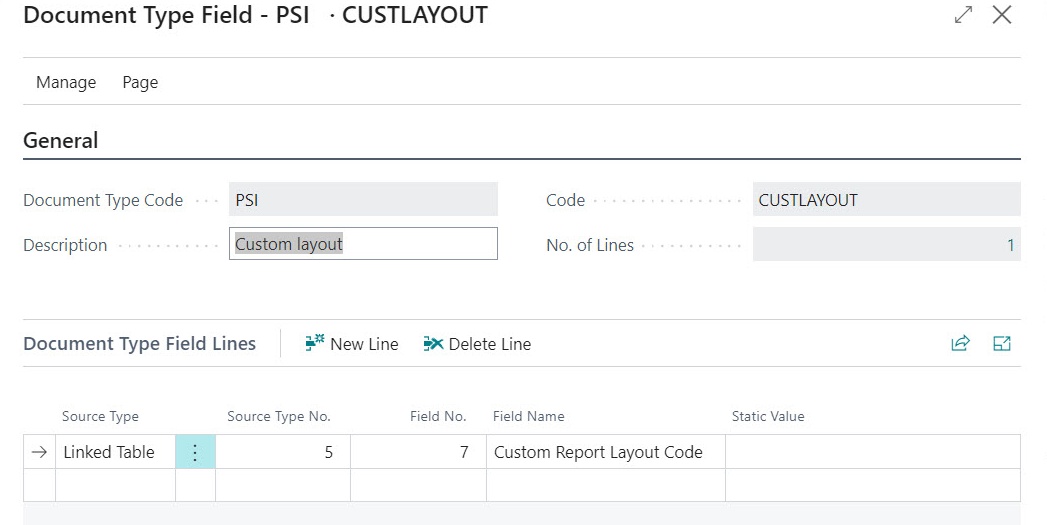
Once done create a new document field, called CUSTLAYOUT which takes its value from the Custom Layout Code of the Linked Table.
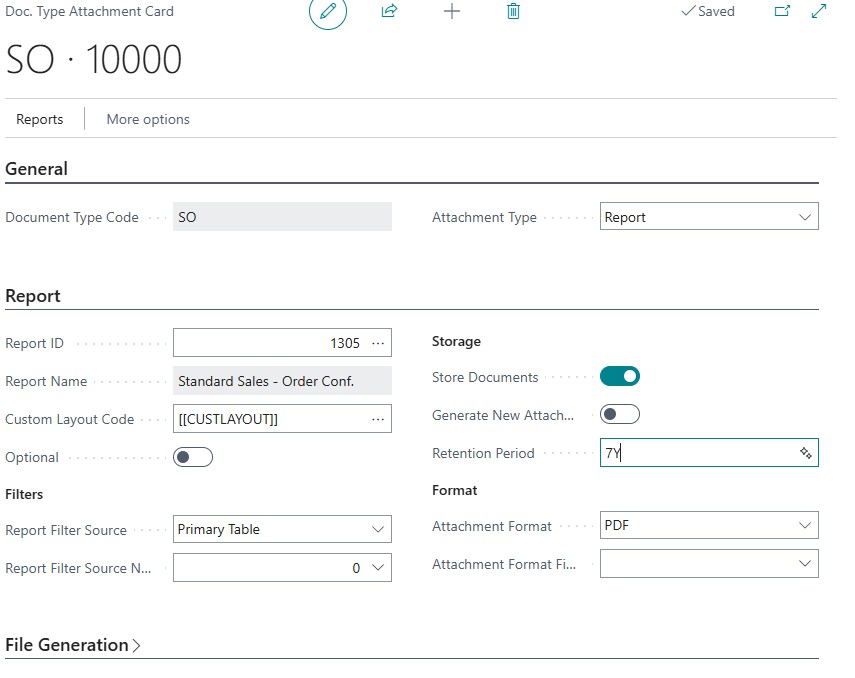
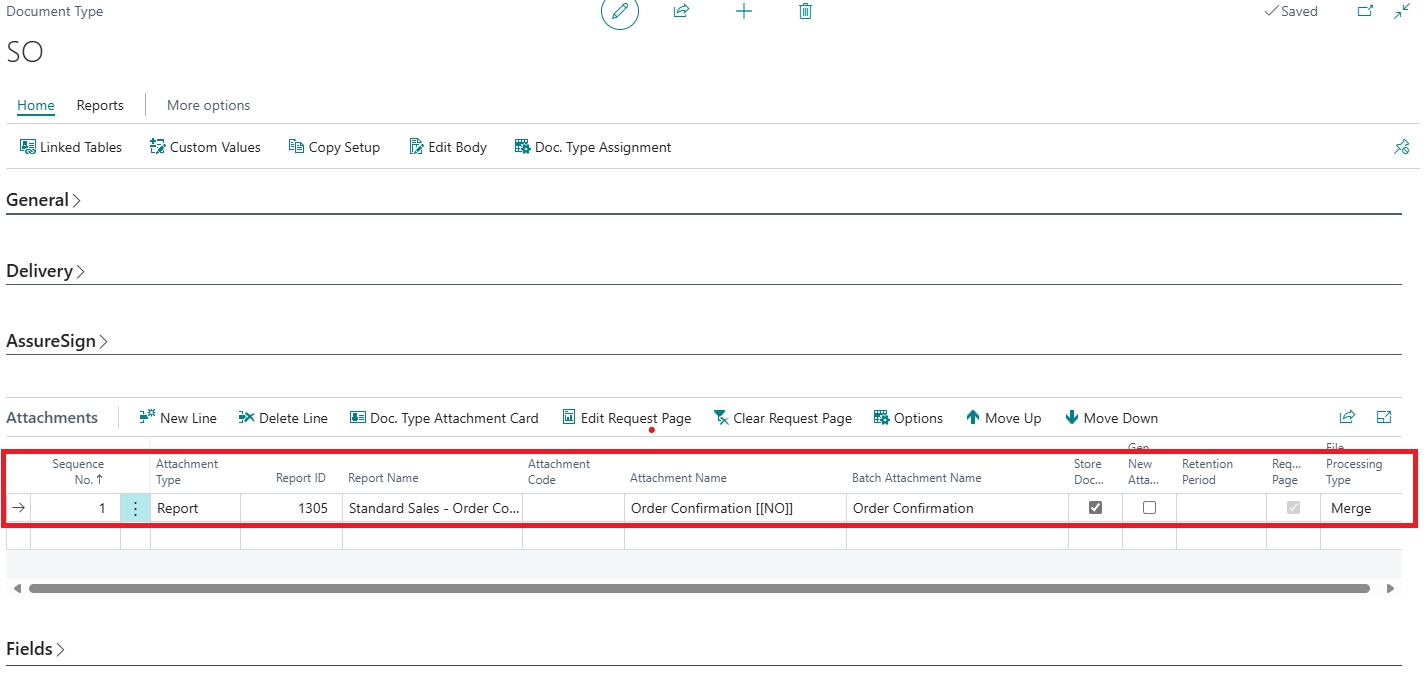
Use that field value to specify the custom layout code that should be used for this document type. Navigate to the "Document Type Attachment Card".
Things to be aware of:
-
If the user chooses to combine records into a single document to be sent, then the first record in the batch will determine the custom layout code that is used
-
If the Document Layouts record specifies a different Report ID to be used that will not be respected by Document Delivery.
Sending open documents attached to reminders
In some scenarios you may want to attach multiple reports in one go. For example, an issued reminder you may want to send the invoices and Credit Memos belonging to that reminder.
The first thing to do is go to the document type and add further attachments to the document type that you want to send alongside the core report (the issued reminder report).
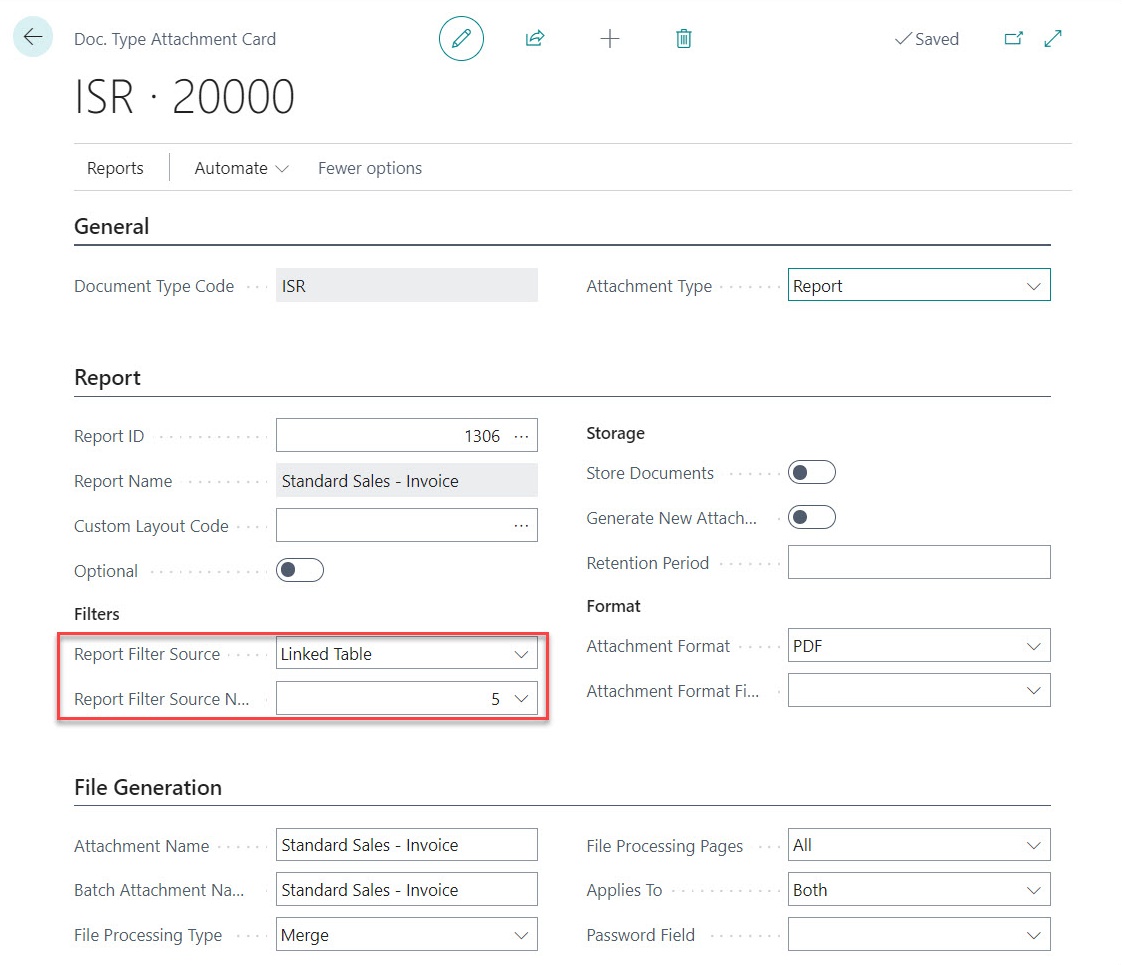
Once you have changed the document type you will then need to add in a Linked table. The linked table will allow you to filter the Sales Invoice Header table to attach the correct document to our core report.
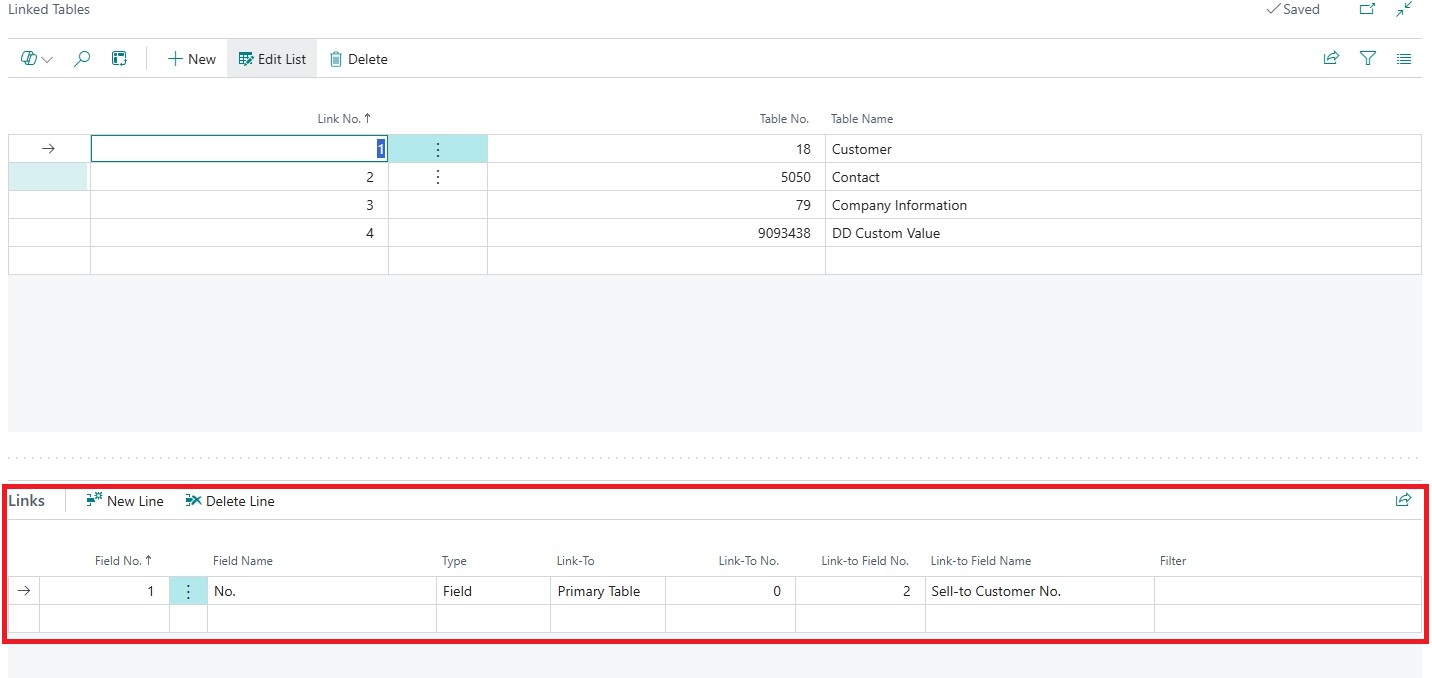
In the linked table screen, you can see how we have applied some filters to fields in the Sales Invoice header table. It will be those that get applied to the report filters when attaching them to our email.
The final step is to make sure that you have setup the report filter to pick up your linked table.