Trying to find a record which you have linked to a specific document, can become a bit of chore, especially as the number of Linked Document page grows over time. Within Clever Document Links it is possible to use Document Attributes to help find documents. Document Attributes are effectively additional data that describes the document link and makes it easier to find relevant documents.
Document attributes can be used in two areas. They may be used to filter the Linked Document List within Microsoft Business Central or, if using Microsoft SharePoint or Azure File/Blob Storage for File Storage, they can be used to add MetaData (shown as Columns in SharePoint) to the files. Finally, a Document Attribute can be used to create Attachments when you use both Clever Document Links and Clever Document Delivery Apps.
To use Document Attributes you need to navigate to the Document Attributes page, which you can do either this using either the search action on the role centre or from within the Navigate action group of Document Links Setup.

On the "Document Attributes" screen, simply click on the New button and begin by giving your attribute a unique Code along with a Name (something meaningful to describe the code you have just given the attribute).
If you are using Microsoft SharePoint or Azure Blob/File Storage as the document repository then you can also specify the SharePoint Metadata Tag. This is the name of the Metadata (or column) within SharePoint or the name of the Metadata within Azure. If this is specified then the attribute value will be used as the value for the Metadata tag.
Note: For SharePoint the Metadata Tag field is only if the Metadata Tag already exists as a column in your SharePoint Library. For Azure Blob/File Storage the attribute Name will be created/updated automatically.
Note: It is recommended that SharePoint Columns should be set as type 'Text' for all data types to remove formatting issues.
Whilst it is possible to set attributes manually against a document, this presents a manual overhead. It is therefore possible to default attribute values by selecting an option in the Default Value field. This field has the following options:
- None - No value will be defaulted and this needs to be set manually on each document from a value in the Attribute Values list.
- User ID - The User ID of the user who uploaded the document will be populated.
- Date - The date the file was uploaded will be populated.
- Time - The time the file was uploaded will be populated.
- Date/Time - The date and time the file was uploaded will be populated.
- Company Name - The Business Central Company Name will be populated. This can be useful within SharePoint if the multiple Business central companies are used.
- Field value - The value of a field on the source record was be used. For example, if uploading a file against a Sales Order this could default the Customer Name.
If selecting Field Value then you also need to setup how the system will apply values to the Document, which can be done by selecting the Fields (Default Values) option on the screen which will open the "Default Attribute Field" screen.
![]()
The following dialog is displayed allowing you to map the fields for each source:
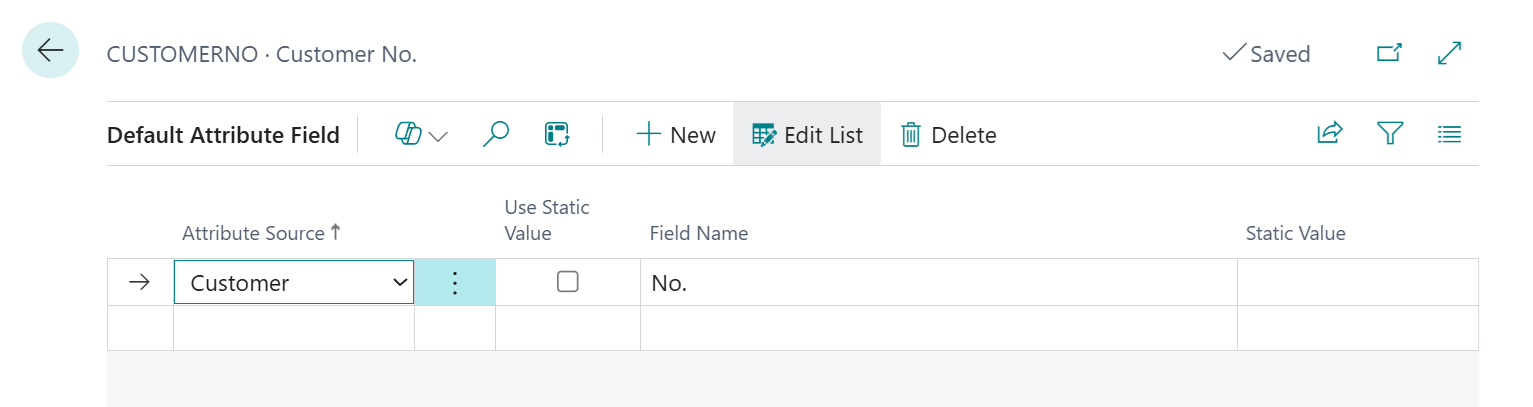
Within this dialog select the Attribute Source and the Field Name to use from the list of fields on the underlying record. For Example, if you want to default the Customer Name when you upload a document against a Sales Order select Sales Order as the Attribute Source and then Sell-to Customer Name as the Field Name.
In addition to the above, it is also possible to assign a Static field value again a certain Attribute Source for instances whereby you want each Document Link to share the same Static Value a defined Attribute Source. A Use Case for this could be if you want to ensure that anything attached to an Item is setup to be an attachment to be sent with Order Confirmations when using Clever Document Delivery.
An example of using a Static Value is shown below for reference.

If you select None as the Default Value or you wish a user to be able to override the default value you can configure a range of values for the user to select from. This may be done by selecting the Values action:
![]()
This will display the "Document Attribute Values" screen as below:

Within this screen you may specify a list of values for the user to select from. The bottom part of the screen will display any documents that are currently assigned the Document Attribute/Document Attribute Value.