Some of our apps require a dependency, the installation of Clever EDI is one of these apps.
With the installation of Clever EDI, two other apps will be installed Clever Config and Inbound Documents will be installed at the same time.
|
Note: You should not uninstall Clever Config or Inbound Documents if you plan on using the Clever EDI app. |
On install a Web Service is created to allow communication between Microsoft Dynamics 365 Business Central and your trading partners.
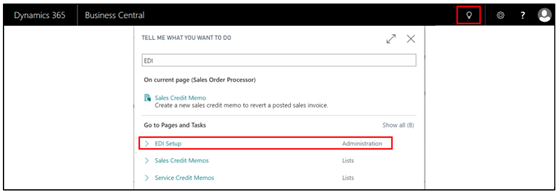
You can navigate to the Web Services screen using the search function on your role centre. There will be a newly created entry on the Web Services page. On this entry, click on the Publish tick-box to enable the service.

|
Note: You do not have to enable it if you prefer Technology Management can set this up for you instead. |
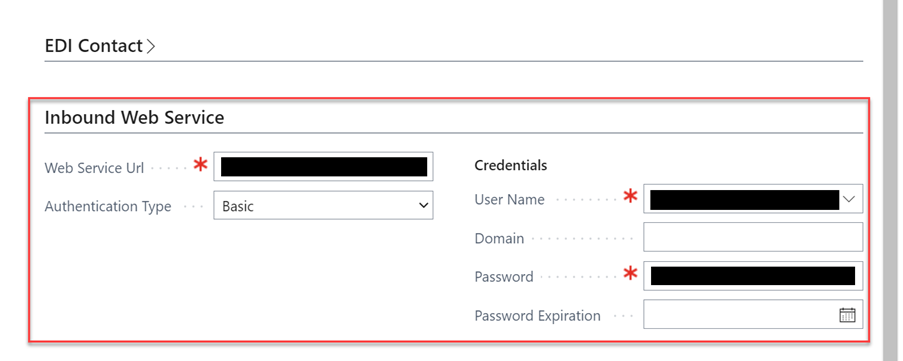
A user and password must be provided in order to authenticate with the webservice these details are entered on the EDI Setup screen, you can find this using the search tool. To obtain your Webservice Username and Password please email
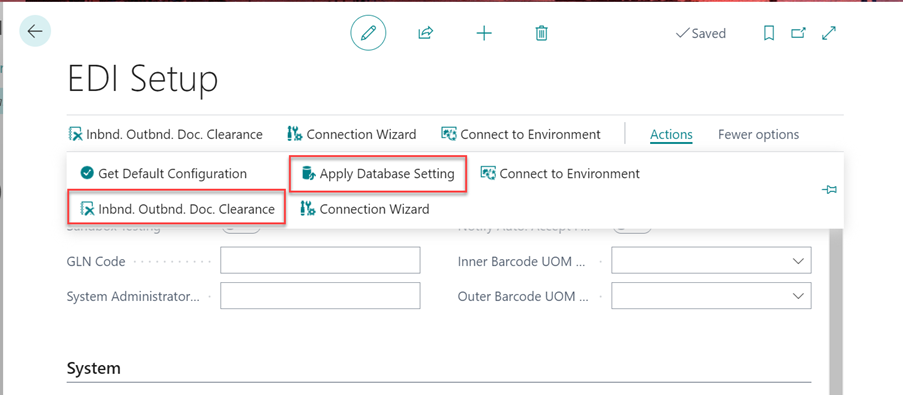
Once you’ve opened the page run the Get Default Configuration function from the Actions Tab.
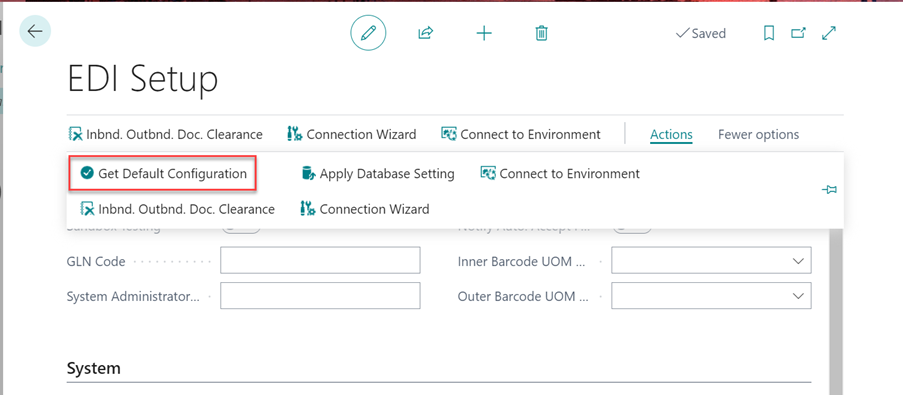
Running this will create Document types, Data Exchange Definitions for mapping the file to fields on your Microsoft Dynamics 365 Business Central documents and the Web Service URL, all these bits of setup will be explained throughout the User Guide.
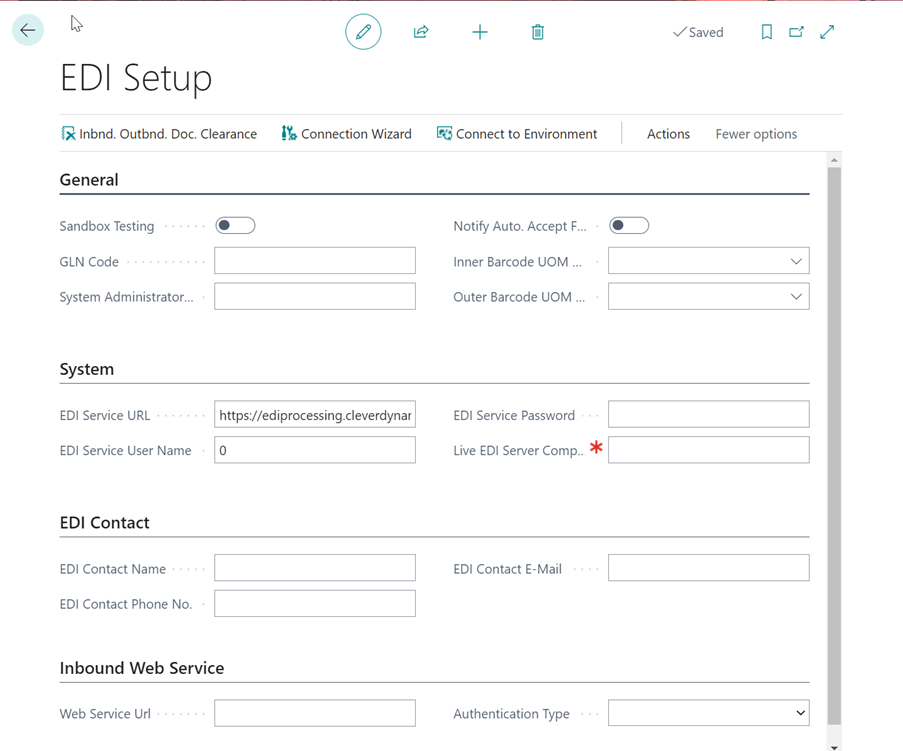
Now on the EDI Setup Page you can start to fill out all the fields which the Default Configuration hasn’t populated.
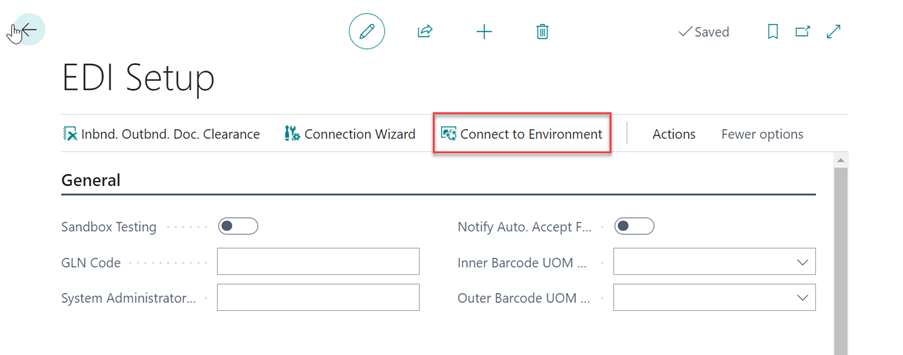
The other two functions on the EDI setup Page are Inbnd. Outbnd. Doc. Clearance and Apply Database Setting.
You will be asked to populate the field DateTime Processed Filter. Including whether you would like to clear all Inbound Documents or Outbound Documents within this specific period.
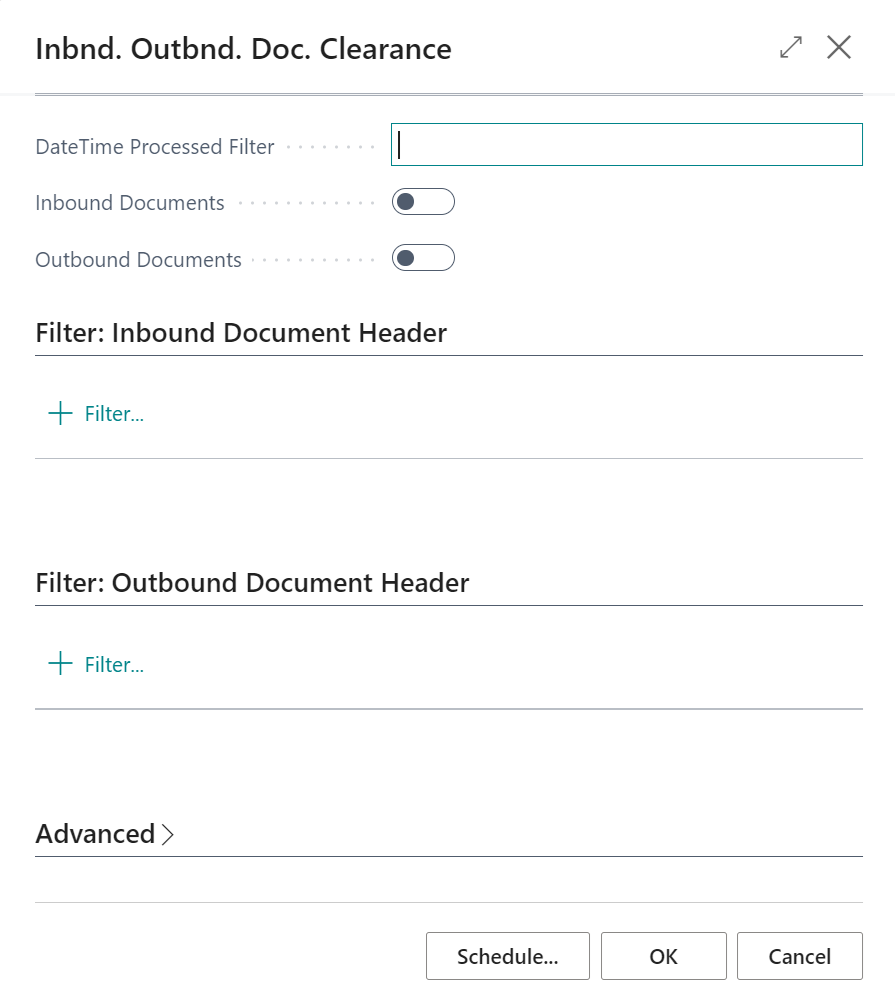
Pressing this action will remove all Pending, Accepted and Rejected documents within the date filter you apply and the option you select.
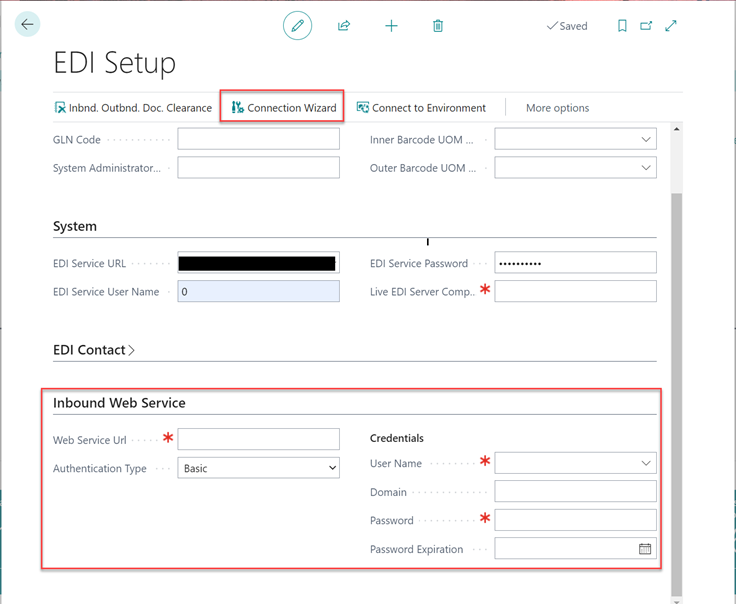
If you run Apply Database Settings, this will populate the Live EDI Server Database Name and the Live Company Name, mentioned in System FastTab section of the User Guide.
|
Note: If you have manually populated the database and company fields this information will be overwritten by running this function. |
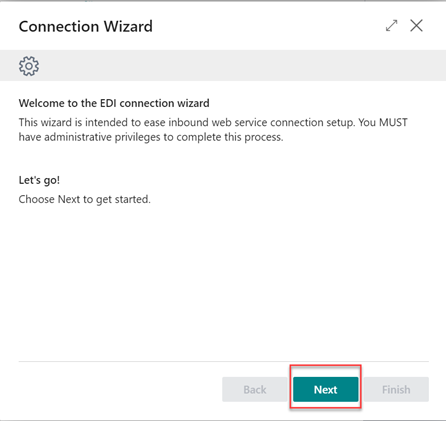
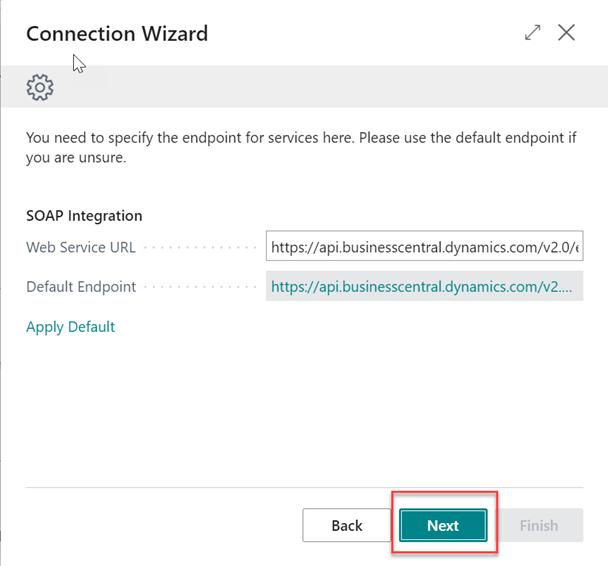
With the Connection Wizard action, you can set different authentication types for the Inbound Web Service.
On the request page select the Next button:
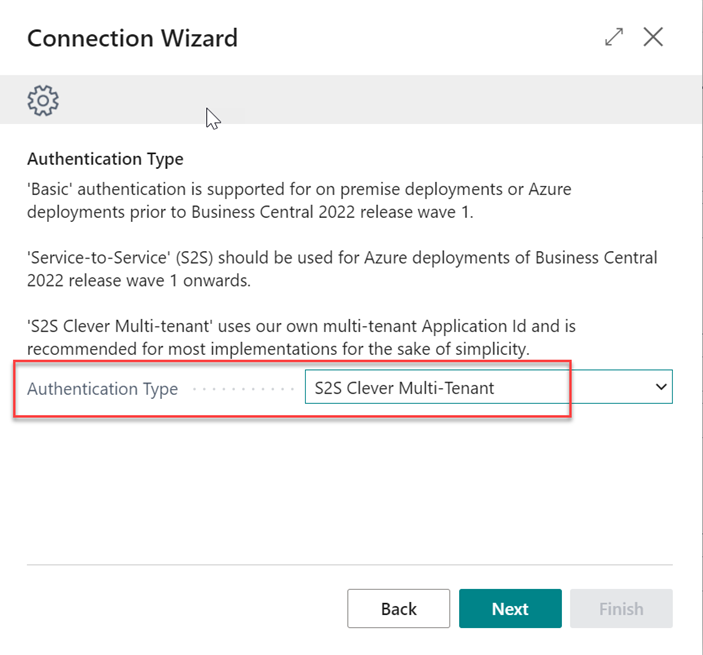
On the next page you can select one of three different Authentication Types:
- Basic
- S2S Clever Multi-Tenant
- S2S Own Single-Tenant
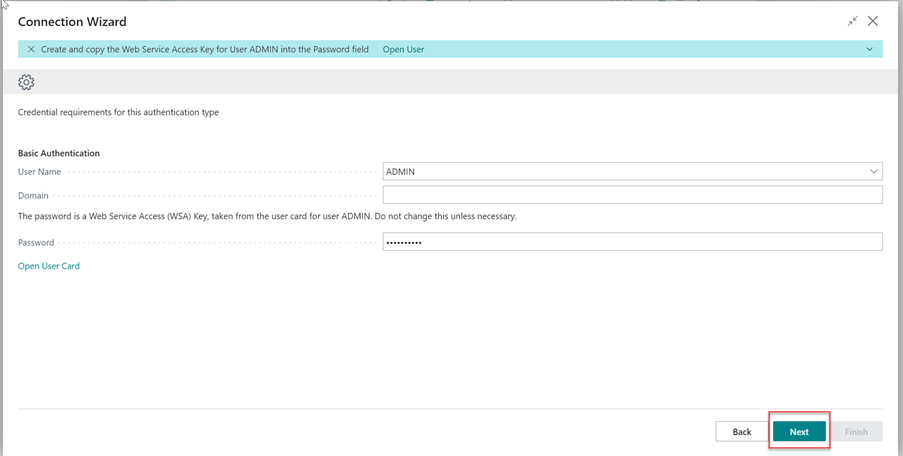
Basic Authentication
When you select Basic authentication:
On the next page you need to set the credentials:
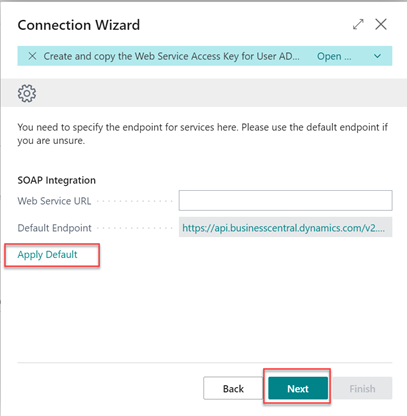
Also the Web Service URL needs to be set, if you want to use the default webservice press the Apply Default Option:
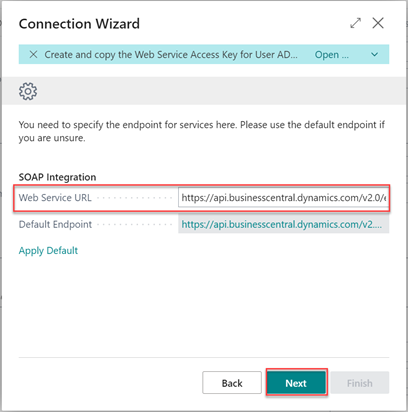
At the end you need to press the Finish button:
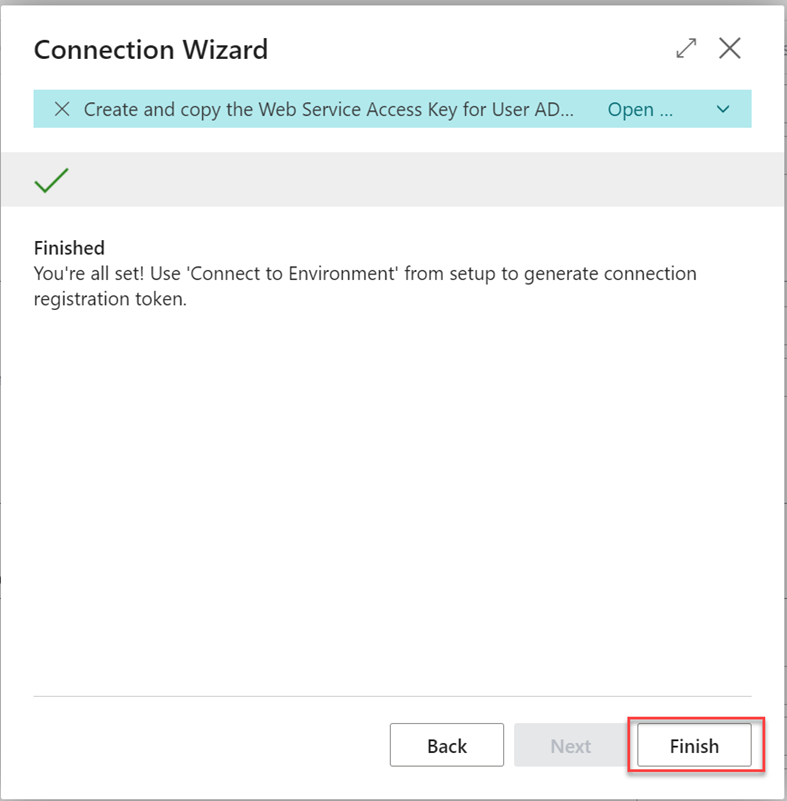
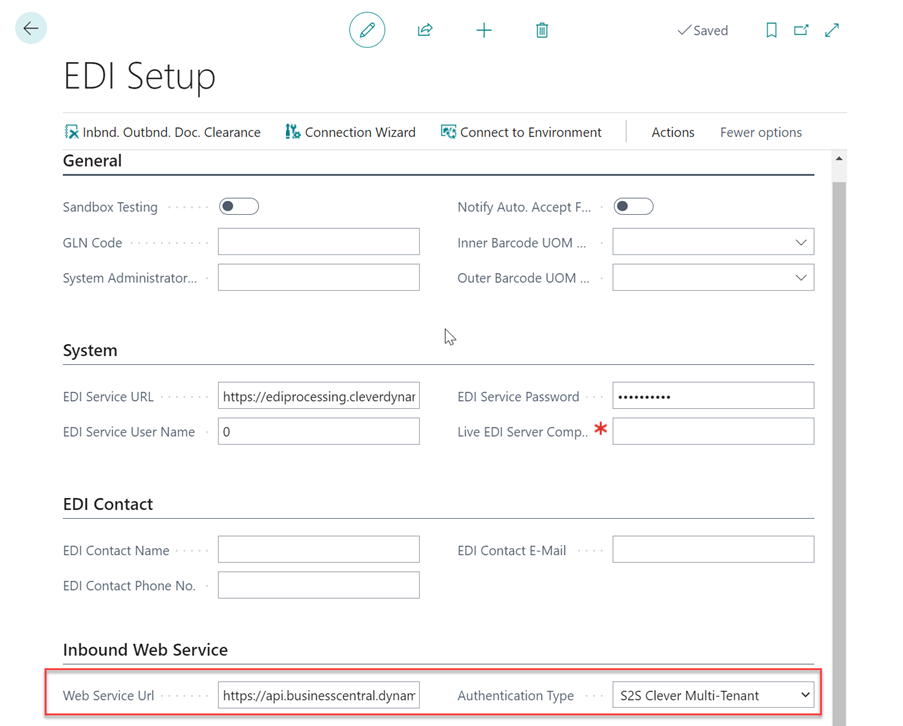
After the Wizard has been run, the related data will be automatically populated on the EDI Setup page:
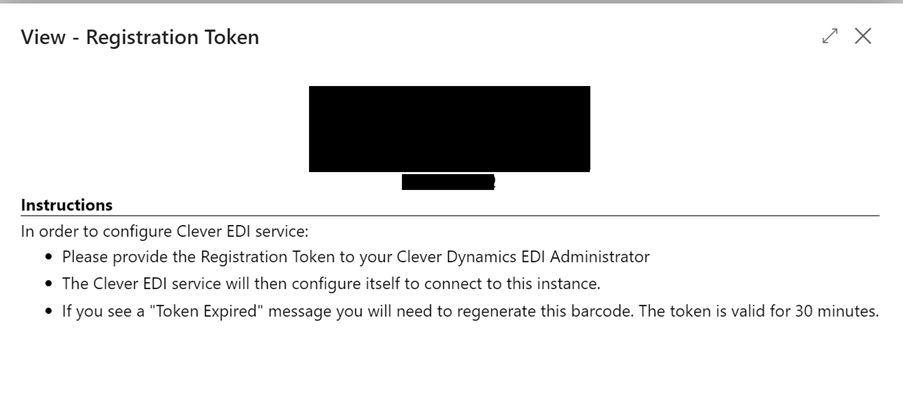
In case of Basic authentication, the Web Service Access Key (from the User card) and the Registration Token need to be sent to the Clever Dynamics EDI Administrator. This token can be generated by using the Connect to Environment action.
Service-to-Service Clever Multi Tenant Authentication
You can select S2S Clever Multi-Tenant authentication:
In this case only the Endpoint needs to be set:
For this type of authentication limited fields will be set and displayed on the Inbound Web Service FastTab:
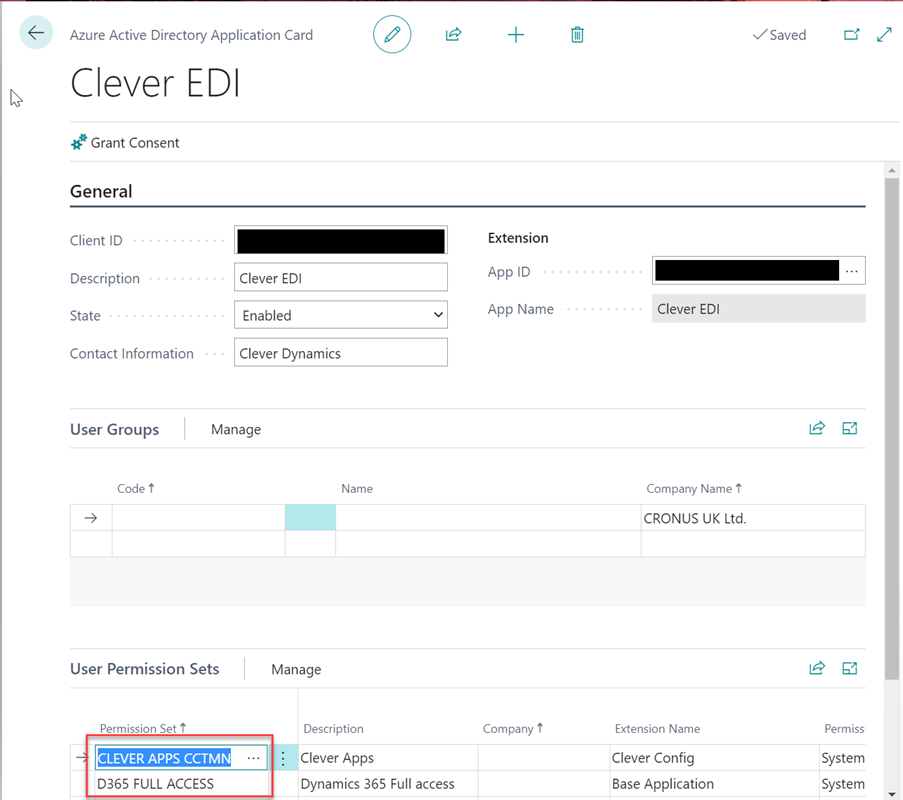
Completion of the Wizard will create an Azure Active Directory Application Record entry with an application user that has the following two permissions:
- D365 FULL ACCESS
- CLEVER APPS CCTMN
Clever Apps permission will include permissions to all clever dynamics apps which are installed on the environment.
|
Note - Only the latest versions of our apps will extent the Clever Apps permissions set, so if you are using older versions of the apps which are not updated to be included then please add those permissions to the application user if necessary. |
The Admin is required to add any additional permissions if there any 3rd party application what connects to inbound/outbound document creation/send.