Clever Landed Costs allows you to create Landed Cost Container records to track the transit of goods from Vendor to their arrival destination.
Within a Landed Cost Container, you can specify Container Details and allocate the relevant Items (Purchase Order Lines) and furthermore manage updates and receiving. Information specified on the Container (such as the Vehicle ID) are able to used as a reference when matching documentation from Vendors/Shipping Agents and also the Landed Cost Invoices you receive which relate to Containers.
The "Landed Cost Container" screen will show any Open and Released Landed Cost Containers. When creating a Container the Status will be initially set to Open. When all stock assigned to a Container is received then it will be automatically be changed to a Closed Landed Cost Container - meaning the Status field will be set to Closed. Further information on Closed Containers can be found here.
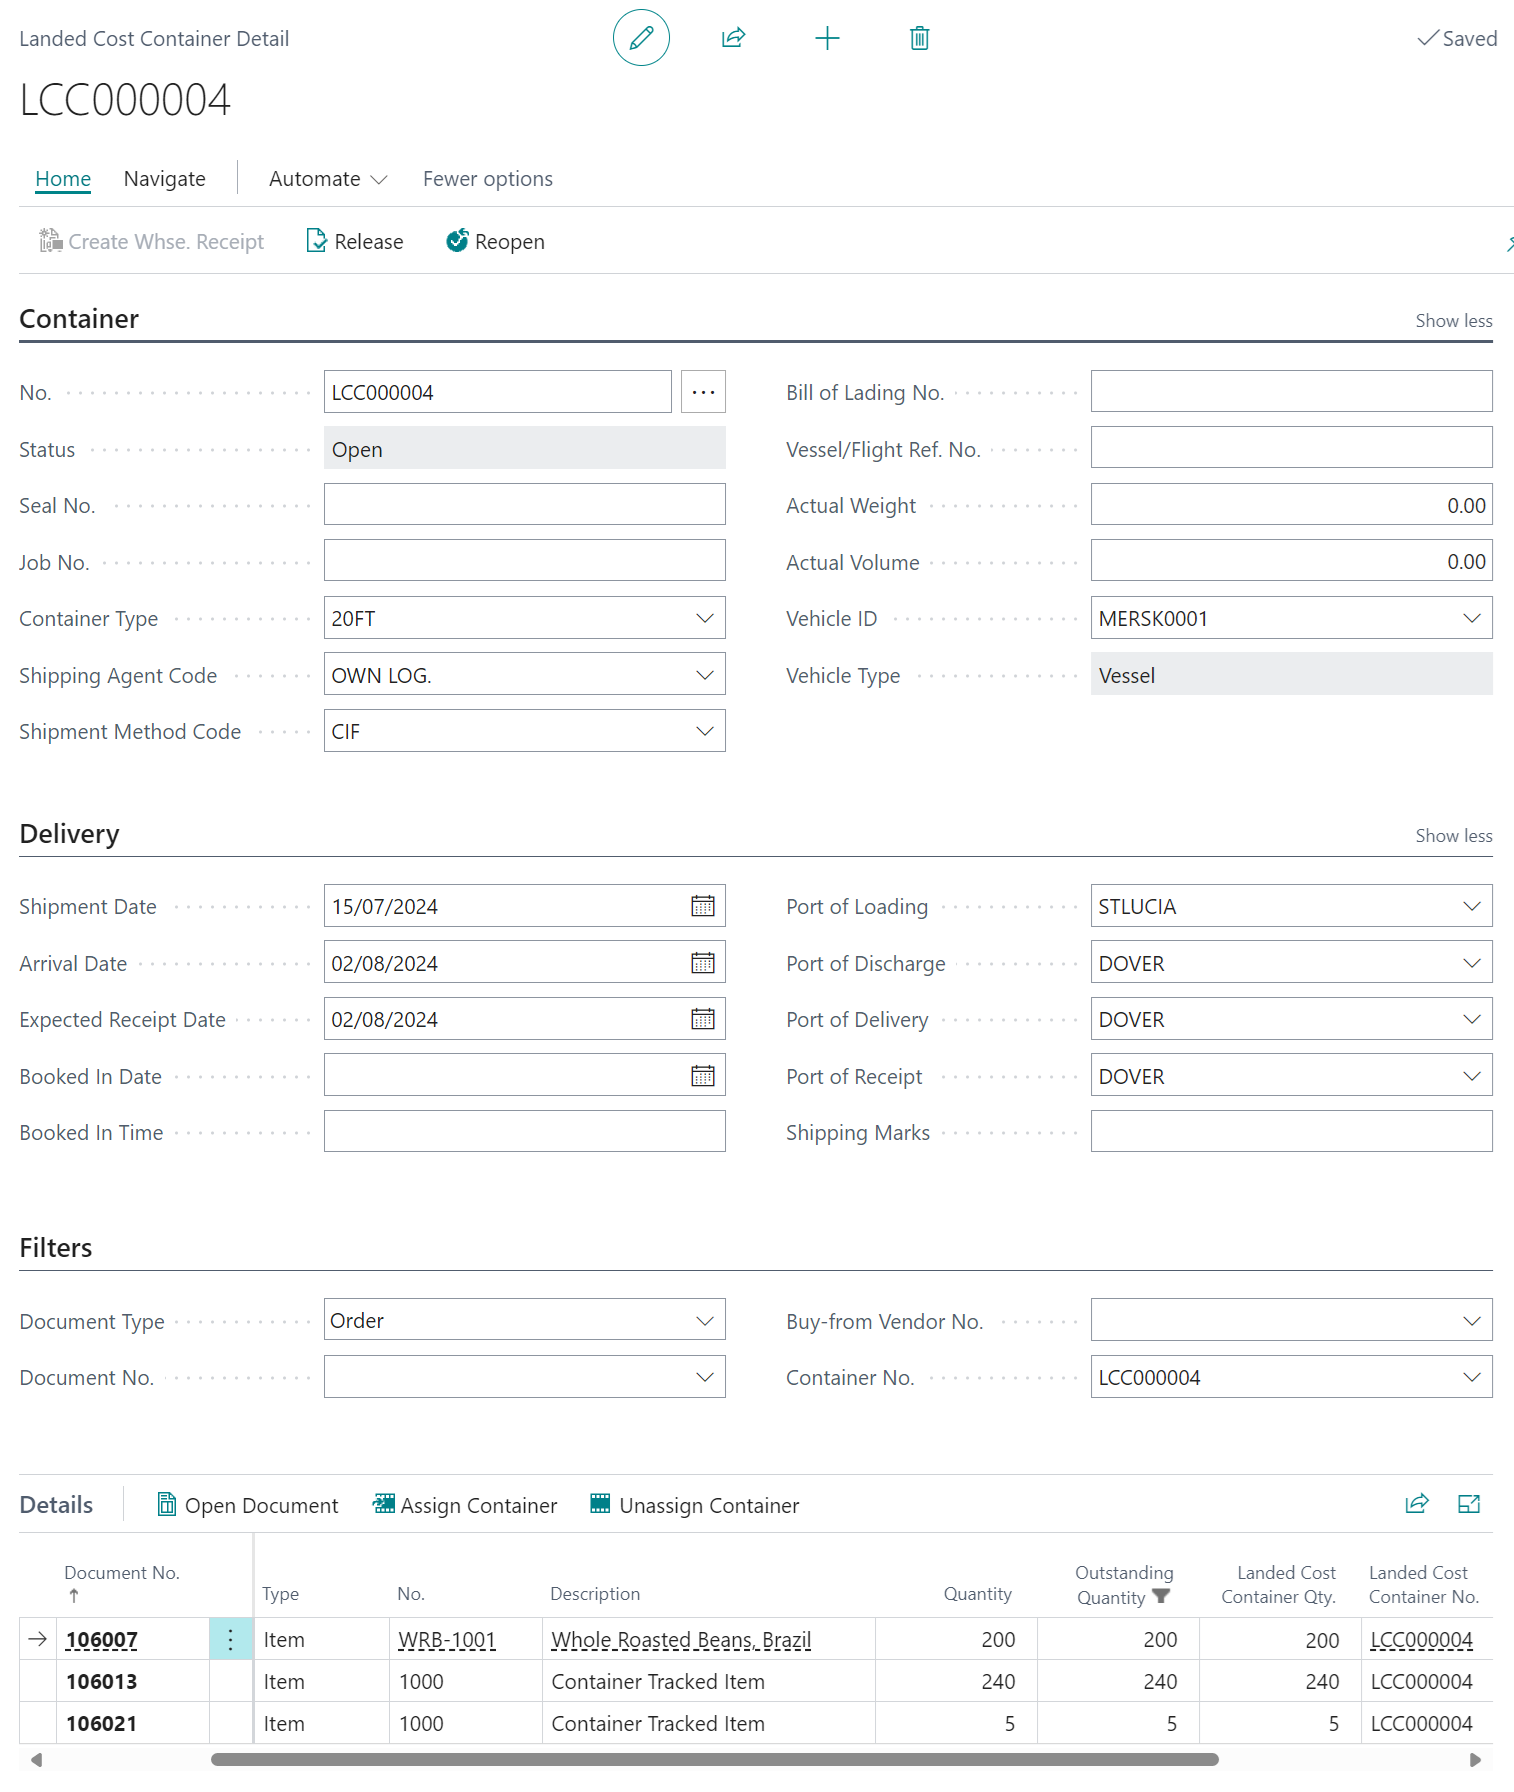
The "Landed Cost Container Detail" screen can be seen below.
Landed Cost Container Types
Container information is set on the Container FastTab of the screen, where you can define information related the Container (as shown above) and one of these is the Container Type, which is populated from a list of "Landed Cost Container Types" that you will need to setup in the system based on the types of Container that you wish.
Search in the menu for Landed Cost Container Types to open the list page.
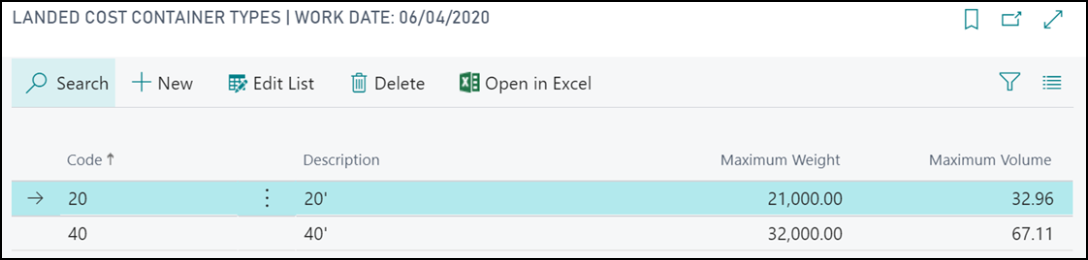
Define a Code and Description for each type of container that you need to track. Optionally also define the Maximum Weight (kg) and Maximum Volume (m3) of this type of container.
Landed Cost Vehicles
On the Container FastTab you will also be able to specify the Vehicle (e.g. a Vessel) that is transporting the goods from the Port of Loading to the Port of Delivery.
Within Clever Landed Costs you setup the list of Vehicles that are used within the "Landed Cost Vehicles" screen, which is detailed here. The Vehicle ID will be used when receiving Inventory into the system and available for matching Landed Cost Invoices to Containers.
Delivery Information and Port Setup
On the Container Detail FastTab you are able to capture information relating to the Shipment and Delivery of the Container.
You are also able to identify the Ports which relate to movement of the Container, e.g. from Port of Loading through to Port of Receipt. In order to be able to specify this information you must first setup the "Ports" through which you trade as a business.
This is done by creating the relevant setup in the "Ports" screen, which can be accessed from the Search functionality in Business Central. A unique Code must be entered alongside a Description that identifies the Port to the Users.

Assigning Purchase Order Lines to Container
There are two ways to assign a purchase order line to a container.
- Selecting a Landed Cost Container No. manually on a purchase order
- Opening the Container Detail page and selecting one or more lines to be assigned to the container
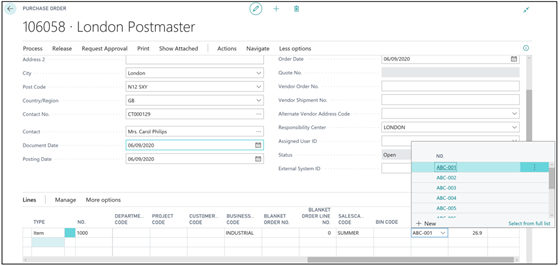
Selecting Manually on a Purchase Order
On the purchase line find the LC Container number field to add a container number. You the "Select from Full List" option to create a new container record first, if required.
Assigning via the Container Detail Screen
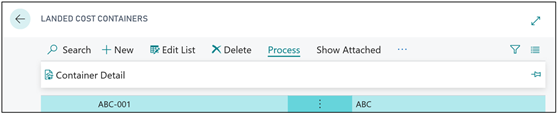
Search for Landed Cost Containers in the "Tell Me" box to open the list of containers and highlight the specific "Landed Cost Container" you wish to assign Purchase Lines against. Click on Process > Container Detail which will open the Container Detail screen for the selected record.
The Details section of the "Container Detail" screen shows purchase lines that have been assigned to this container or are not assigned to any container. Select one or more lines and click on Manage > Assign Container to assign those lines to the current container. Notice that the LC Container No. and Landed Cost Job No. fields are copied from the current container. You can also remove purchase lines from the current container by selecting them and clicking on Manage > Unassign Container. When the invoice arrives this can then be used to filter the landed cost assignment on the invoice to the same shipment container.
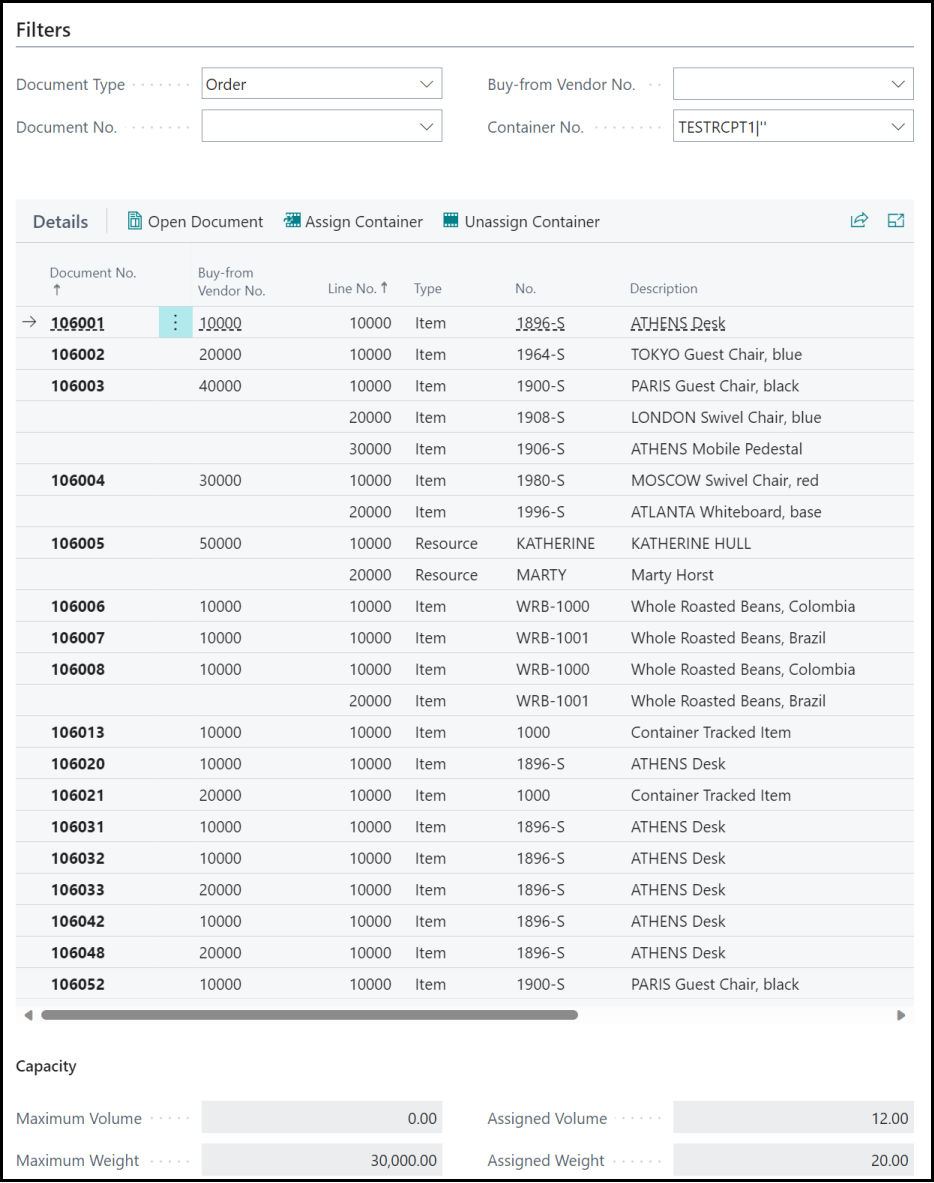
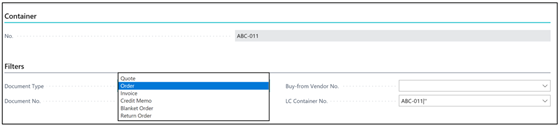
You can also use the Filters section of the screen to find the Document Lines that need to be assigned to a Container.
If you are assigning Purchase Order Lines to a Container you may wish to create a Warehouse Receipt for the Container so that you can quickly receive all Items within the Container by matter of posting a single receipt, especially if the Items are spread across multiple Purchase Orders. With Clever Landed Costs it is possible to create a Warehouse Receipt quickly for a Container, as detailed here.
Updating Container Quantities
When you assign a Purchase Line to a Container, the Landed Cost Container Qty. will be set for each Line according to the Quantity of the Purchase Line. If you receive information that the Quantity is not as expected, then you are able to update the information from the "Container Detail" screen, so long as the Quantity is a reduction to the Purchase Line.
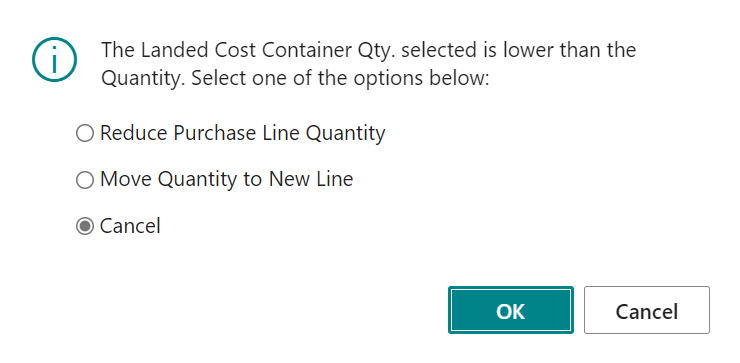
Simply update the Landed Cost Container Qty. field with the new quantity, upon which you will be prompted to confirm whether to reduce the Purchase Line Quantity or whether to move the balance to a new line, as can be seen below. If you choose the Move Quantity to New Line option the system will create a new Purchase Line on the Purchase using the same cost details of the existing Purchase Line.
In addition to being able to update the Landed Cost Container Qty. manually on a line-by-line basis, it is also possible to export Container Lines to Excel and update multiple Items in one go using the Edit in Excel functionality from the Details section of the screen, as detailed in the Edit in Excel section.
Container Status
On the "Container Detail" screen there is a Status, which is initially set to Open when the Container is created. Whilst Open, the user is able to add information about the Container and assign Purchase Lines to it, but to create "Warehouse Receipts" and to essentially lock the Container from being updated.
You have options on the menu of the screen to Release and Reopen a Container.
When a Container Status is set to Released you will able to update the Expected Receipt Date, Arrival Date and Arrival Time on the Delivery FastTab if you receive updated schedule information. Changing either the Expected Receipt Date or Arrival Date will automatically update the Expected Receipt Date on the Purchase Lines that are assigned to the Container, ensuring that your Purchase Order and Availability information is kept up-to-date.
In addition to the above changes, you are also able to update the Landed Cost Container Qty. information for any Purchase Line - again ensuring that if updates are providing whilst the Container is In Transit or at the Arrival Port you are able to update the Container details without having to Reopen the Container. It should be noted that you will not be able to update Quantities if any "Warehouse Receipts" exist for the Item.