The Drops associated with a Route can be viewed on the Drops FastTab of the Shipment Management Route page. Each line shows a Destination (delivery or collection) on the Route. This is where the order of the route drops can be managed.

This Page covers the below options in relation to managing Drops:
-
Delivery Entries
-
Drop Address
-
Moving Drops Up and Down
-
Saving Delivery Order
-
Drop Time Slots
-
Delivery Instructions
-
Moving a Whole Drop
-
Moving a Line within a Drop
-
Splitting and Moving Part of a Line within a Drop
-
Removing an Entry or Entries from a Drop
Delivery Entries:
To see the entries that make up the Drop, select Entries on the ribbon:

This will give you the order and item information being delivered/collected on the drop. It is also possible to view the source document by selecting Show Document from the ribbon.

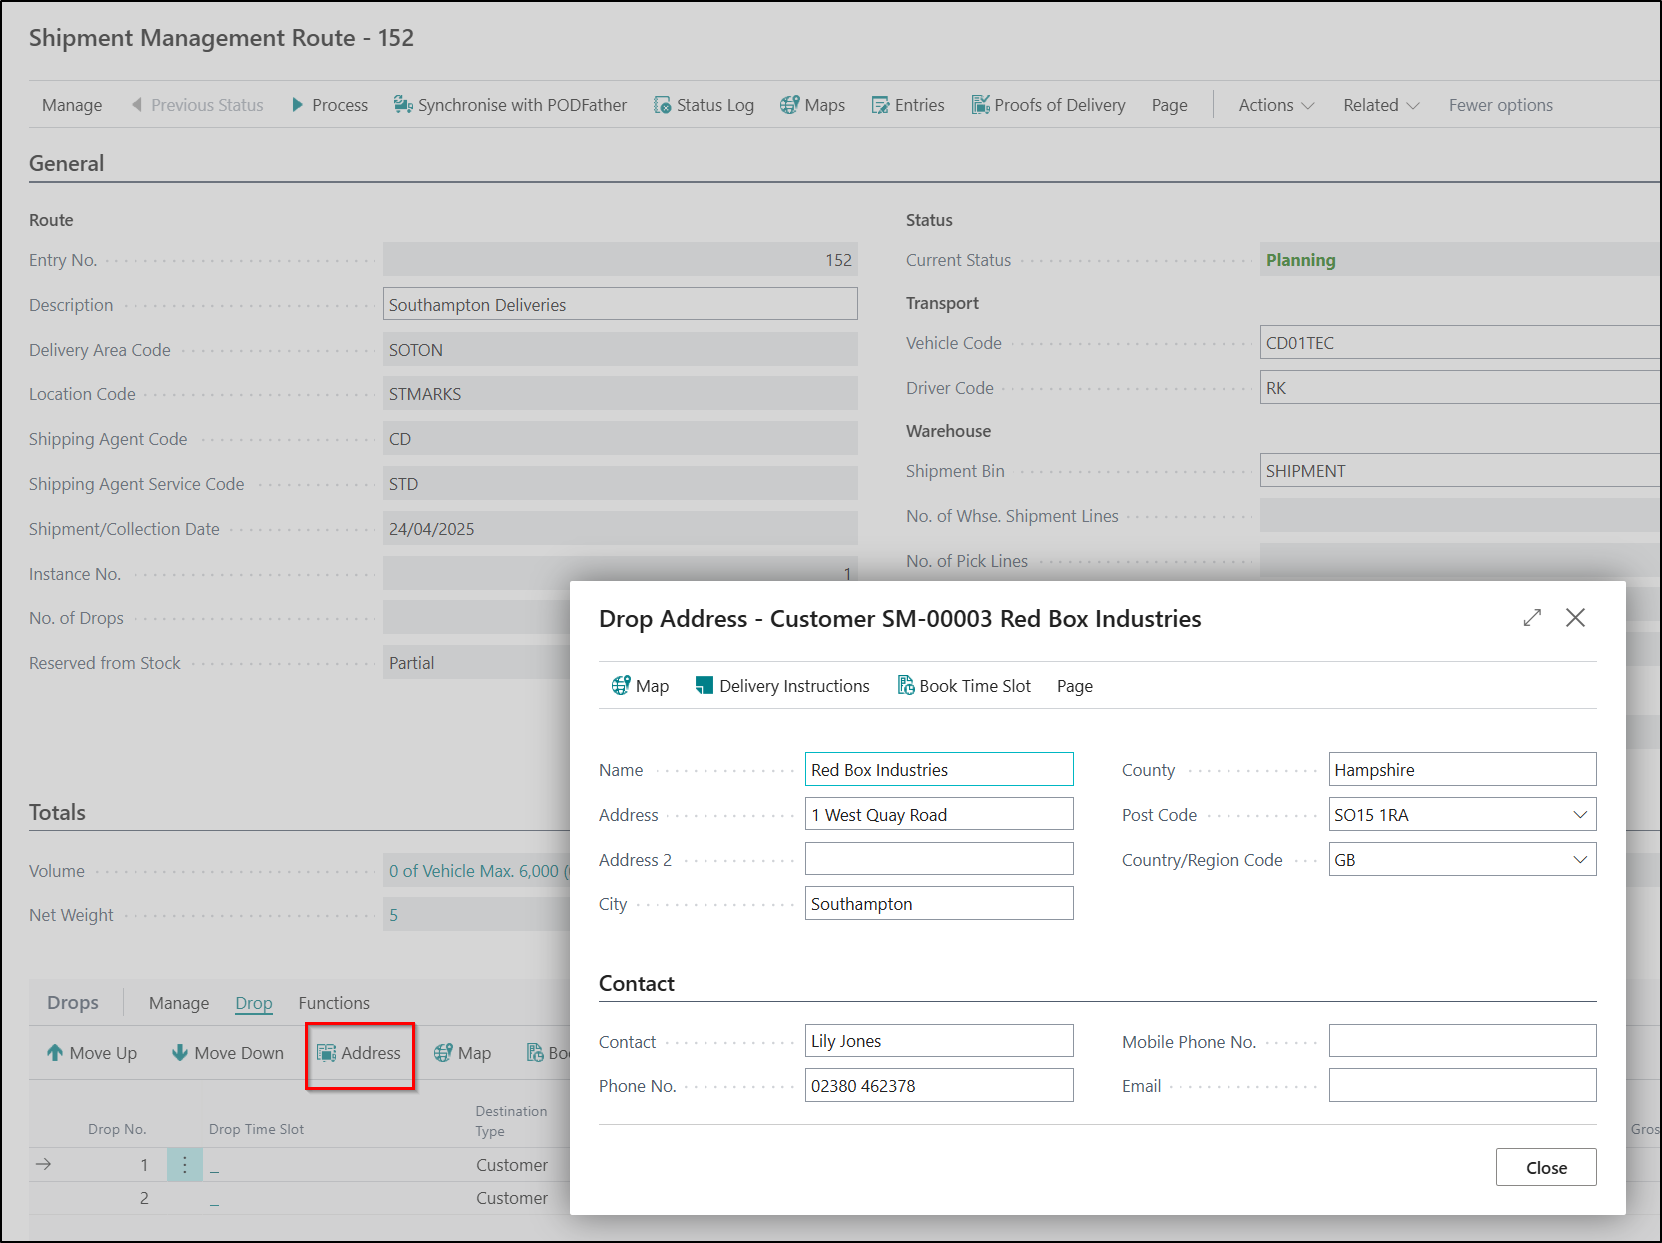
Drop Address:
The Drop Address Page will contain details of where the Drop should be delivered or collected from. This information will be automatically populated based on the information defined against the Source Document.
Moving Drops Up and Down:
By default, Drops will be sequenced based on previously saved order, as it may be that the default order of Drops is not the optimal delivery order. Clever Shipment Management allows you to re-sequence them as required, using the Move Up and Move Down actions from the Manage menu on the ribbon.
Saving Delivery Order:
Saving the delivery order is useful in instances where the Route has a Drop Number you would not typically have in the Delivery Area. As an example, this could be if Drops have been moved onto a new Route or the delivery order has been changed. To save this delivery order, highlight the drop that has been added and select Save Delivery Order on the Ribbon.

This will show a prompt where the Delivery Area to save to can be entered. Once this has been completed in the dialog will show the existing delivery order lines for the selected Delivery Area Code.

It is then possible to specify whether the drop should be delivered first, last, before or after the selected drop. Click OK and the Delivery Area will be updated with the changes. Saving the delivery order allows the existing Delivery Area to be amended to incorporate the updated delivery order changes.
Drop Time Slots:
If time slots are required then these can be booked by selecting the Book Time Slot action or clicking within the Time Slot Field:
This will display a dialog allowing a Time Slot to be booked.

See Drop Time Slots for more information on using time slots with routes.
Delivery Instructions:
Any Delivery Instructions for the drop can be viewed or amended using the Delivery Instructions action:
Delivery Instructions can be entered as free entry text. These instruction are passed as notes to the driver.

If any Delivery Instructions exist, then the Delivery Instructions Exist Field will be ticked to quickly indicate this to the User.

Note: If using Clever Shipment Management in association with Clever Shipping Agent Integration then any Delivery Instructions entered on the Sales document will be copied to the Delivery Instructions in Shipment Management.
In addition to the above, the Delivery Instructions could also be automatically displayed when processing the Route if you use the Show Delivery Instructions Status Types
Moving a Whole Drop:
When reviewing drops it may be more efficient to move the Drop to a different Route. Alternatively the Drops on the Route may exceed the capacity of the vehicle or exceed the hours of the driver utilised on the Route. To do this select Move Lines from the ribbon:
This allows a Drop to be moved to either an existing Route or create a new Route.

If moving to an existing Route, enable the Existing Route option, and the select the Route No. for the drop to be transferred to.
If you know the route number you’d like to move the Drop to you can fill this in, alternatively select the drop-down arrow and this will open a list of valid existing routes available for you to move the drop to. The list will automatically filter for the relevant location code and a date greater than or equal to todays work date. You can apply additional filters to find the most suitable route.
If moving to a new route, enable the New Route option and complete the Delivery Area, Shipping Agent, Shipping Agent Service and Shipment Date. This will then create the new route
Note: When moving a drop to a new route, Shipment Management permits you to override the delivery date to one which is not scheduled as per the setup for that Delivery Area Schedule. If you move drops to a route under a different delivery area the delivery order on the route for the drops will be reset to zero, you will then need to move the drops up/down accordingly to give the route an order. If the user tries to create a new route that is a duplicate of an existing route, the system will prompt if the existing route should be used.
When deciding on moving drops it can be useful to know the impact of the drops on the total load. By selecting one or more drops, it is possible to see the Volume, Net Weight and Gross Weight in the Selected Drops area immediately under the lines. The Gross Weight will be highlighted Red if it exceeds the maximum load of the vehicle (if assigned).
Moving Part of a Drop:
In addition to being able to Move a whole Drop to a new Route, you also have the option of being able to move individual Source Document Lines to another Route where required.
This can be completed from the Shipment Management Entries Page and using the Move Lines Function. Once selected, the same options will be available as described in the Move a Whole Drop section.

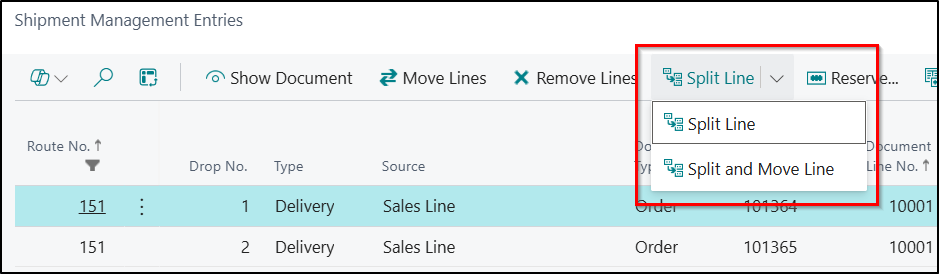
Splitting and Moving Part of a Line within a Drop:
In addition to being able to Move a whole or a part of a Drop to a new Route, you also have the option of being able to Split and/or Move part of an individual Source Document Line to another Route where required.
For example, if you have a Source Document Line for 10 of an Item which are quite large and cannot all fit onto one vehicle, you might want to split this out into two lines of 5 and then ship each part on different vehicles.
This can be completed from the Shipment Management Entries Page and selecting either the Split Line or Split and Move Lines Functions.
Once selected, you will be able to define the quantity to split as well as having the same additional options available as described in the Move a Whole Drop section if selecting the Split and Move Line Function.
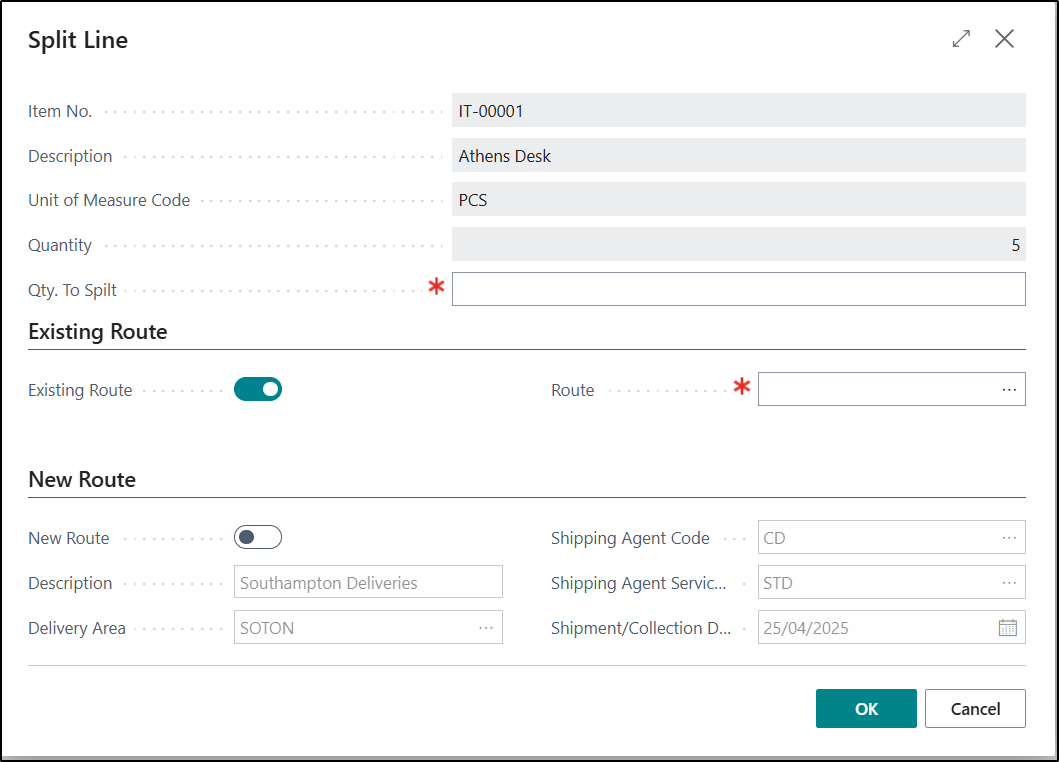
Note: When using either of the above Split Functions, the original line on the Source Document will be automatically split as well.
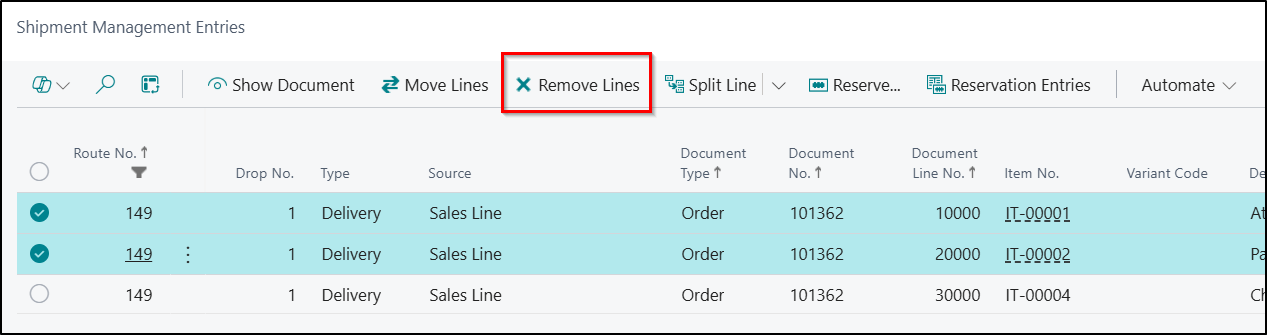
Removing an Entry or Entries from a Drop:
If you would like to remove a specific Entry or Entries from a Drop for an reason, then this can be achieved from the Shipment Management Entries Page by highlighting the relevant entries and then selecting the Remove Lines option. Entries can only be removed if the current Status of the Route allows for entries to added or removed.
Note: If you do remove an entry and it needs to be rescheduled, then you will have to go into the Source Document and Reopen and Release again in order to assign it to another Route.