The Input Log feature within Clever Trade Plus gives you, the User, the flexibility of choosing exactly what documents you want to store changes within. This is really crucial because this gives you the flexibility of confirming what documents you care to track.
As this can be setup for both sales and Purchases, the setup for these are handled either in the "Sales & Receivables Setup" page or the "Purchase & Payables Setup" page.
Opening one of these screens will display a new FastTab called Sales/Purchase Input Log with all the relevant options stored here.
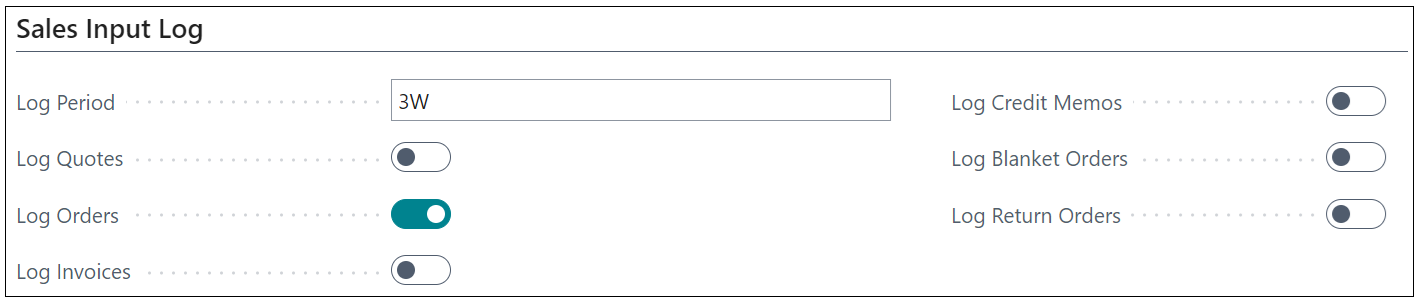
In here, you have the option to select at document level which documents you want to track all changes made to, so you can choose from Quotes, Orders, Invoices, Credit Memos, Blanket Orders and Return Orders. Any that you leave as 'No' will simply not track any changes made to these documents so any you do want to track changes for should be 'Yes'. Changes made include data being 'Inserted', 'modified' or 'deleted' from the document.
The Log Period is used in conjunction with the "Profiles" 'Business Manager' and 'Order Processor' for visibility of the logs on the Role Centers. These Role Center cues are covered in more detail in the Guide. Within the Log period, you need to state as a date formula, how much data you want to be visible at any one time. In the example above I have '3W' which will display 3 weeks of changes in my input logs.
Input Log Triggers
The data being captured mostly doesn't require an additional trigger in Business Central and will be logged based on the data being modified, deleted or inserted. However there may be actions within the documents that currently don't log the information in the Input Log table so to handle this, you can access the "Input Log Code Triggers" page and add/suggest any additional functions here that should be included. Once the trigger is stored here and then occurs, the Input Log will then record this entry as well as the usual modify/insert or delete ones.
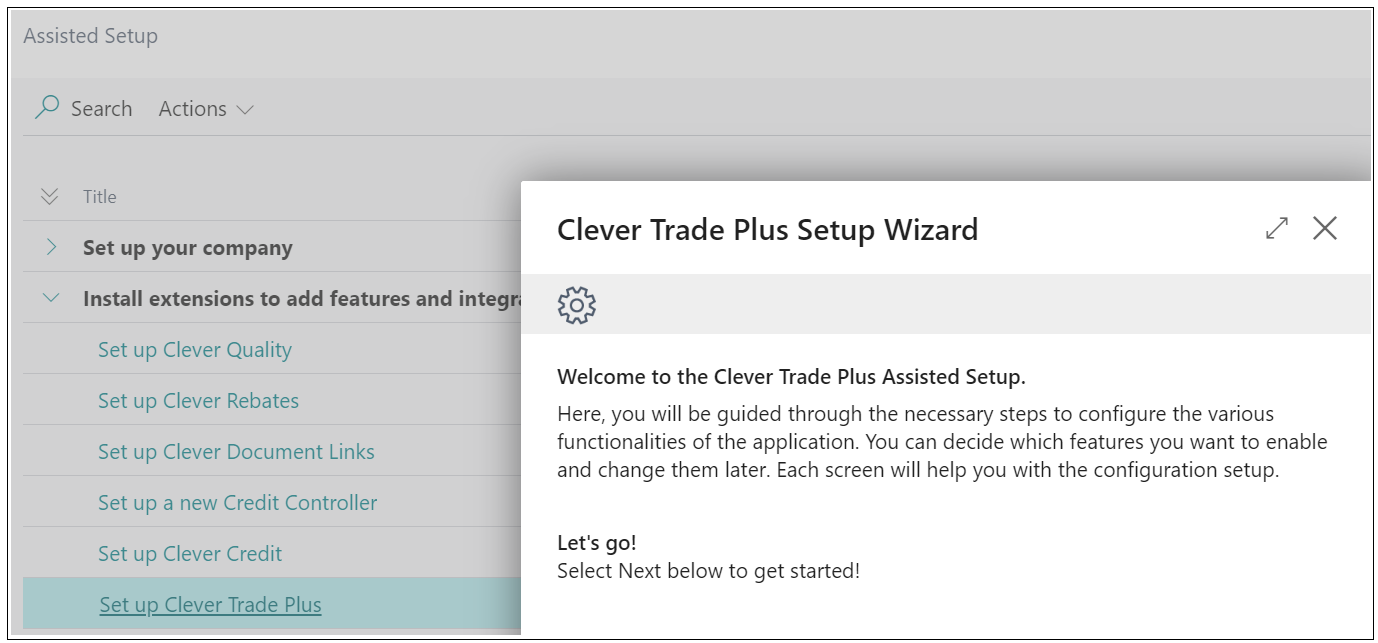
Assisted Setup
If you require further guidance when completing the setup for this, you can use Assisted Setup to complete this action. This process not only guides you through the setup actions required but also provides more instruction on how/why these are required. This is really beneficial for Users that may need more help when setting up features within Clever Trade Plus.
To access this, you can search for Assisted Setup in the search bar which will open up a page like the below image. Choosing the Set Up Clever Trade Plus will run through all the setup for most of the features within this app, which you can skip or complete as you go. This is also really helpful should you want to complete the setup for a number of apps at once.