In order to queue emails and have Business Central automatically send documents for Clever Document Delivery, a Job Queue must be created.
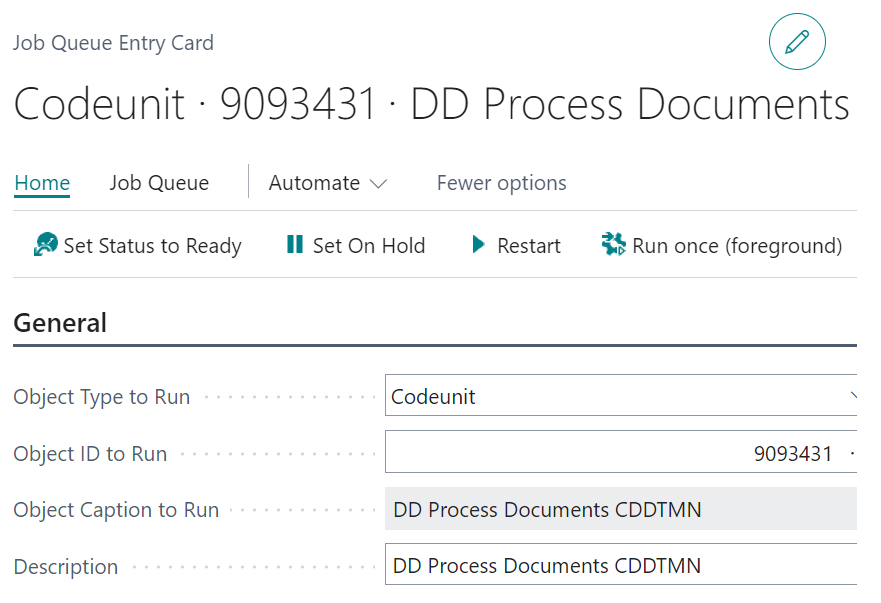
On the "Job Queue Entries" page, create a new Job Queue card ensuring the Object Type to Run is changed to 'Codeunit'. In the Object ID to Run field, either type the Codeunit No or select from the dropdown value '9093431'.
You can customize the Recurrence fast tab by choosing the days of the week that you want the job queue to run on and the frequency by which you want them to run by putting a value in the No. of Minutes between Runs which here has been set to 10 minutes. Just ticking a day will auto-populate this if you just want it to process once per day. Populating the Starting Time field will then schedule the Job Queue to process the Documents on the days specified, at the Start time you have proposed and taking into account the No of minutes between runs.
When completed, click Set Status to Ready in the Ribbon to activate the new Job Queue, which will then be visible in your "Job Queue Entries" page. You will see that the Status here has now been updated to Ready meaning the Job Queue is ready to use.
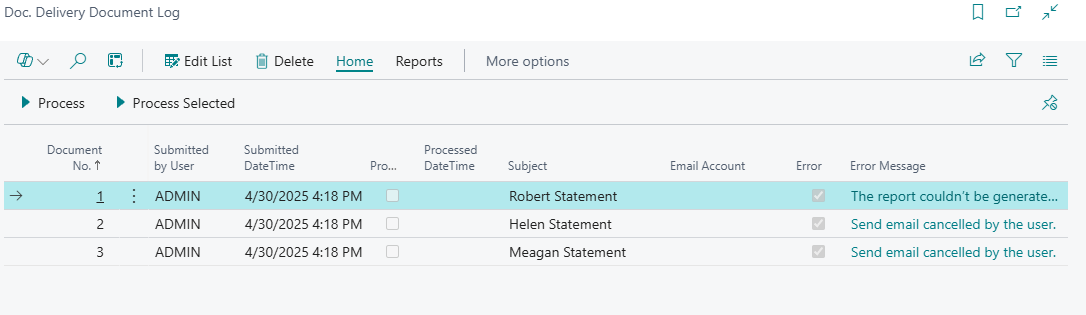
If further documents are submitted to Document Delivery before the next run, they will also show up in the Document Log as not processed. The documents will process based on the schedule you have defined.
Automatic Job Queue's
The above process is dependant on a User selecting the entries they want to run via the Job Queue and selecting the Queue Email (Doc Delivery) option to push them into the job queue schedule. However, as defined on the "Document Delivery Setup" page, there is the functionality to have Business Central automatically Queue documents via Job Queues without a User needing to specify these.
Where the value Queue is stated in the Auto Send Document FastTab on the "Document Delivery Setup", on either Release or Post of that document, Business Central will automatically push that document into the "Doc. Delivery Document Log" and queue it. The "Job Queue Entries" card will then process it on the next run. For more information on the "Auto Send setup", please refer to the Setup page.
Job Queue setup for Customer Statements
In "Document Delivery Setup", a User can specify if Customer Statements are to be send via Send or Queue.
If using this functionality, for either Send or Queue options, a new "Job Queue entry card" must be created to allow Business Central to check for any Customer Statements that are to be issued.
Create a new "Job Queue Entry Card" where the Object Type to Run is Codeunit and the Obect ID to run is 9093474. This must be setup with recurrence to confirm the days of the week you want Business Central to search "Customer" Cards to see if there are any Customer Statements that need to be issued, for example you may with to tick only weekdays so that every week day, Business Central will look to see if there are any valid Customer Statements to be sent. If there are none, no Customer Statements will be issued and the process will simply re-run again the following week day. Set Status to Ready in the ribbon once this is setup.
Where the Auto Send option on the "Document Delivery Setup" page for Customer Statements is Send, this new job queue for 'Auto Send Statement CDDTMN' will run on the recurring days you have specified, doing a check throughout all the Customers in Business Central that have the Statement Frequency field on the "Customer Card" populated. It will then look at the Frequency formula specified for that Statement Frequency Code in the "Auto Send Frequency" table as well as the Statement Last Sent date from the "Customer Card" to confirm if the Statement last sent date + the Frequency is today (the day the job queue is running). If Yes, the Customer statement for that Customer will be sent automatically and nothing further is required.

Where the Auto Send option in setup is Queue, the same calculation detailed above will occur, but instead, where the Statement last sent date + Frequency is today, the Customer Statement will be Queue'd in the "Doc. Delivery Document Log" and will be sent using the 'DD Process Documents CDDTMN' Job Queue where Object ID to run is 9093431, working the same as the other Auto Queue documents. Only when the recurrence for this job queue is reached will the entry in the Document Log be processed and sent.