The Receipt Function allows the Device to receive goods into the Warehouse in the same way a User would manually receive the items in within Business Central itself. The same transactions will be created i.e. Posted Purchase Receipt, Posted Warehouse Receipt etc. and the same information updated i.e. Qty Received on the Purchase Order line etc.
The values can be entered on the Device by either scanning a Bar Code which contains the data or they can be entered in manually.
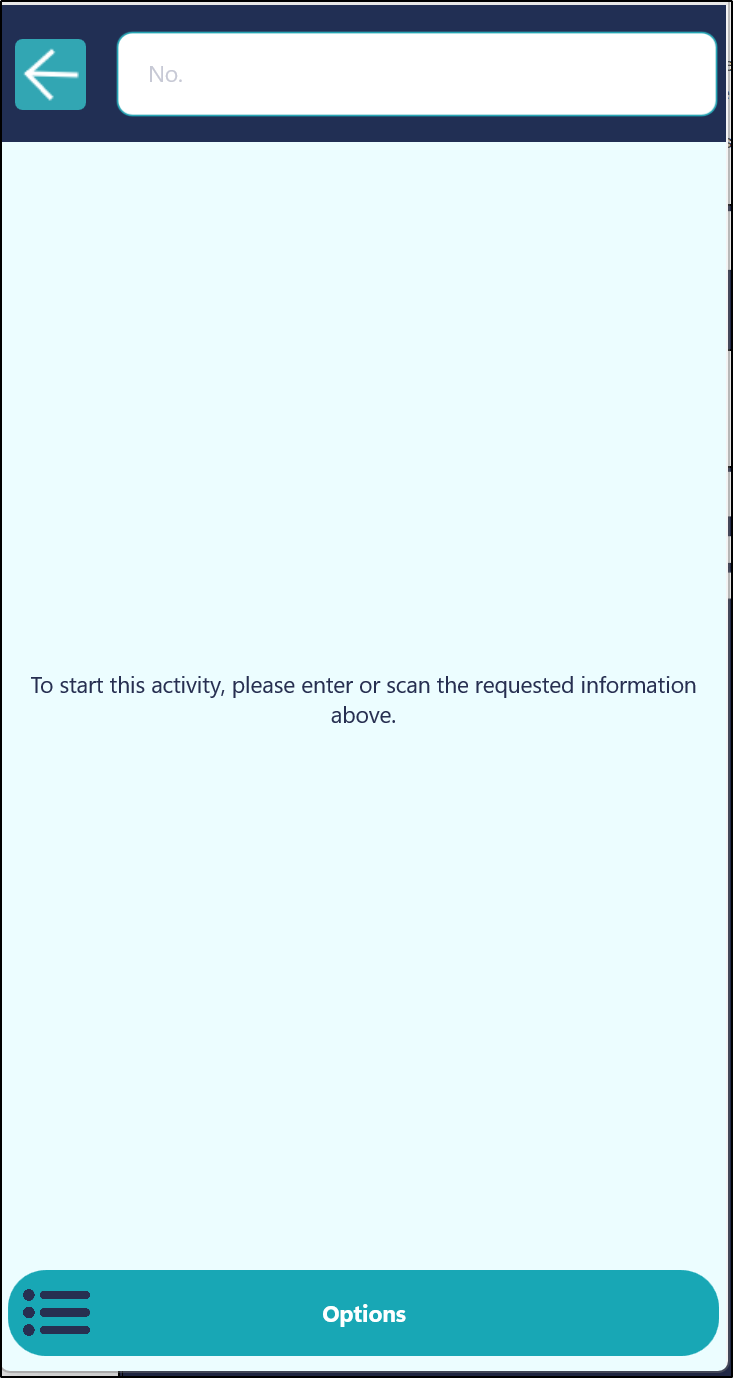
After the Receipt tile has been selected, the Device will prompt the User to enter the Document No you want to process. This could either the Purchase Order No or the Warehouse Receipt No for example.
Note - If entering the Purchase Order No, then the Warehouse Receipt document in Business Central will be automatically created for you.
Alternatively, the user can also click on the Option button at the bottom of the screen in order to show the screen below.
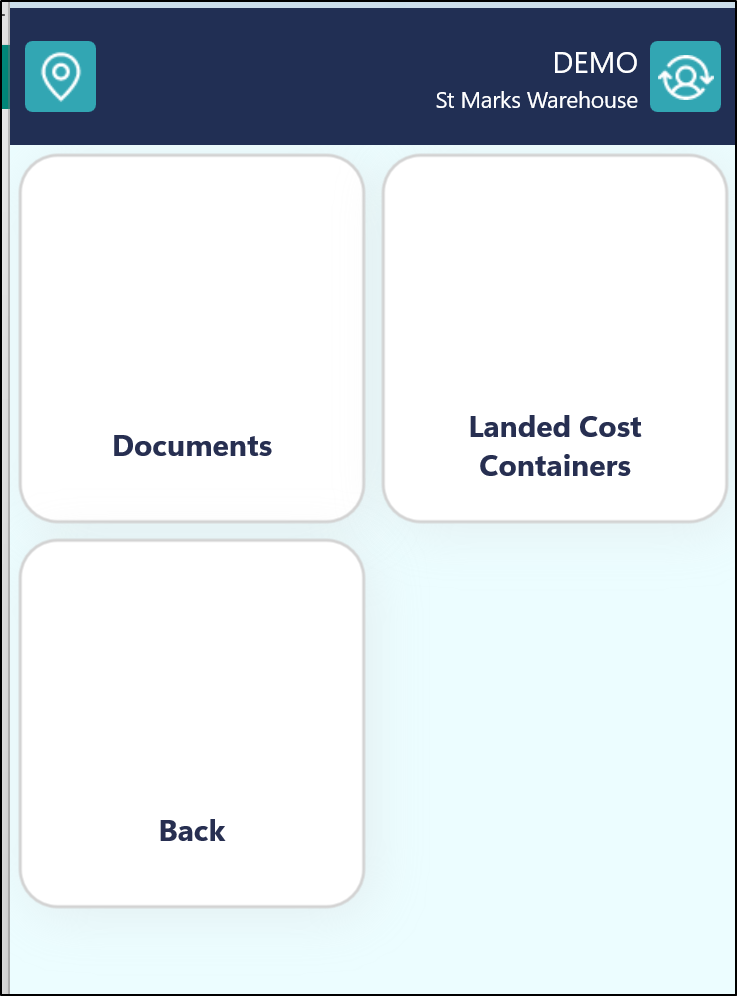
The Documents option can be selected in order to show a list of documents that the user can select from instead of having to type in the number.
The Landed Cost Containers option can be selected if you are also using the Clever Landed Costs App. Users can then type in the Landed Costs Container No in order to find the receipt that you want to process where required.
Once a document has been selected, users will then be prompted to enter the Item No.
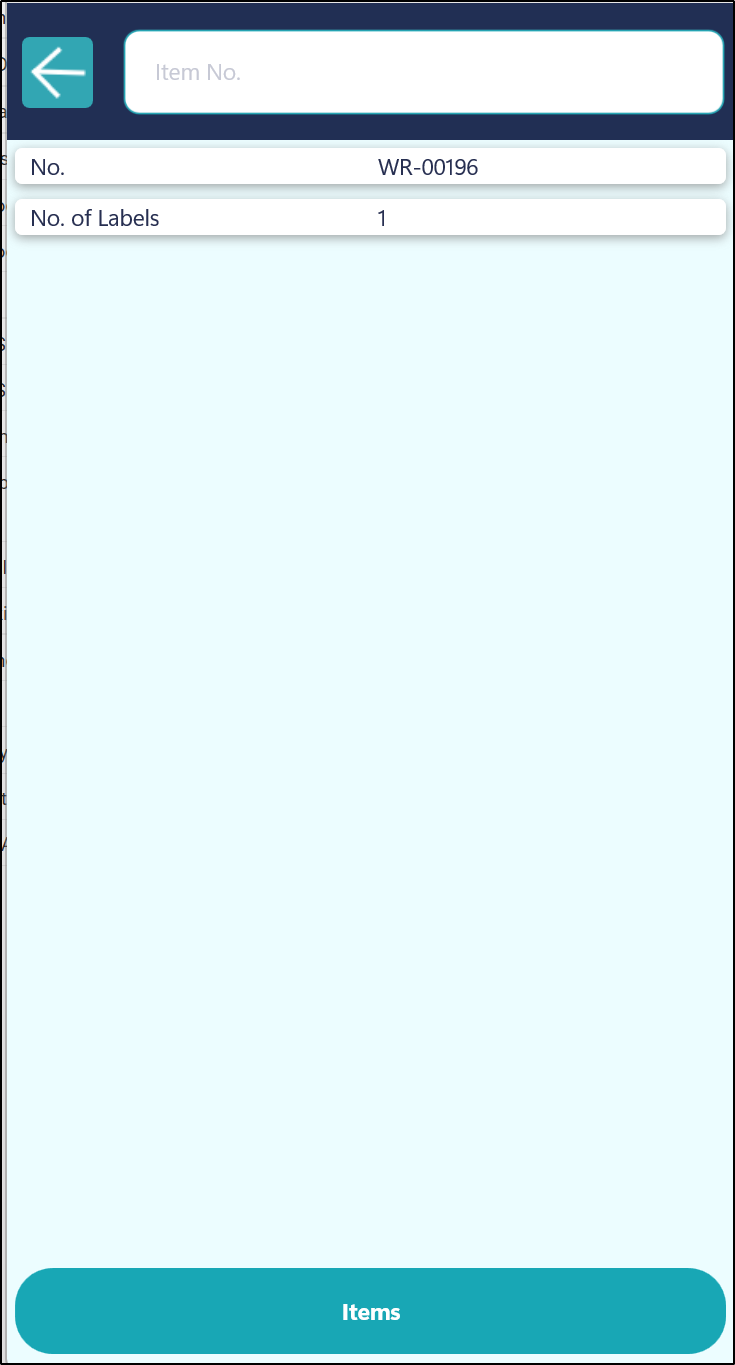
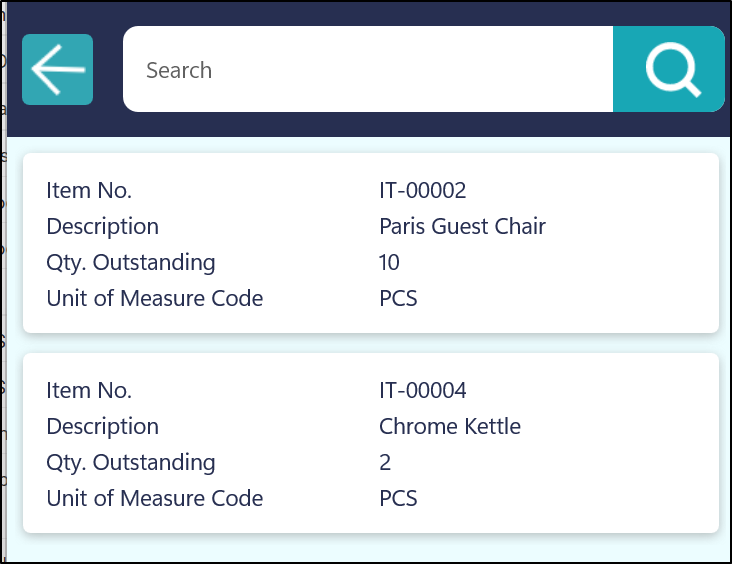
Alternatively, you can also select the Items button in order to display a full list of outstanding items from the selected document and select the Item from this list instead.
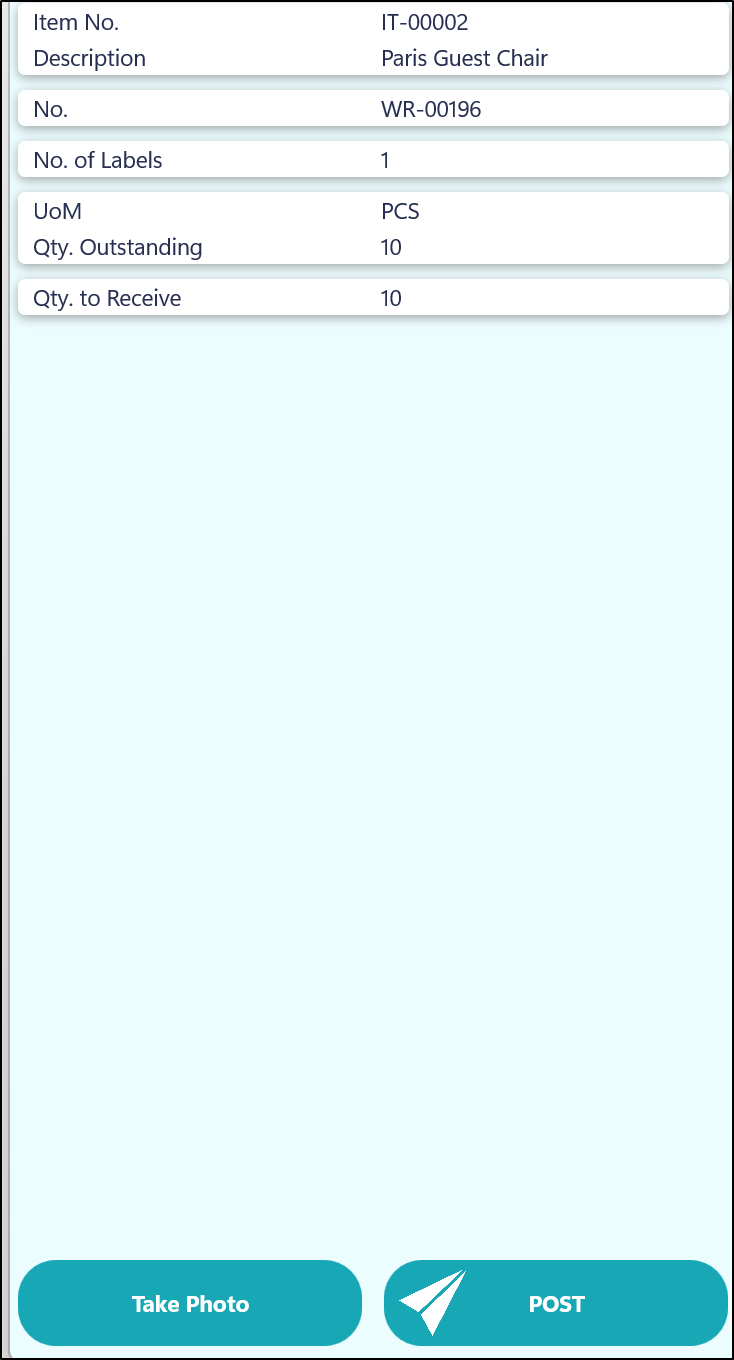
You will then need to enter in the Quantity you want to receive. This could either be the full amount or a partial amount depending on how many you actually received into the Warehouse.
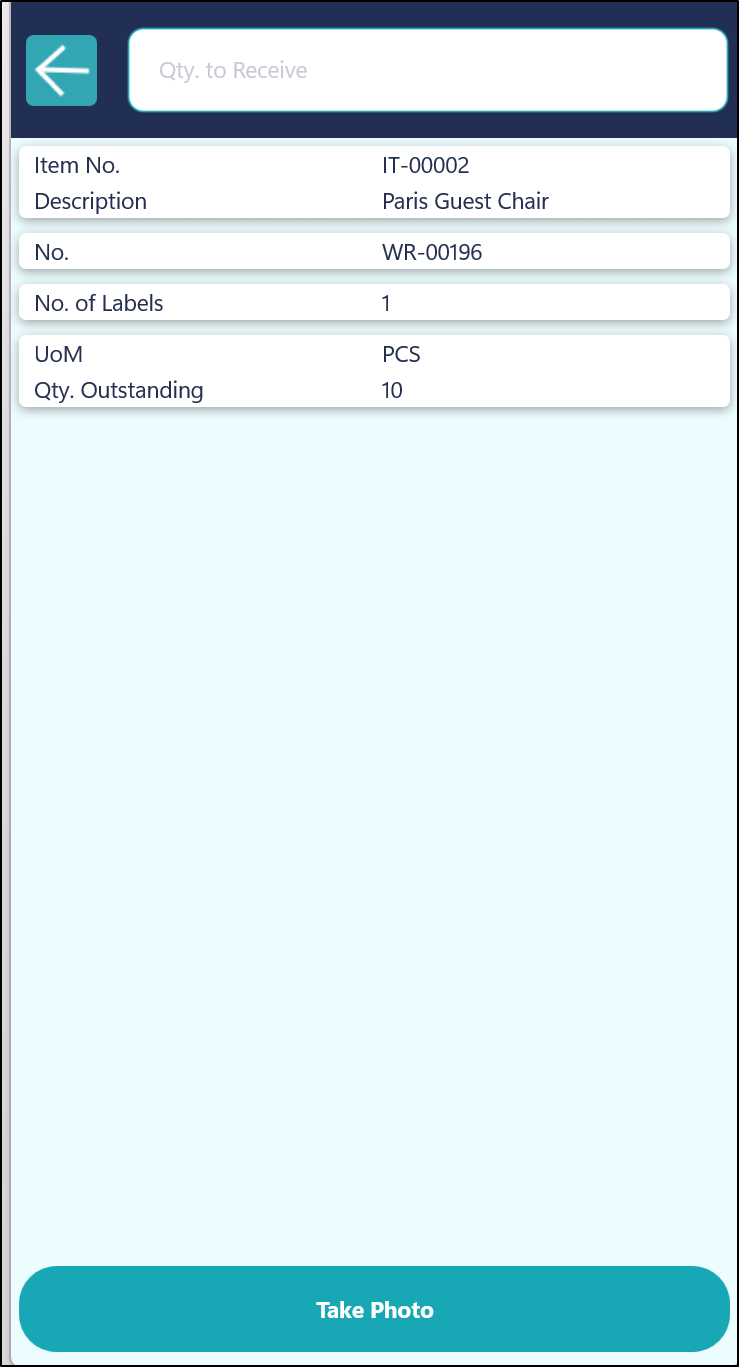
At this point, you can also choose the Take Photo option if you would like to take a photo of the Items you have received. If you do take one, then it will be stored against the Posted Purchase Receipt Line in Business Central which will be automatically created once the Receipt has been posted.
Once you are have confirmed all the information is then correct, you should then click the Post button in order to receive in the Items and create the normal transactions in Business Central.
Note - If the Item you are receiving in on the Device is an Item Tracked Item, then you may also be asked to enter in the Serial/Lot Number depending on how your Item has been setup. Please refer to this Page Using Item Tracked Items for more information.