Once the app is installed, you can setup the Clever Credit from the "Credit Control Setup" screen. The options that you setup within the "Credit Control Setup" screen (accessible from the search feature in Business Central) will control the behaviour of Clever Credit within your system.
The below instructions detail how to manually setup Clever Credit. If you wish to use the Assisted Setup (accessible from the Setup Wizard option shown on the screenshot below) please refer to the Assisted Setup instructions.
If you want to utilise Clever Dashboard for Clever Credit, select the Get Default Configuration option in the ribbon (or via a notification on this page), and ensure you 'Apply the Package'. This will load the the Configuration Package called 'Clever Credit Dashboard Data' into your system.

From the Setup sub menu option the following information can be viewed and/or edited as required.
- Ageing Bands
- Credit Control Statuses
- Credit Controllers
Refer to the Ageing Bands, Status Codes and Credit Controllers articles for further information.
General FastTab
If Release Doc. On Credit Release is turned on, this will mean that when a Credit Controller navigates through Business Central to release the document from being 'Credit Held', it will also set the Status field (situated on the document header) to 'Released'. This indicates to users and Business Central that the document(s) can move through to the next stage of their process.
The Default Credit Controller is the user who will be able to release all credit held documents and will see customers on the credit control page that have not been assigned to another Credit Controller. The Statistics Calculated field is a non-editable field controlled by the Calculate Customer Statistics Action in the ribbon. For more information on the Calculate Customer Statistics process, see the Calculating Customer Statistics documentation.
The Exclude Held Docs from Credit Limit field, when toggled on, subtracts the value of held sales/service documents from the Outstanding Orders value, as seen on the Customer Statistics Factbox shown on the "Customer" card.

In the Credit Control Reporting Period field, we can set a date formula which impacts the data found in the Collection Performance cues on the Role Center.

If you wish to assign a grace period for Overdue credit as a global setting, rather than Customer specific, you can populate the Default Overdue Credit Grace Period field. This must be populated with a Positive time formula and will error if a negative number is entered. Where the "Customer" Card is populated with a Grace Period, the value in the "Customer" Card takes priority.
Where a Grace period is added, regardless of whether this is from the "Credit Control Setup" page or the specific "Customer Card", when invoices are posted, you can view the "amended" due date from the "Customer Ledger Entries" screen by the Grace Period Due Date field. This now takes the original due date and adds on the Grace Period formula used to show both the original and the Grace period due dates for extra clarity.

The purpose of this field is to provide a window of time that allows the Customer's Account Status to not shown as 'Overdue' when they do have Overdue invoices, allowing them the flexibility of having more time to raise Sales Orders and not be credit held. The Account Status is based on 'Todays' date so for example, when not populating the Grace period field (either in Setup or on the "Customer Card"), if 'Todays' date was '30/06/2023', any "Posted Sales Invoices" with a Due date of anything up to 29/06/2023 would be classed as Overdue so if another "Sales order" was released, it would be Credit Held. If, however there was a Grace Period for '10D' (10 days), this would mean any "Posted sales invoices" with a Due Date of anything up to '21/06/2023' would be Overdue, in which case anything dated '21/06/2023 - 30/06/2023' would not (because these are dated within the '10D' grace period).

As the grace period is only utilised for the "Credit Held List" and is solely for giving Customers more flexibility from being credit held, the grace period only impacts this part of the process, therefore only the Account Status and "Credit Held List" are based on this calculation. Any other area within Clever Credit or standard Business Central will not check the grace period when calculating Overdue Invoices, meaning pages such as the "Clever Credit" (list and factboxes) and "Customer Ledger Entries" will all show Sales documents as Overdue ignoring the grace period.
The Assign Default Controller toggle option on the General FastTab will (if set) assign any new Customer to the Default Credit Controller.
The Exclude Zero value documents from Credit Check toggle is used for all Customers that will have their sales documents credit held. Where this is 'No', standard behaviour is used so all sales documents that are to be credit held will be, regardless of their value. Where this is changed to 'Yes', any sales documents that are released where the Sales value is Zero will bypass the credit hold check and be released without needing to be approved. This can be used for instances where you may create Sales Documents with zero value for free samples you are sending out. As there is no need to credit check something that is free to the customer, these documents can be ignored.
Sales & Service FastTabs
The fields within either the "Sales" or the "Service" FastTabs control what documents are credit held (either due to being over their Credit Limit or if there are Overdue payments on the customer account) for both Sales and Services. Selecting any documents within these FastTabs as 'True' will perform a credit check against the relevant customer automatically put the document on hold, requiring a Credit Controller to release the document, if the customer's credit limit has been reached or they have an overdue balance on their account.
These controls can be bypassed at the customer level, from the Clever Credit FastTab on the "Customer" Card.

Credit Control FastTab
Within this FastTab, there is a field called Recalculate on Cust. Ledger Entry Insert.
When this option is Enabled, the values and ledger entries on the Customer Credit Status screen will be updated as and when postings are made to the Customer Ledger. This means that the information shown will always show real time figures within your appropriate aging bands. If this field is not Enabled, then the recalculation will be performed each time you re-open the Customer Credit Status screen, or alternatively, you can schedule the update to happen at periodic intervals using Business Central Job Queue functionality.
The calculation can be a big overhead for a system and it is recommended to use a Job Queue to perform the updates instead, therefore when you open the Credit Control Setup screen for the first time you will be prompted to setup a Job for the calculation via the following notification.

Choosing "Schedule a job queue..." from the notification will open the assisted setup wizard as shown below, simply press the Next button to confirm the frequency and the assisted setup process will create the Job Queue entry for you using the details you have entered.

An example of a completed Job Queue Entry for the statistics calculation process is shown below and you can view and update this at any time from the Job Queue Entries screen.

Document Links FastTab
Within the Document Links FastTab is the option to Copy from Interaction to Customer Ledger Entry. This means that if anything has been added to the Interaction card using Document Links, where this field is 'Yes', that document will also be visible from the related Customer ledger Entry via the Document Links Factbox. Having this option as 'No' simply means you can use the Document Links function from the Interaction but it will not be transferred to the entry on the "Customer Ledger Entries" screen.
Document Delivery FastTab
The Document Delivery FastTab will only be shown if Clever Document Delivery is installed. Doc. Delivery Document Types can be selected in all three fields. The fields related to emailing function on some Clever Credit pages will be explained in more detail within the Interactions article.

Note: Notifications for when a sales document has been credit held can be optionally disabled. To disable the notifications, navigate to the "My Notifications" page from the search bar and ensure the Enabled field shows as 'No' (untick). Changing this to 'Yes' will then enable the notifications again if required.
Payment Gateway FastTab
The Payment Gateway FastTab will only be shown if Clever Payment Gateway app is installed. This feature assists with taking customer payments directly from Customer Interactions. More information can be found on the Payment Gateway Integration page.
The 2 fields in here are Payment Gateway Jnl Template Name and Payment Gateway Jnl Batch Name and are both dropdown fields.
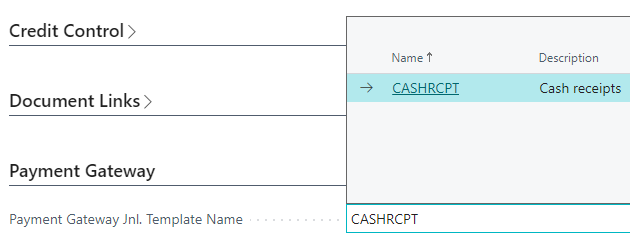
The field for Template name requires you to select which Journal Template you wish to use when using Payment Gateway from Customer Interactions. Then within the Batch name field, select from the dropdown the specific journal batch you want to use. I would suggest this is a new batch specifically for handling Payment Gateway payments using Clever Credit so they are not accidentally posted by other users.
When the customer payment details have been submitted within Payment Gateway, Business Central will then create an entry in the specified Journal template and Batch you have stored in these 2 fields, until a user manually posts these entries in the journal to complete the process.

To use Payment Gateway from Customer Interactions, these must be populated.
More information on how to use Clever Payment Gateway can be found here.