Directed Movements are typically planned movements which are created for replenishment purposes. They can only be used where the Location is setup for Directed Pick & Put-Away. The Warehouse movement documents should firstly be created in Business Central and then assigned to a Device User to action on the Device.
When the user clicks on the Device Movement Tile, if you have have multiple Zones setup, then you will have to select the required one as the first step. The user will then be asked to choose whether to action a specific movement or not.
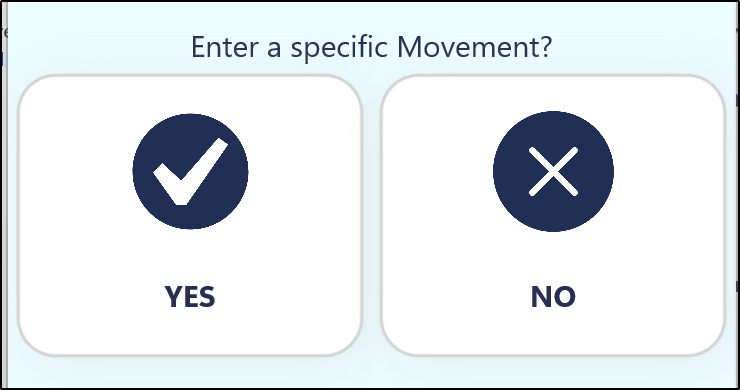
If they select Yes, the user can then either:
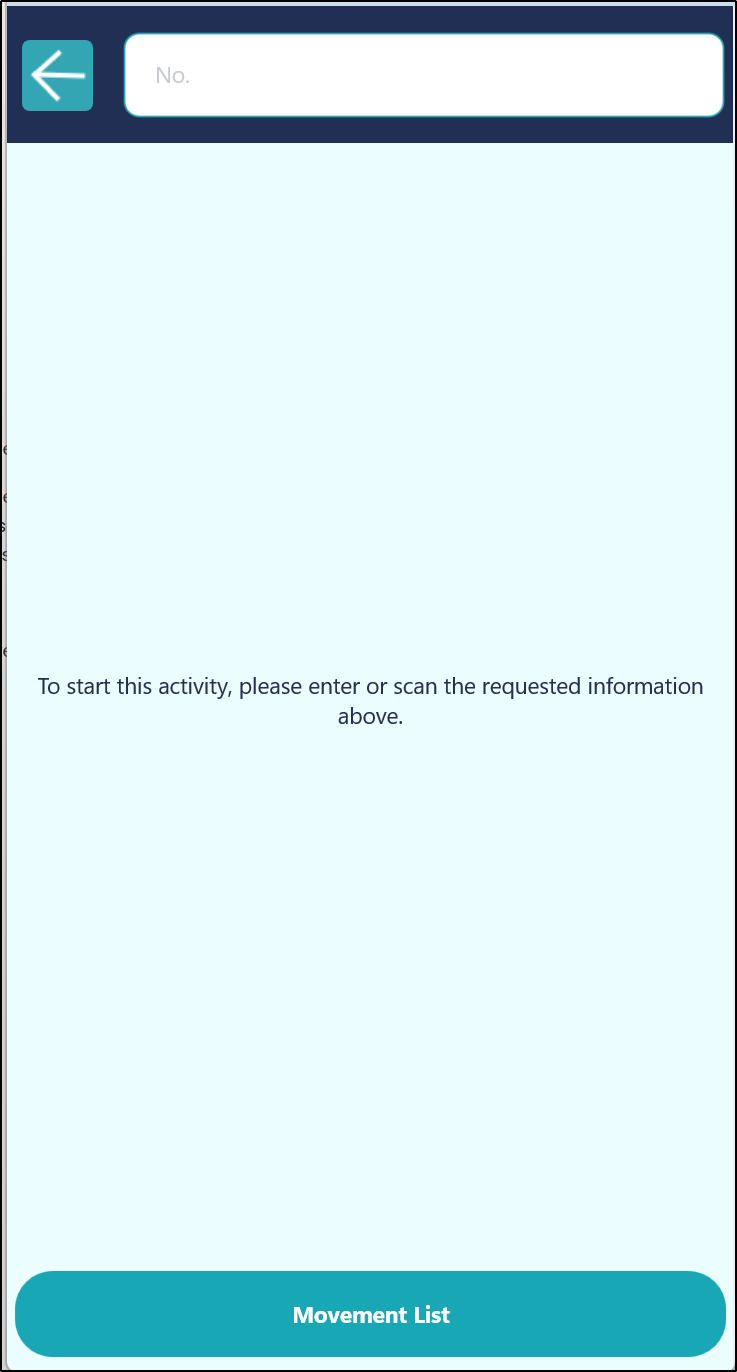
- Scan or enter in the Warehouse Movement number
- Click on the Movements button in order to be presented with a Lookup list of Movements to select from
If they select No, then they will just be presented either a movement that has been assigned to you by your Warehouse Manager or with the next available movement from Business Central which is not being worked on by another user.
If you have Enabled the Move/Pick Line Sel. by Lookup Field in Clever WMS Devices Setup, you will either be prompted to select which Item within the movement you want to action first.
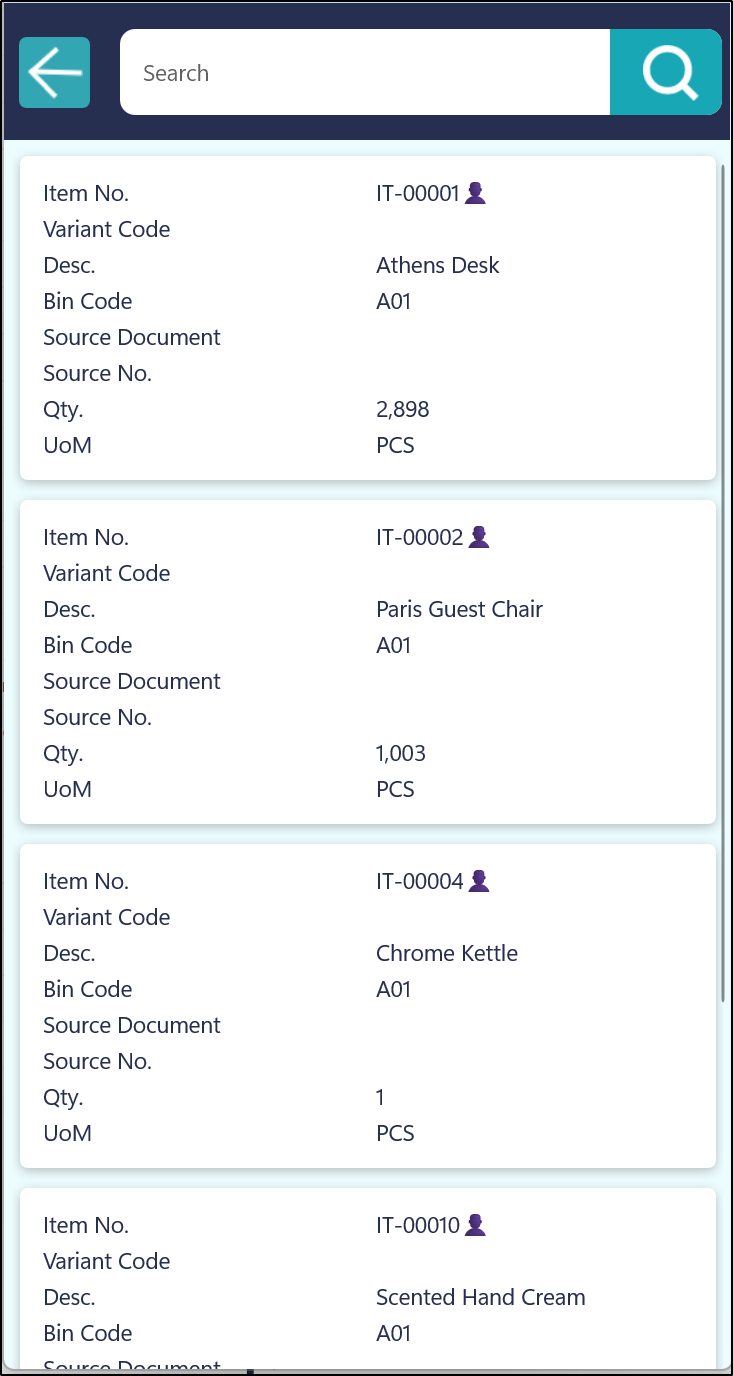
If the Field is Disabled, then you will be automatically presented with the first Item that needs to be processed but you can choose a different Item by clicking on the Movement Lines button. This will display a Lookup list of all the Items included on the selected Movement.
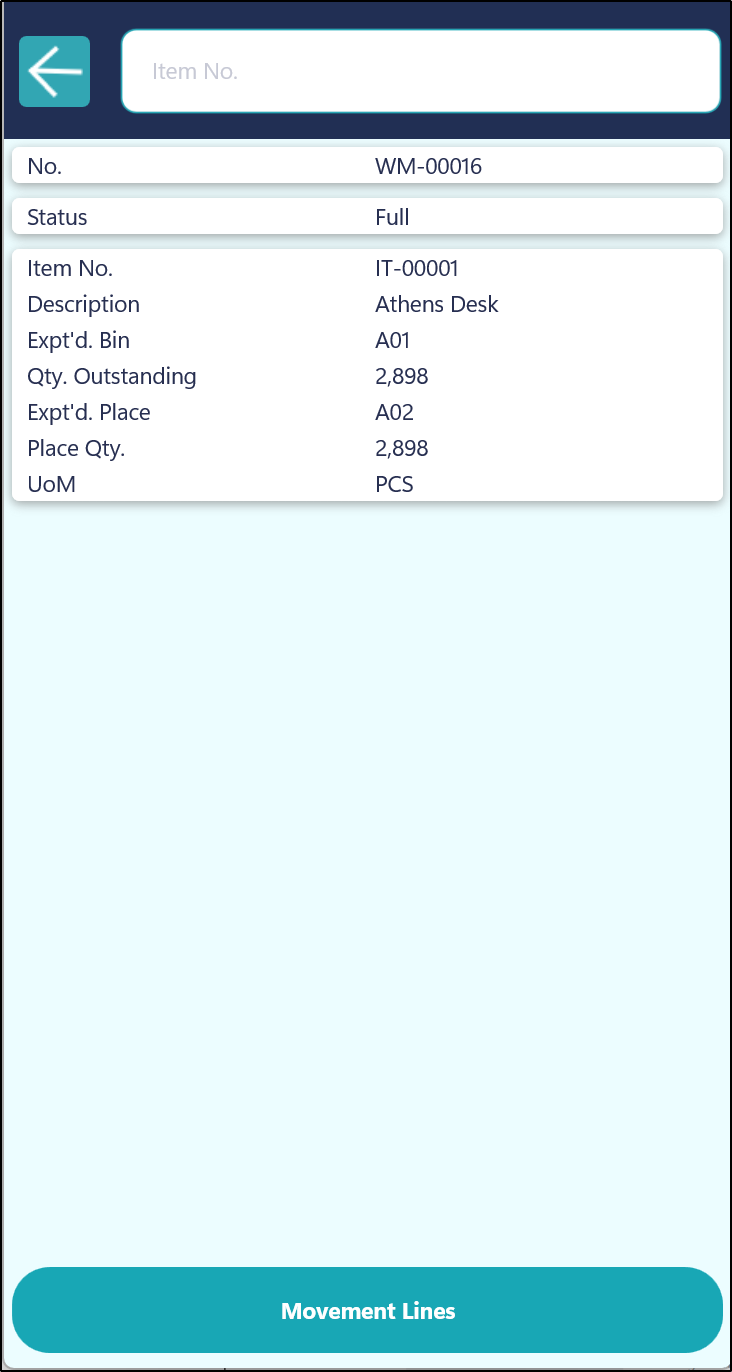
Using either option, the screen will show you a summary of the Movement such the Bin the Item is currently located in, the quantity that needs to be moved and the Bin where the item should be moved too. You should then move through each Page and confirm the information.
Once completed, the Movement will be processed within in Business Central. A Registered Movement document will be automatically created as well as the corresponding Warehouse Entries.