Before connecting SharePoint for Clever Document Links, there are some pre-requisites required in Microsoft Azure that MUST be done prior to linking SharePoint.
App Registrations
Firstly you need to create your App Registration in Azure. This is where you will be able to create your client secret/store your certificate and gain access to your Tenant ID's which are required for the SharePoint Setup wizard.
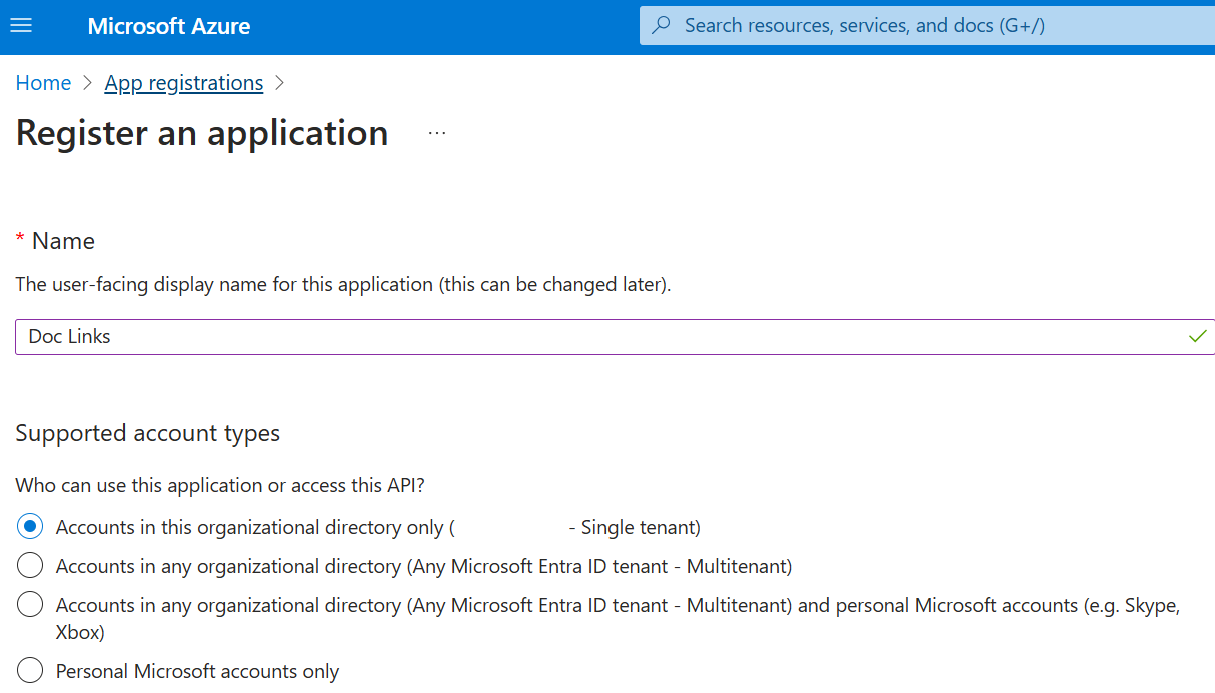
Open your Azure account and Register an Application. Give this a Name, i.e. Clever Document Links and select which Account Type you want to use. In this example, we have used Single tenant.
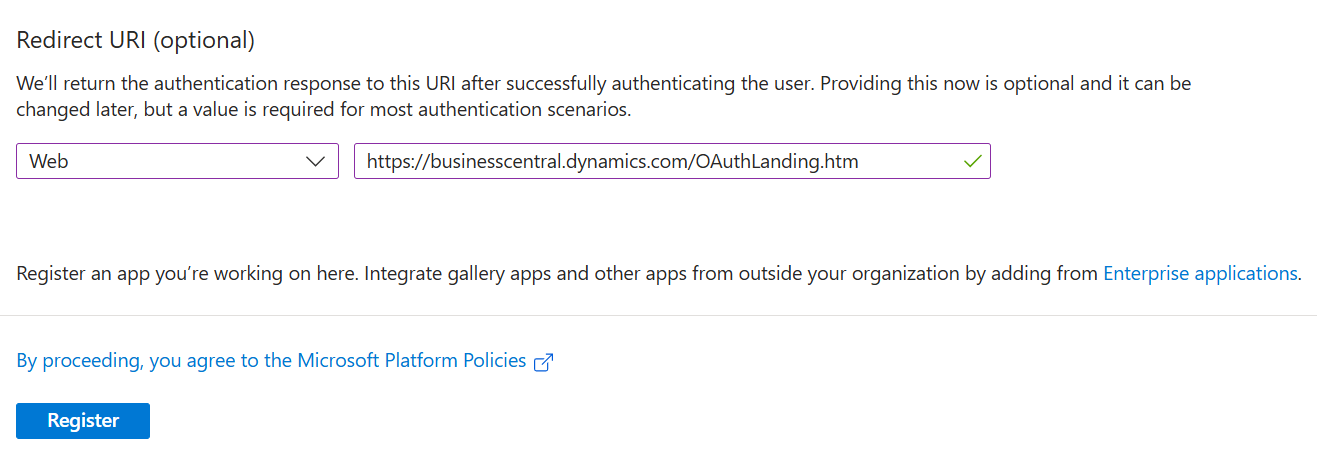
On the same page, you need to populate a Redirect URI. The option for Web should be selected from the dropdown and then the field populated with the URL for your Business Central home page. This is to ensure that Business Central can then send a request after authenticating the User. Click Register at the bottom of the page to confirm this setup.
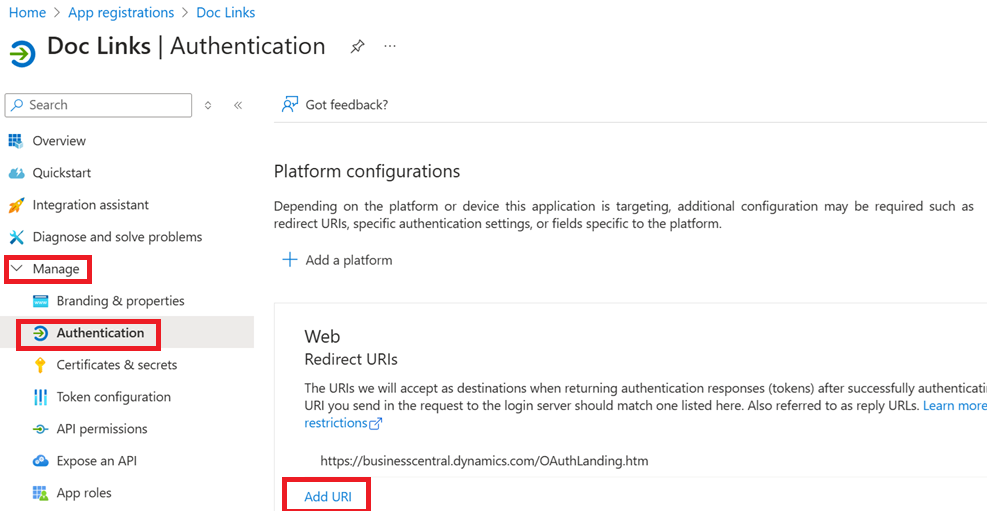
Now you have an App registration, you need to add in an additional Redirect URI. To do this, click into Manage from the Azure ribbon, select Authentication and Add URI.
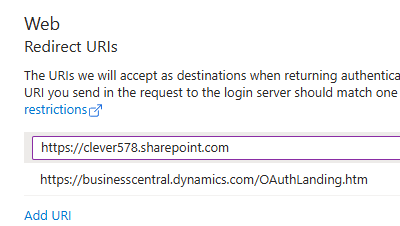
You now need to add the URL for SharePoint so that you can point Azure to the correct location so simply copy your SharePoint URL and paste it in here. You will use this as the Scope for the SharePoint Setup later in the process. Click SAVE at the bottom of the screen to save the new URI.
Permissions
Now you have an App Registration, you need to grant the correct permissions. These should be assigned by your Global Administrator to ensure the permissions can be granted.
Within Azure, click into Manage in the ribbon and select API Permissions.
You will automatically have 1 permission assigned, the User.Read. This can be removed. Ensure the below 3 are added.
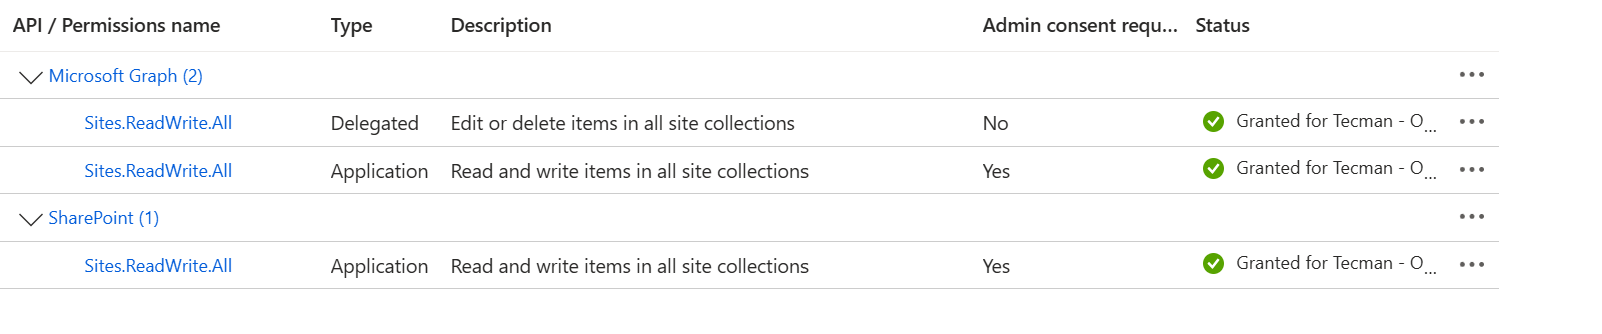
1. Click into the Add a Permission button and select Microsoft Graph at the top. Firstly, select Delegated from the options and scroll down to Sites to tick the Sites.ReadWrite.all permission.
2. Next, repeat the above steps but this time, choose Application from the options and scroll down to Sites to tick the Sites.ReadWrite.all permission.
3. Finally, click on Add a Permission and this time, choose the SharePoint API. Choose Application and tick the 'Sites.ReadWrite.all' permission.
Certificates and Secrets
If you choose to use a SSL Certificate, you must apply for this via an official authority prior to using Clever Document Links as the certificate must be uploaded both into Azure and Business Central before you can use the application.
A client Secret can be created in Azure so that the details provided can be populated into Business Central when setting up the SharePoint connection.
The below steps show you how to update these in Azure.
Certificate
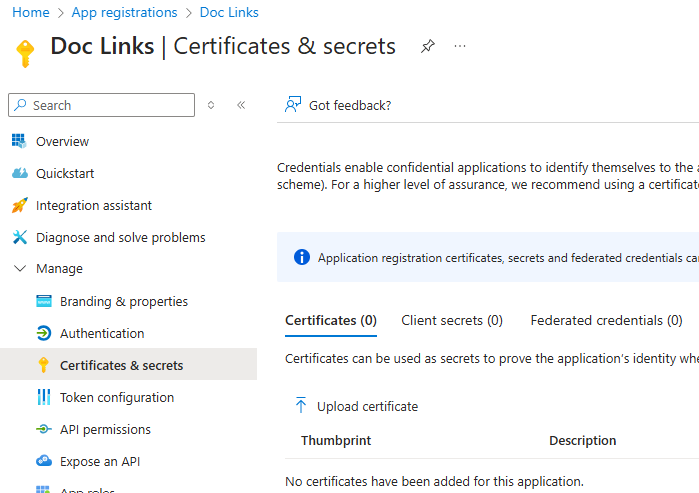
Once you have your certificate, you should have this in 2 formats, a .pfx file and a .cer format. In Azure, within the App Registration you have created, select Manage in the ribbon and choose the Certificates & Secrets option.
Click the Certificates header and Upload Certificate. This will open up a side window to the right where you can select the file. Upload the .CER format of the certificate in here and give it a brief description, i..e "Clever Doc Links Certificate".
The .pfx format is required when running through the "SharePoint Setup wizard" which you can find here. This is uploaded directly into Business Central.
Client secrets
If you're using a Client Secret, open up Azure into your App Registration, select Manage in the ribbon and click on Certificates & Secrets.
Ensure Client Secrets is selected as a header and click on New Client Secret.
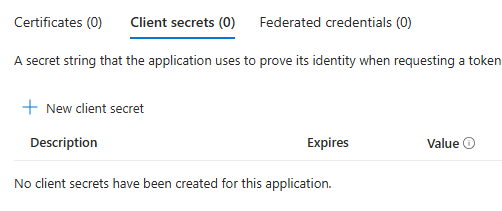
This will open up a new window to the right where you can provide a short Description for the secret along with the Expiry. Bear in mind you will be required to re-create a new client secret once the old one expires so choose the option that suits your business needs.

Take a copy of the data in the Value field immediately and keep it stored elsewhere as you will need this for the SharePoint Setup wizard but Azure will hide this value after a short time which means you will be unable to access it without creating a new one.
Now this setup has been completed in Azure, you can continue through the remaining articles to setup SharePoint.