Before you start using Clever Data Validation it is recommended to complete the "Data Validation Setup" screen.
The data validation setup page can be opened from the Manual Setup option on the welcome page that is shown automatically if downloading the app from Microsoft AppSource or can be launched from the "Assisted Setup" list. Alternatively it can be opened by choosing the  icon, entering Data Validation Setup, and then choosing the related link.

The menu of the has the following options:
|
Assisted Setup |
Selecting this option will run the Clever Data Validation Assisted Setup Wizard which will guide you through the setup required for Clever Data Validation. |
|
Setup |
The Setup option provides easy access to other setup page related to Clever Data Validation. Selecting this option will allow you to open the pages for creating Data Validation Templates and Standard Data Formats. |
| Default Configuration | This option creates a default configuration to help you set up the app more quickly. Please refer to Default Configuration Page more information on the setup created by this option. |
You can configure Clever Data Validation to perform the relevant checks within Business Central, as detailed below.
General
As shown above, the only setting on the General FastTab is the Check as you Type option, which is used to control whether the system will check individual fields against applicable data validation templates at the point you leave a field.
Note: The Check as you Type option should be used with care. This may cause performance issues if you have lots of data validation templates and it also only checks the value of the field is correct, it will not test for missing mandatory fields. It is recommended that you run check either manually or using the check on unblock/document release functionality unless you have a specific requirement for this option.
Master Data
Within the Master Data FastTab you are able to setup rules against some key Business Central areas, to ensure that Master Data is setup completely, prior to being used.
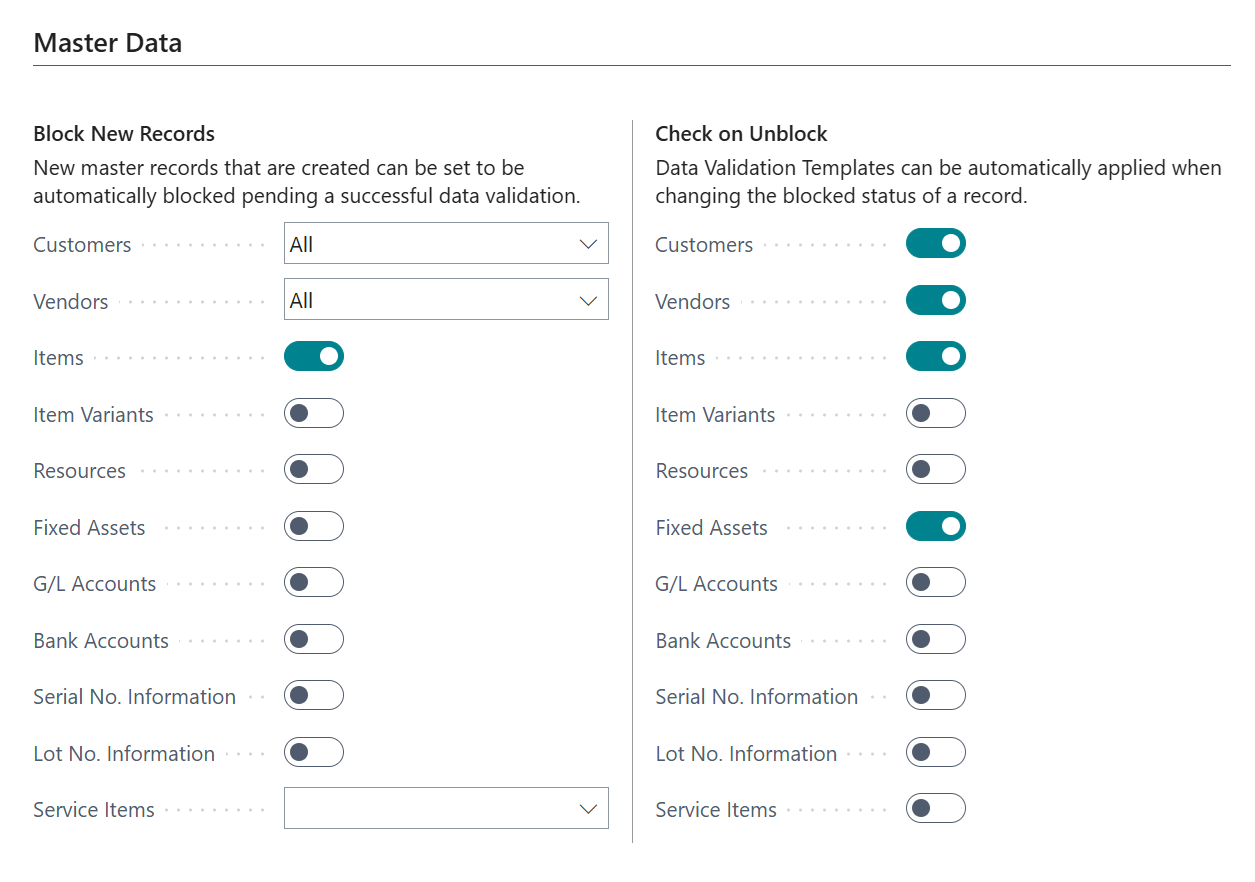
The first section, Block New Records allows you to automatically apply a block to the specified record type at the point that it is created. This prevents the records from being accidently used if they are not complete or have not had a data validation check. The Check on Unblock section will automatically run any associated data validation templates when the Blocked status is removed. if the master data record fails data validation the Blocked status will be retained.
Documents
The document section allows you to specify that any data validation templates associated with either the document header or related lines should be automatically run when the user releases the document.
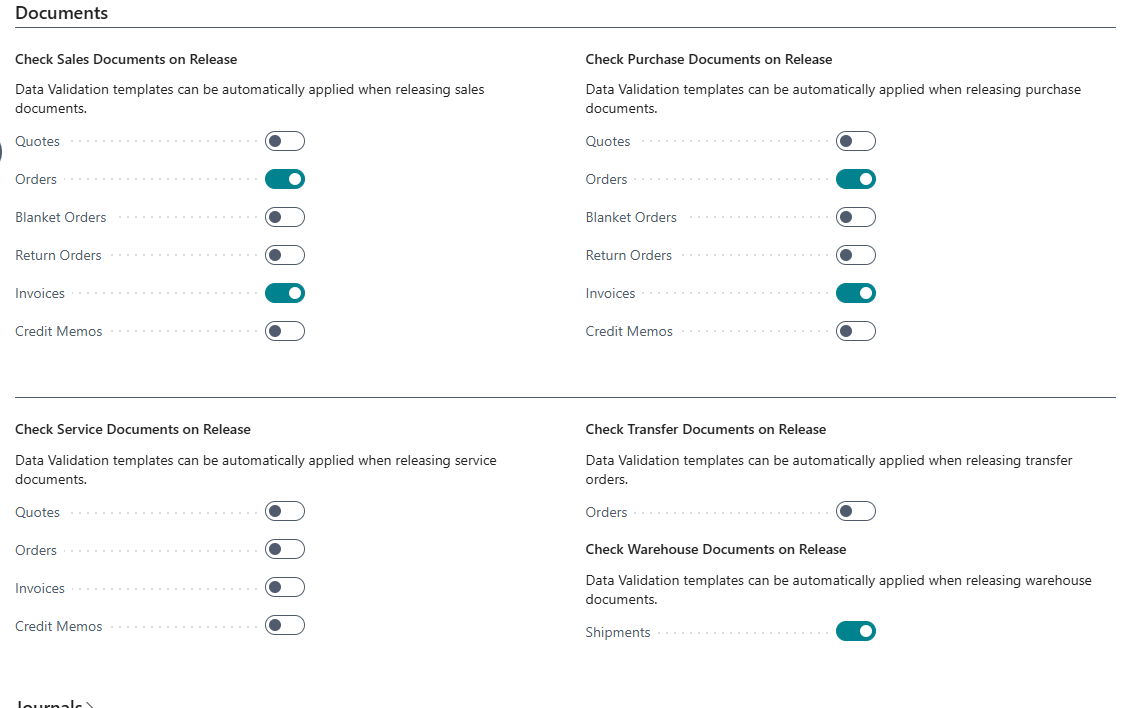
As shown above, with Clever Data Validation you are in control of what types of Documents can be checked on Release across Sales, Purchase, Service and Transfer. If the document fails data validation then the errors will be displayed and the document will retain an Open status. These options prevent a document being released if they contain incomplete or invalid data and therefore help to prevent problems in downstream business processes.
If these options are enabled data validation checks will also be made before posting a pre-payment invoice (where applicable) against an Open document.
Journals
Available from Version 1.5 of Clever Data Validation, you have the ability you have the ability to perform Data Validation checks on different types of Item and General Journals within Business Central.
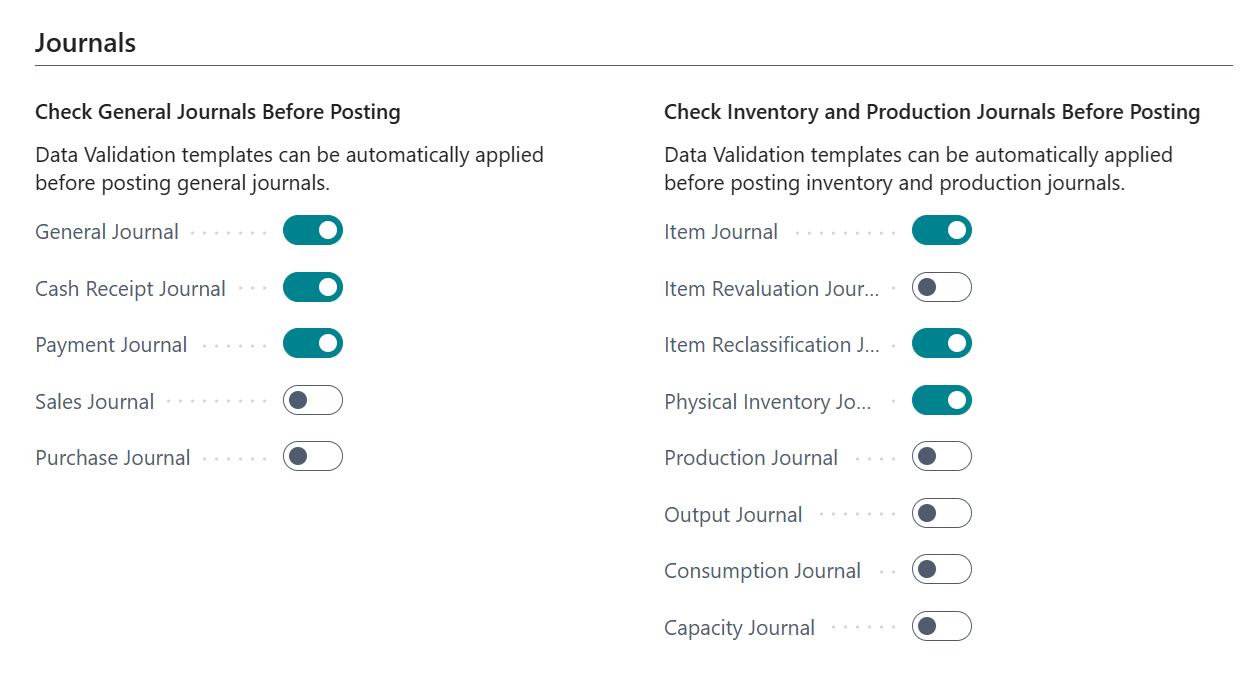
When Enabled for the above types of Journal and where you have setup a relevant Data Validation Template the system will automatically validate your Journal data at the point of posting, preventing errors for both financial and stock transactions. As with other types of checks, the issues will be shown to the user and must be resolved prior to the Journal being posted.