Some of the standard triggers included within Clever Labelling (setup when applying the Default Configuration package) allow you to manually create labels across a wide range of processes within Business Central, allowing for such scenarios as pre-printing receipt labels or re-printing damaged labels.
Note: for any of the below processes you must first ensure that the corresponding Trigger is set to Active, as detailed in the Trigger Management section. If there are no active triggers setup, then the print options detailed below will be hidden.
Purchase Order Pre-Print
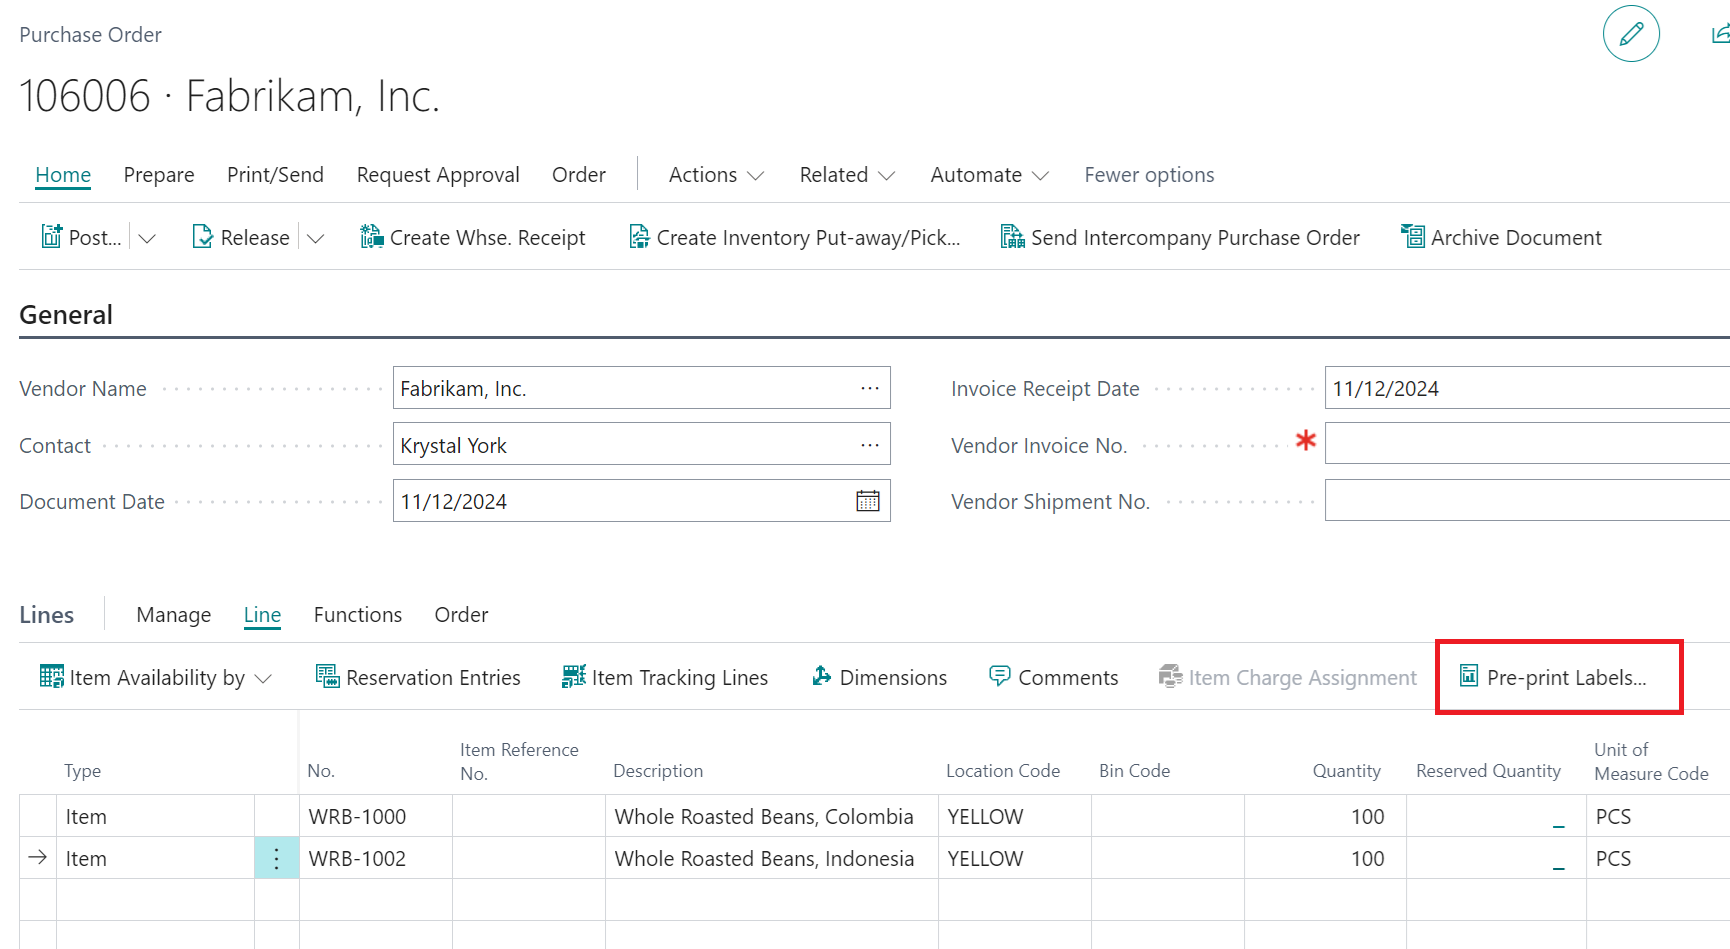
Within a "Purchase Order" you have the capability to print labels for any of the Items on that you are expecting to receive, prior to their delivery into the warehouse. This can be useful in scenarios where your supplier doesn't provide labels that you are able to scan when receiving or where you may break the receipt quantity into defined container quantities compatible with your own warehouse storage facilities.
To print Labels for an Item on the "Purchase Order", you can simply select the Item line that you wish to print labels for and then select the Pre-print Labels option from the Line menu, as shown below. If your Items are Item Tracked and the Item Tracking has been created in advance of the receiving process, using the built-in Purchase Order Pre-print Label Design, Business Central will produce the labels including the Item Tracking breakdown.

The system will process any valid labels (adhering to any trigger criteria/settings) that are specified within the Purchase Order Pre-Print trigger set on the "Clever Label Trigger Management" screen.
In addition to being able to produce Labels for a selected Item, Clever Labelling also provides the capability to be able to print labels for any defined Item Tracking. This can be done by navigating to the "Item Tracking Lines" screen and selecting the Pre-print Labels option from the Line menu, as shown below.
![]()
Purchase Receipt
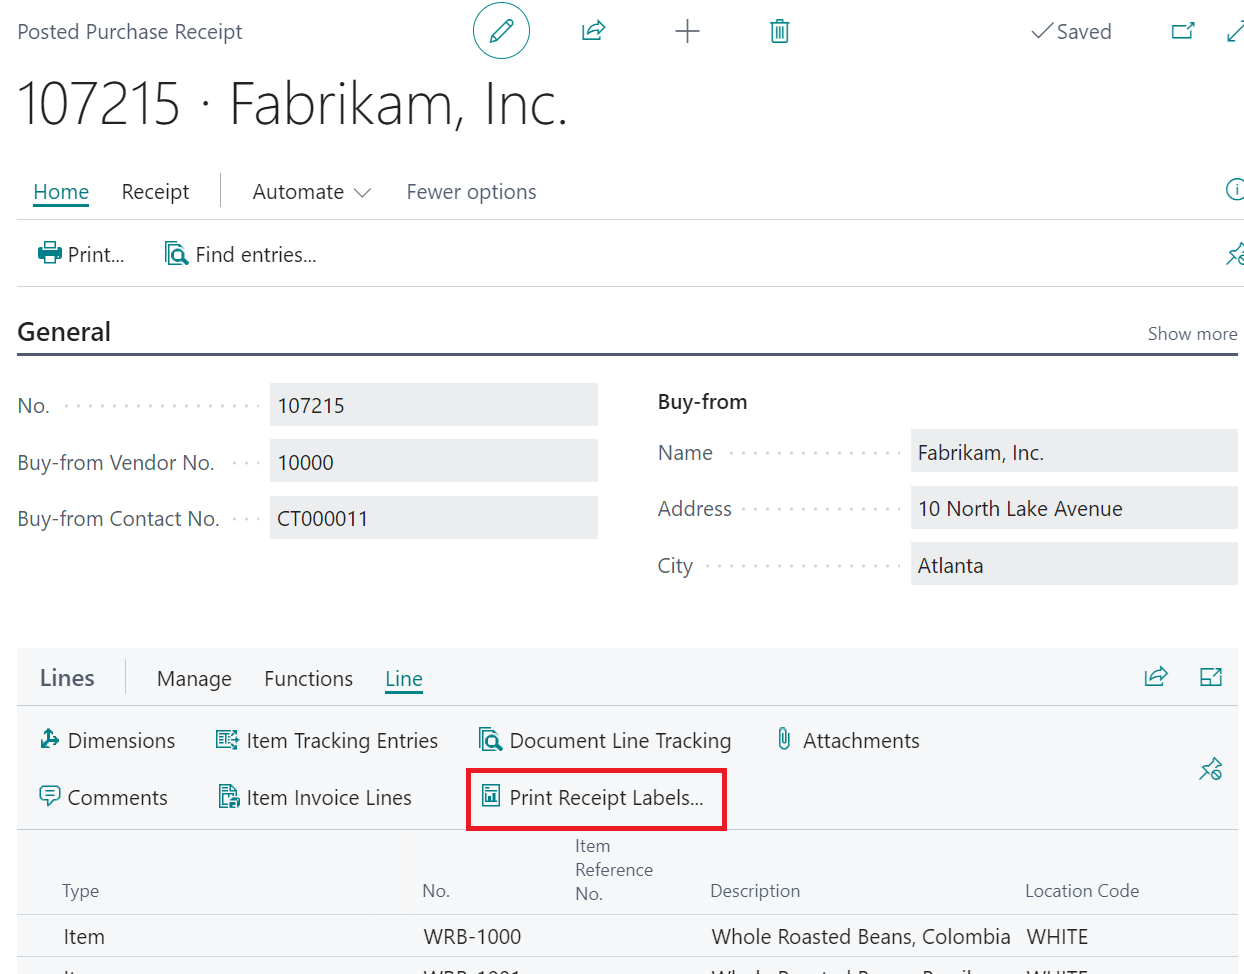
You can print (or re-print) Labels for a purchase receipt, by navigating to the relevant "Posted Purchase Receipt" after the receiving process has been completed. Simply select the Item that you want to produce Labels for, on the Lines section of the "Posted Purchase Receipt" and use the Print Receipt Labels menu option, available from the Line menu.
The system will process any valid labels (adhering to any trigger criteria/settings) that are specified within the Purchase Receipt trigger set on the "Clever Label Trigger Management" screen.

Posted Warehouse Receipt
When using Warehouse Receipts, which may apply to multiple Purchase Orders for a single Warehouse Receipt, you can print Labels from the "Posted Warehouse Receipt" screen. As with other Documents, simply select the relevant Item for which the Label is required and press the Print Receipt Labels option from the Line menu, in the same way as you would for the "Posted Purchase Receipt" documented above.
The system will process any valid labels (adhering to any trigger criteria/settings) that are specified within the Posted Warehouse Receipt trigger set on the "Clever Label Trigger Management" screen.
Purchase Return
When sending stock back to a Vendor you can generate return Labels for the stock, using the Print Return Labels option on the Line menu of the "Posted Return Shipment" screen.
The system will process any valid labels (adhering to any trigger criteria/settings) that are specified within the Return Shipment trigger set on the "Clever Label Trigger Management" screen.
Transfer Receipt
For stock that is received through the Transfer process, you are able to produce Labels for Items you have received. Simply select the Item that you want to produce Labels for, on the Lines section of the "Posted Transfer Receipt" and use the Print Receipt Labels menu option, available from the Line menu.
The system will process any valid labels (adhering to any trigger criteria/settings) that are specified within the Transfer Receipt trigger set on the "Clever Label Trigger Management" screen.
Warehouse Put-away Pre-Print
It is possible to manually create Labels for the stock that you have received into your warehouse but have not yet put away, prior to performing the movement of Items from the Receipt Bin into the Storage Bin(s). From the "Warehouse Put-Away", select the Item that you want to produce Labels for and select the Print Put-away Labels menu option, found on the Line menu.
The system will process any valid labels (adhering to any trigger criteria/settings) that are specified within the Warehouse Put-away Pre-Print trigger set on the "Clever Label Trigger Management" screen.
Registered Put-away
To print Labels for Item(s) after the put away process has been completed, navigate to the "Registered Put-away" document and simply select the Item that you want to produce a Label(s) for and then select the Print Put-away Labels menu option, found on the Line menu.
The system will process any valid labels (adhering to any trigger criteria/settings) that are specified within the Warehouse Put-away trigger set on the "Clever Label Trigger Management" screen.
Posted Inventory Put-away
If you are using Inventory Put-aways within your purchase receipt process, you can print Labels for Item(s) after the put away process has been completed from the "Posted Inventory Put-away" screen. From the Lines section of the screen, simply select the Item that you want to produce the Label(s) for and then select the Print Put-away Labels menu option, found on the Line menu.
The system will process any valid labels (adhering to any trigger criteria/settings) that are specified within the Inventory Put-away trigger set on the "Clever Label Trigger Management" screen.
Sales Shipment
You are able to print labels for stock you are shipping from the "Posted Sales Shipment" screen. From the Line section of the screen you are able to select the Item(s) that you want to produce a Label for and then select the Print Shipment Labels option, from the Line menu.
The system will process any valid labels (adhering to any trigger criteria/settings) that are specified within the Sales Shipment trigger set on the "Clever Label Trigger Management" screen.
Posted Warehouse Shipment
If you wish to print shipment labels for stock after processing a Warehouse Shipment, which can contain Items from one or more documents, then you can do this from the "Posted Warehouse Shipment" screen. As with other types of document, the option to do this can be found on the Line section of the screen, from which you need to select the Item(s) that you want to produce a Label for and then select the Print Shipment Labels option from the Line menu.
The system will process any valid labels (adhering to any trigger criteria/settings) that are specified within the Posted Warehouse Shipment trigger set on the "Clever Label Trigger Management" screen.
Return Receipts
When stock is returned to you from a Customer, if using a Sales Return Order to process the return, after the stock has been received back into your warehouse a "Posted Return Receipt" document will be created. To create Labels for the Items that have been returned, you can do this from the "Posted Return Receipt" screen (within the Line section) and after selecting the Item(s) you need Labels for, simply use the Print Return Labels option from the Line menu.
The system will process any valid labels (adhering to any trigger criteria/settings) that are specified within the Return Receipt trigger set on the "Clever Label Trigger Management" screen.
Transfer Shipment
For stock that is shipped through the Transfer process, you are able to produce Labels for Items you have shipped from the "Posted Transfer Shipment" screen. As with other types of document, simply select the Item that you want to produce Labels for, on the Lines section of the "Posted Transfer Shipment" screen and use the Print Shipment Labels menu option, available from the Line menu.
The system will process any valid labels (adhering to any trigger criteria/settings) that are specified within the Transfer Shipment trigger set on the "Clever Label Trigger Management" screen.
Warehouse Pick Pre-Print
As part of the Picking process some businesses will apply labels to stock, to not only allow them to be scanned as part of the pick process, but subsequently used and/or scanned as part of a loading process, or simply to provide your Customers with labels that they can scan when receiving into their own Warehouse. To produce Labels for a Pick document, simply open the relevant "Warehouse Pick" and from the Lines section select the relevant Item(s) and use the Pre-Print Labels option found on the Line menu.
The system will process any valid labels (adhering to any trigger criteria/settings) that are specified within the Warehouse Pick Pre-Print trigger set on the "Clever Label Trigger Management" screen.
Prod. Order Pre-Print
As part of the manufacturing process you will be creating stock of Items and when that stock is Output you will need to move it around your warehouse, from the production area to storage or shipment areas. With Clever Labelling you are able to produce Labels in advance of the manufacturing process by using the Prod. Order Pre-Print functionality. You are able to produce Labels from both the "Firm Planned Production Order" or "Released Production Order" screens within Business Central. To do so, simply open the relevant "Warehouse Pick" and from the Lines section select the relevant Item(s) and use the Pre-Print Labels option found on the Line menu.
The system will process any valid labels (adhering to any trigger criteria/settings) that are specified within the Prod. Order Pre-Print trigger set on the "Clever Label Trigger Management" screen.