As a business, it may be useful to have Clever Interactions and To's generated automatically, based on Overdue levels. This not only reduces the manual effort of creating them but equally ensures that once a customer is overdue, the correct measures are taken and recorded in Business Central instantly.
As an overview, the below setup is required and we'll break these down further for more information below.
- Create Reminder Terms Code
- Setup Overdue Levels
- Assign Reminder Terms Code per Customer
- Have Interactions and To-Do's created automatically
Watch our short video here for a quick overview on what's involved!
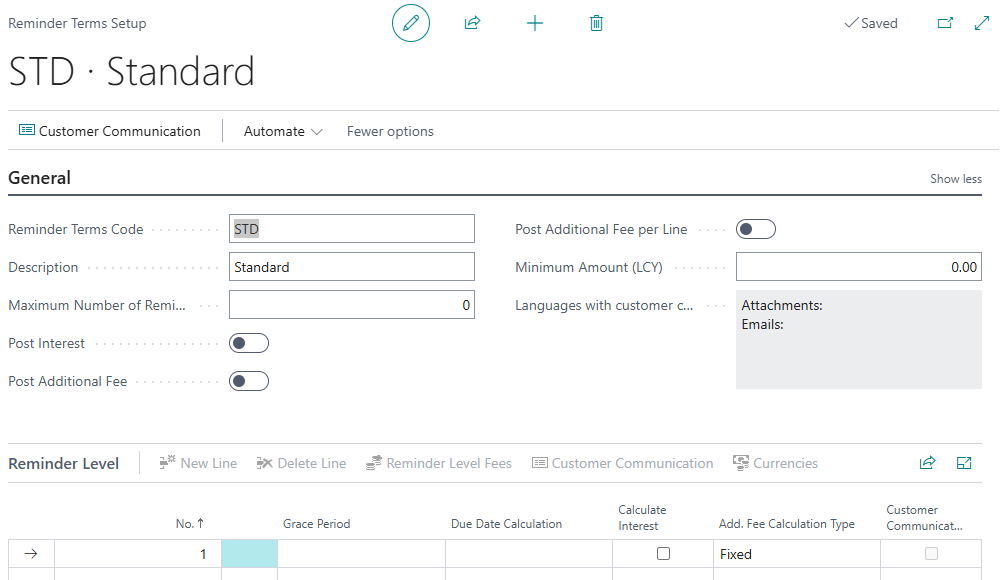
1. Reminder Terms
Utilising standard Business Central "Reminder Terms", create a "New" entry and assign it a Reminder Terms Code and Description. You can leave the reminder levels blank unless you wish to assign out Reminder Level fees.
2. Overdue Levels
Close the "Reminder Terms" and search for "Overdue Level Setup List" in the search bar and create a "New" entry.
Assign a Code for the Overdue levels card as well as a Description. Next, in the dropdown for Reminder Terms Code, select the Reminder Terms Code you just created. If you leave this field blank, then ALL customers will have Interactions and To-Do's created automatically unless you specify customers within the Filters. So you can either populate the Reminder Terms Code and assign this code to each Customer card that requires it, or leave it blank but define the customers in the filters.
Overdue Level Setup Lines
Now you need to populate your overdue parameters to ensure automatic functions can be ran. See below for the data required.
| Level Code |
Define the Level Code you want to use. Note: This is visible throughout the process on the Customer ledger Entries, To Do card and Posted Sales Invoices list so have this as something easy to understand. |
| Description | The description for the associated Overdue level |
| From / To Days Overdue | From Days Overdue and To Days Overdue, i..e '1' and '7'. This means that Business central will stamp the Level code for any invoices overdue by 1-7 days with this code. |
| Create Interaction | Tick this if you want Business Central to automatically create an Interaction for overdue invoices between the From/To Overdue dates. Where 'No', no automatic Interactions will be created. |
| Interaction Type Code |
Define what type of Interaction you want created where Create Interaction is 'Yes'. Options include: Auto Select Overdue Call Statement Where stated, this description will be used in the Clever Interaction. |
| Create To-Do |
A boolean to confirm if you want a To-Do to be created for this Overdue level |
| To-Do Due Date Formula |
Enter a formula (i..e '2D' for 2 days) for how many days the To-Do will have the Due Date automatically calculated on creation. This date is based on Today's date, so if Interaction is today (13/01/2026), my To-Do's Due Date will be set at 15/01/2026. |
| Issue Reminder |
A boolean to confirm if you wish for an Issued Reminder to be automatically created for this overdue level. |
| Send Email Via Doc Delivery |
A boolean to confirm if you wish to send the Issued Reminder via Document Delivery. This will only be shown if Clever Document Delivery is installed. |
| Doc Delivery Doc Type |
If sending Issued Reminders, you can specify which Doc Delivery Document Type to send from the dropdown. |
| Escalation Offset |
Define a date formula to decide if Invoice should remain at current level for stated amount of time before moving to the next overdue level |
| Next Interaction Date Formula |
Use this to define what next interaction date you want to set on your Interaction |
| Cool-Off period |
Date formula to determine how much time should pass before re-processing |

Once you have confirmed your Overdue level parameters, ensure the Overdue Level Setup card is marked as Active before closing.
Business central uses Job Queues to ensure regular checks can be done to process these. You can find how to create this in the General FastTab of the "Credit Control Setup" page.
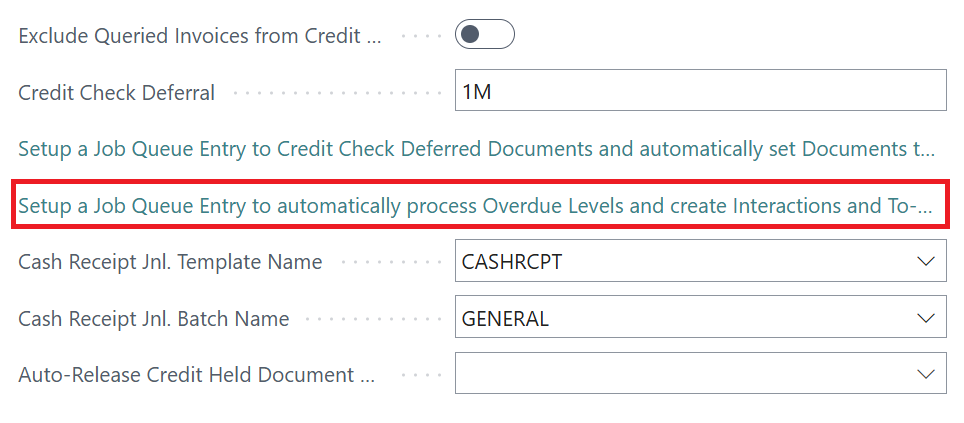
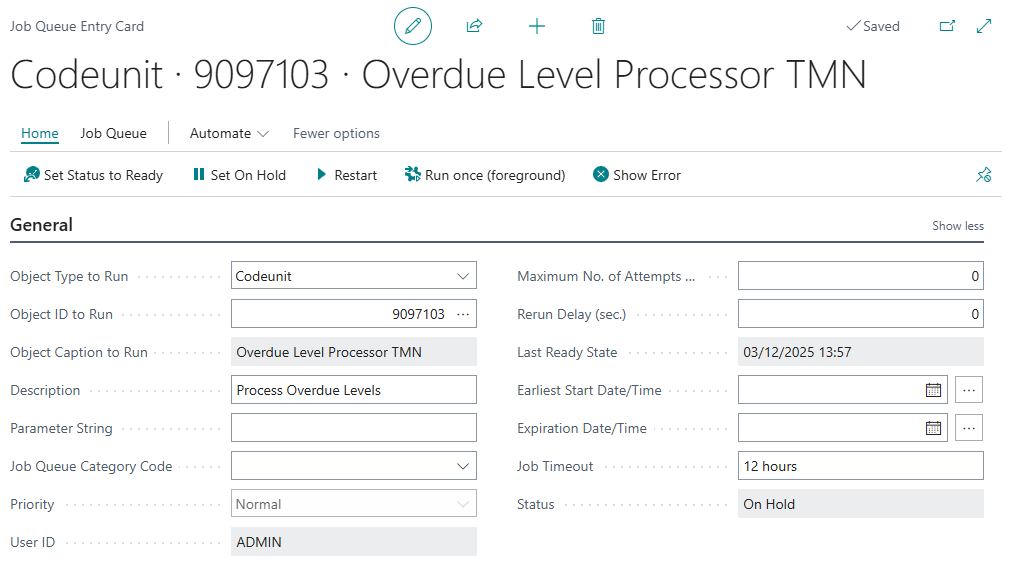
Clicking in here opens up the job queue card which looks like below. Here, you can define the recurrence parameters for how often you want Business Central to check for Overdue entries. Ensure this is set to 'Ready' to start using.
3. Customer Assignment
Now your Reminder Terms are created and you have set up your Overdue levels, you can assign the Reminder Terms to your Customer cards. Note: If you are using the Customer filters to define who the Overdue levels impact, you do not have to do this.
Open a 'Customer' Card and go to the Payments FastTab. Here you will find the Reminder Terms Code field to populate which reminder terms to use per Customer.
4. Using Automated Interactions and To-Do's
Sales Orders/invoices are created exactly the same. The only difference is, when the Job Queue has ran, dependant on your setup in the Overdue Level Setup List, you'll have some actions automated.
See below an example of a Customer whose Due Date is within the parameters of Level 3.

Their Due Date falls within '15-100' days and I expect an automatic Interaction, To-Do and Issued Reminder to be created (and sent via Doc Delivery in this instance).
When the Job Queue has ran, I can check the "Customer Ledger Entries" to see if these have been created. Not only can I see what Overdue Level Code has been stamped for this entry in the ribbon, as well as the Overdue Level DateTime, I can also see the Interactions and To-Do's that are associated with this entry in the Factbox.
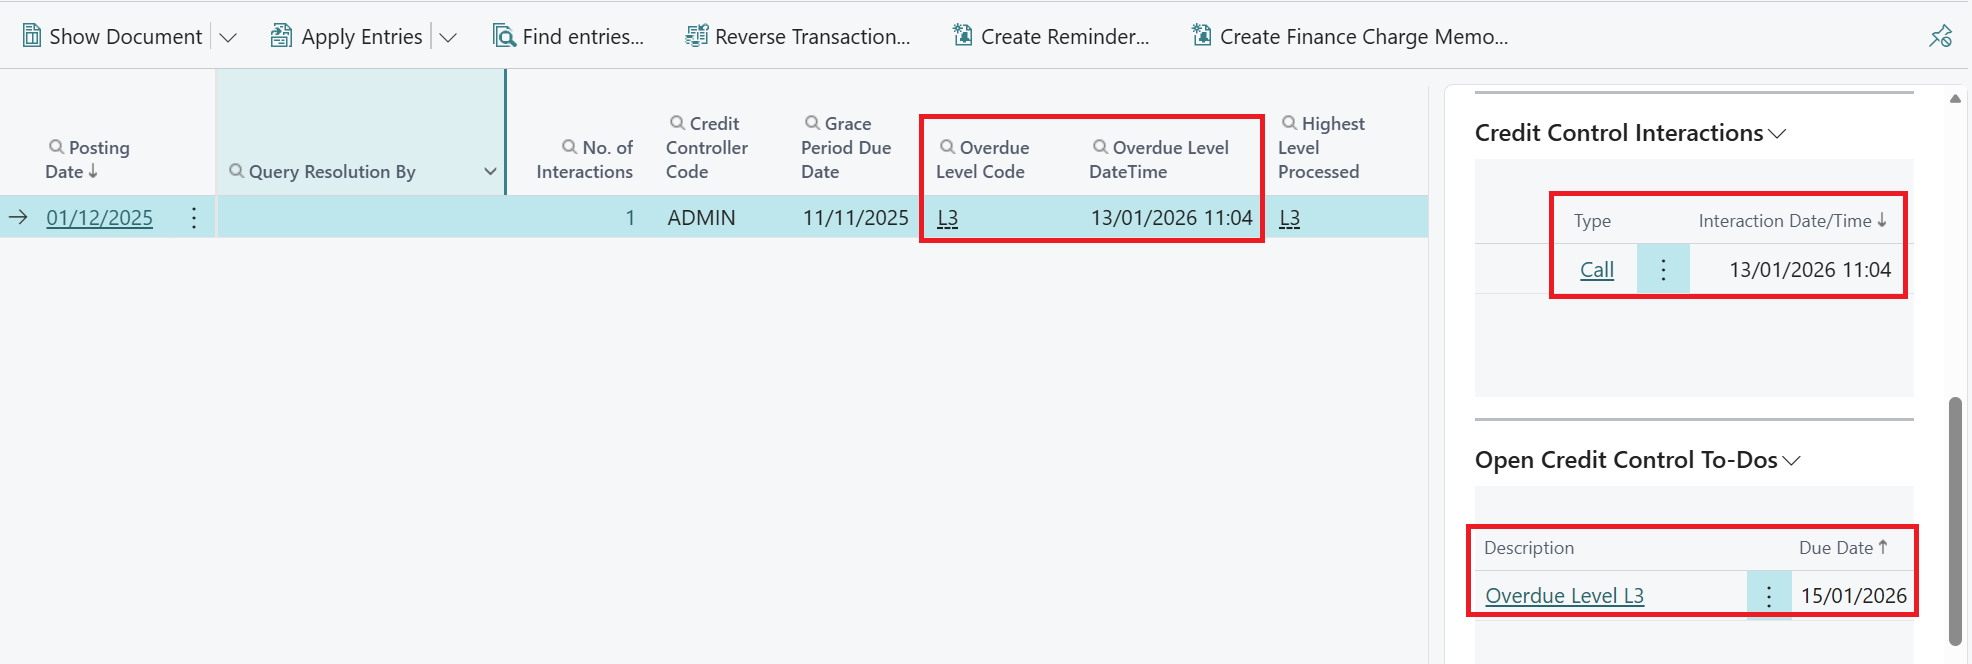
You'll see that my Interaction Type is 'Call', as stated on my Overdue Level, but also my To-Do has been created with a Due Date 2 days ahead from my Interaction, also defined in my Overdue Level.
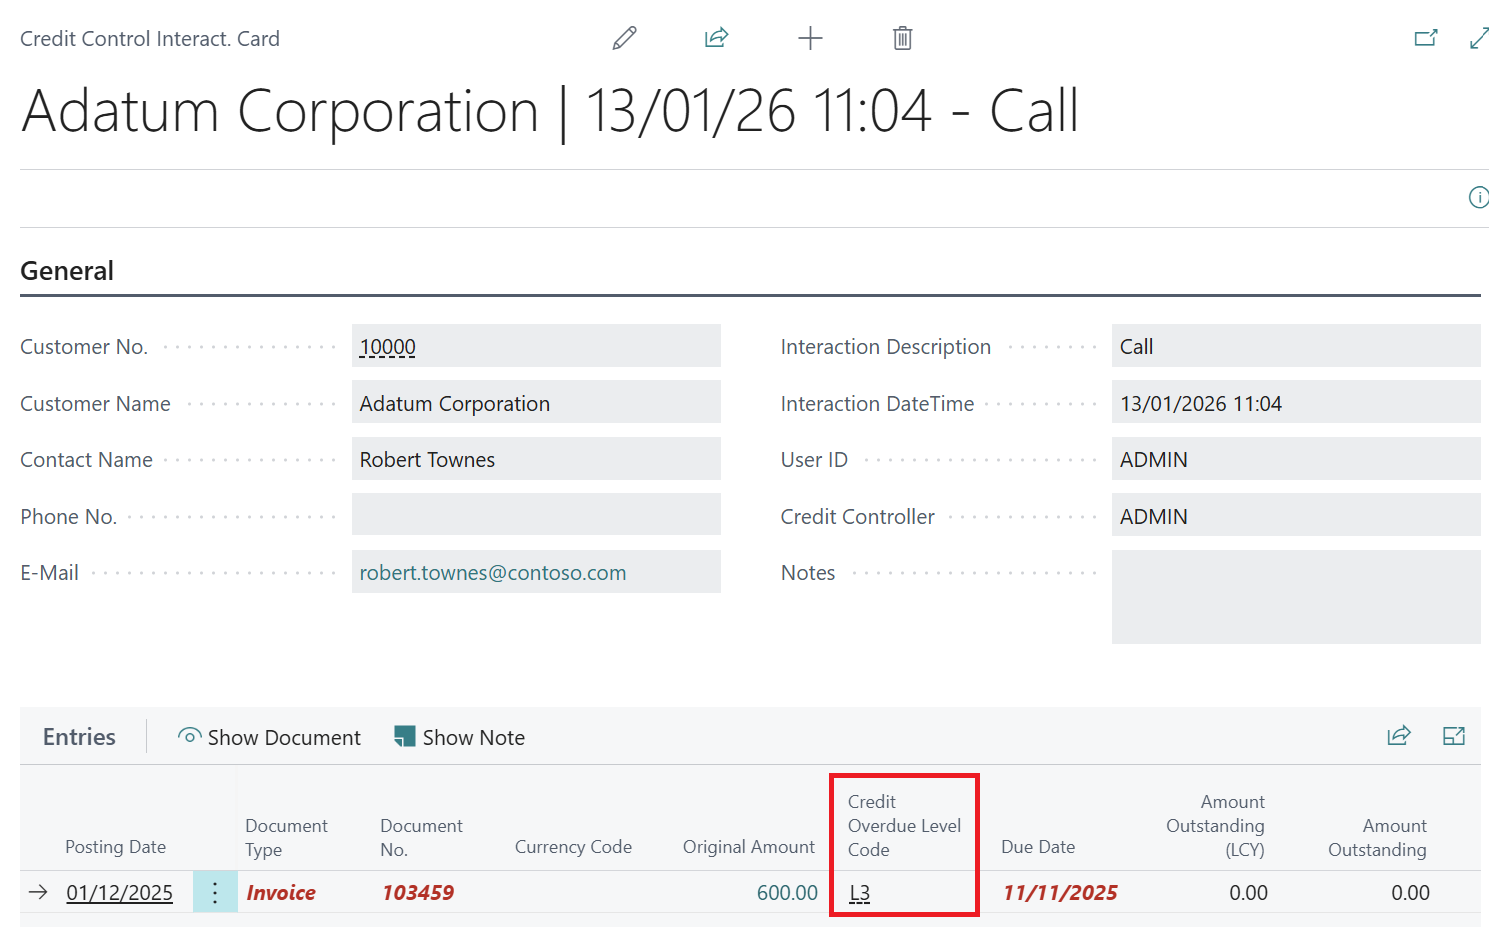
The Credit Interaction and To-Do Card will also display the Credit Overdue Level Code against the entry line.
If you chose to have Issued Reminders created, then this will be automated for you too. Without Clever Document Delivery installed, the Issued Reminder is simply created. For more information on how to use Document Delivery to automatically email Issued Reminders, read the information here.