This section will walk you through the steps that you must follow in order to migrate from Legacy SharePoint Authentication through to Modern Authentication, which is now the recommended authentication method that should be used.
Pre-requisite: before performing this process ensure that your Business Central system is using the latest version of Clever Document Links, as detailed in the Change Log and if you are unsure how to do this, please contact your solution provider.
There are 3 steps that you must follow to successfully setup and configure Clever Document Links using Modern Authentication.
Step 1: Review SharePoint Site, Library and Folder Permission Setup
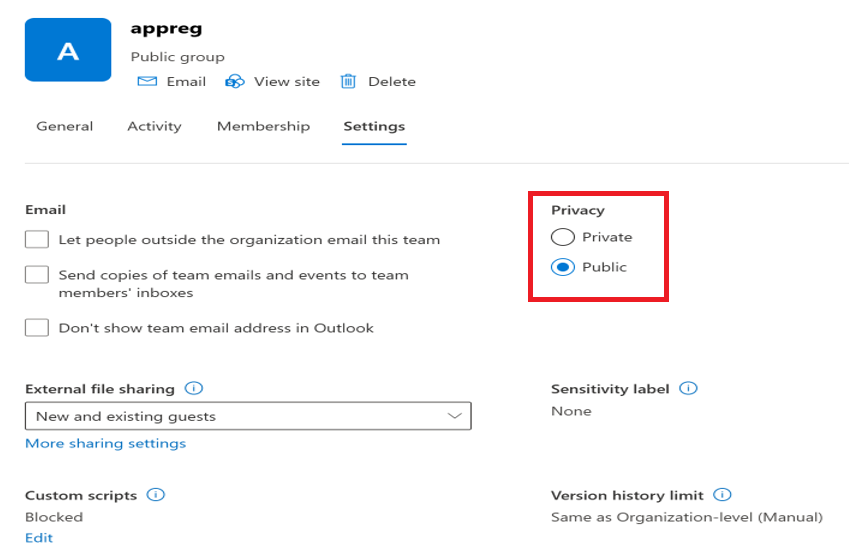
The permissions setup for your SharePoint site will vary, depending on the type of site you have setup.
If it's a standard team site, ensure that the Privacy setting is set to Public.
For any other type of site, such as Document Center, Content Center or a sub site, you will need to include all licensed Business Central Users as members of the site in SharePoint.
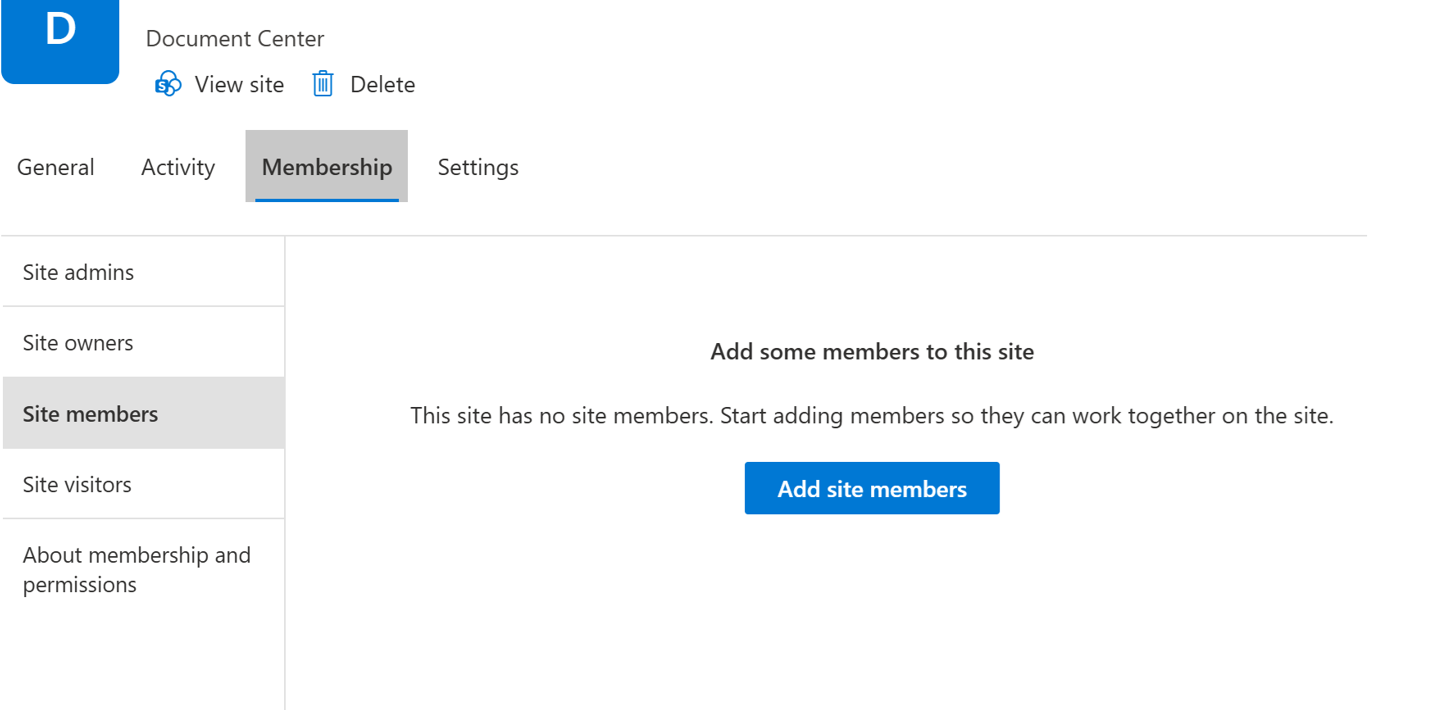
Note: regardless of the type of SharePoint site you, the Account used to configure Clever Document Links in Business Central must be setup as a Site Owner.
Step 2: Microsoft Entra/App Registration Setup
To use Document Links with SharePoint integration and modern authentication, you must first setup an App Registration within Microsoft Entra. If you have already setup an App Registration then you can go straight to Business Central to configure your connection, using the SharePoint Connection Wizard as detailed here.
The App Registration is essentially a connector that provides access from Business Central to the SharePoint site.
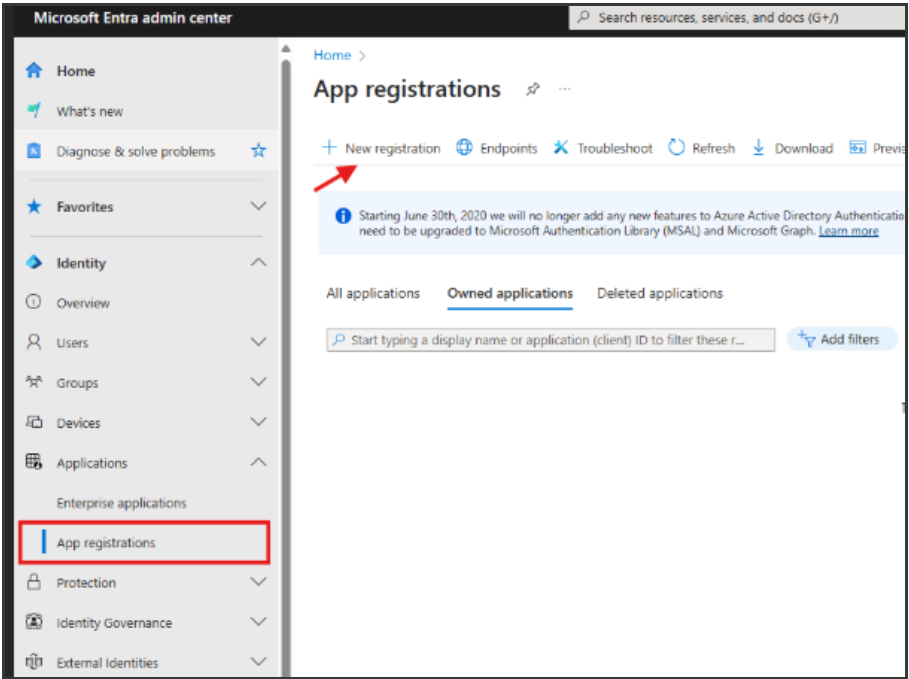
Please follow this guide to complete the setup of the App Registration.
Step 3: Microsoft Entra Setup / App Registration
With both the SharePoint site security and App Registration in place, it's time to setup Business Central to complete the changes required to switch from using Legacy to Modern Authentication.
Open the "Document Links Setup" screen in Business Central.
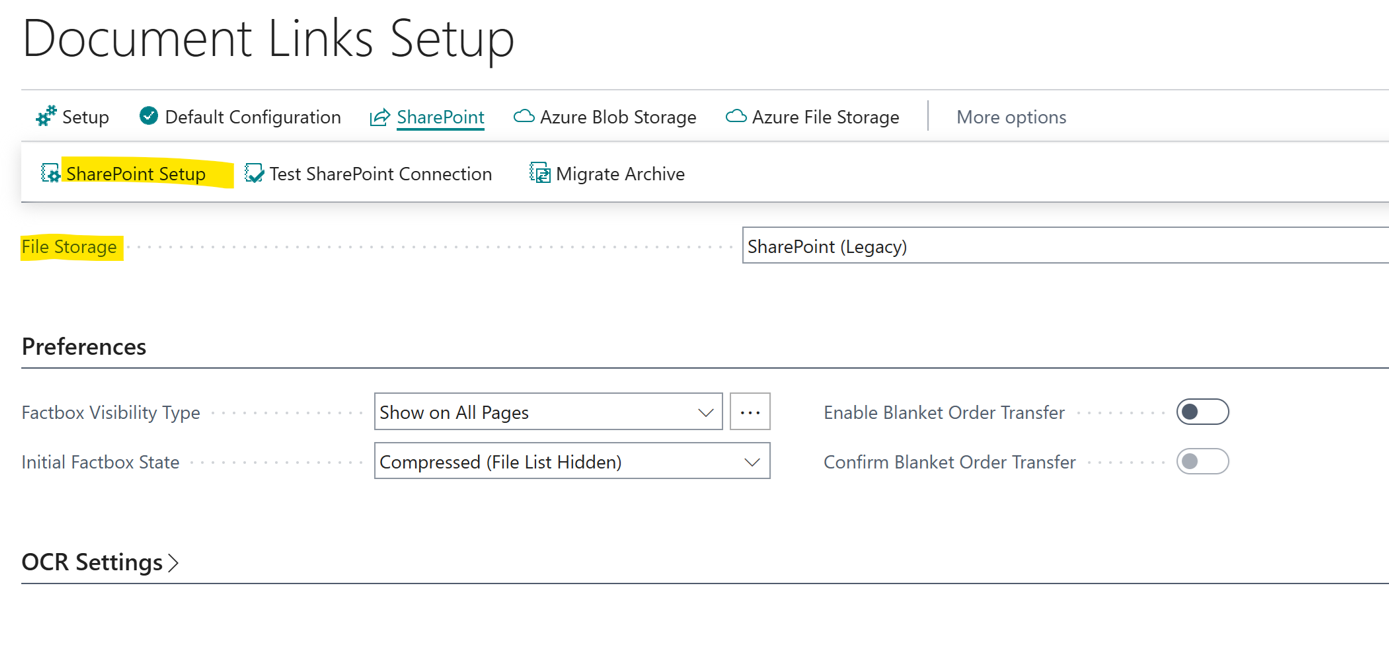
If using a Legacy Authentication the File Storage setting will be set to 'SharePoint (Legacy)'. Change the File Storage to 'SharePoint', which will start the "SharePoint Setup" connection wizard.
Press Next to continue where you will be asked to enter the URL, Scope and Library Name settings.
For the URL field, Enter the URL for your existing SharePoint Site, e.g.
For the Scope we need to choose ‘Sites.Selected’ so that is entered in the format of https://yourdomain.sharepoint.com/sites.selected which defines the permissions required to access SharePoint. ‘Sites.Selected' means that you're only granting permission to access the selected folder within SharePoint.
Note: If you chose to use an SSL certificate rather than a secret in the App Registration setup in Azure (see App Registration Setup) the scope should be set to https://yourdomain.sharepoint.com/.default
For Library Name, it's important to determine if you are using the default library created when first setting up the Document Library or if you are using a custom Library that you created manually. To illustrate this, please see the two below examples.
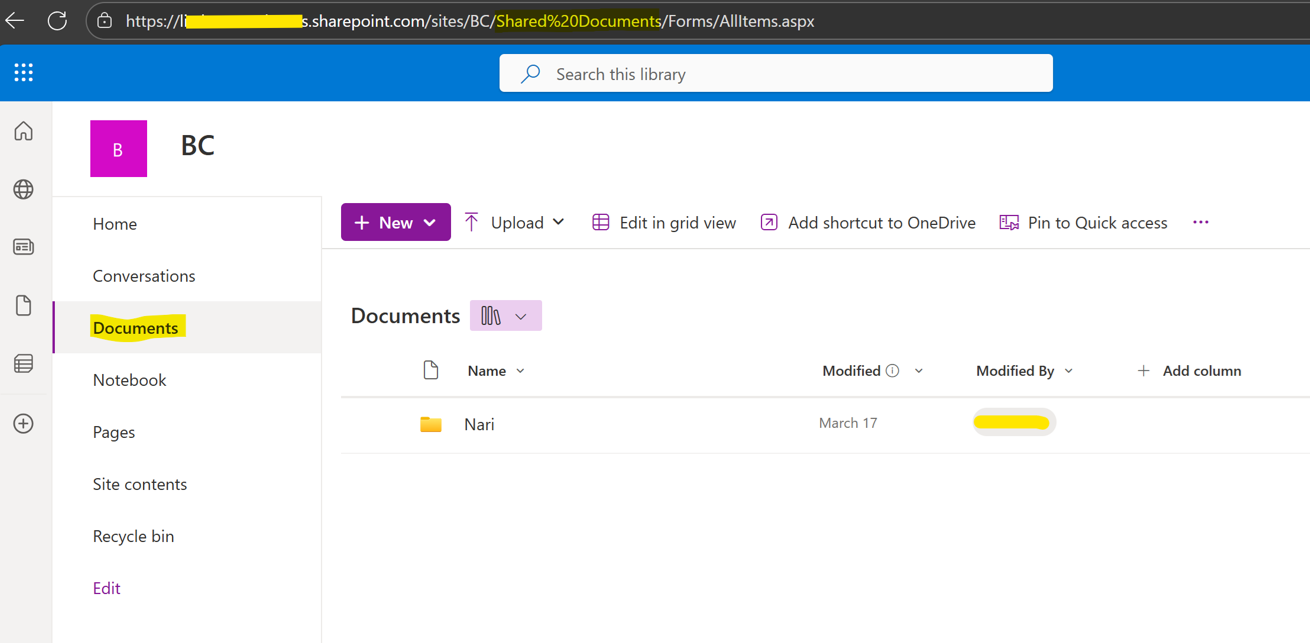
The default library created is listed as ‘Documents’ and the URL will include ‘Shared%20Documents’ as shown below.
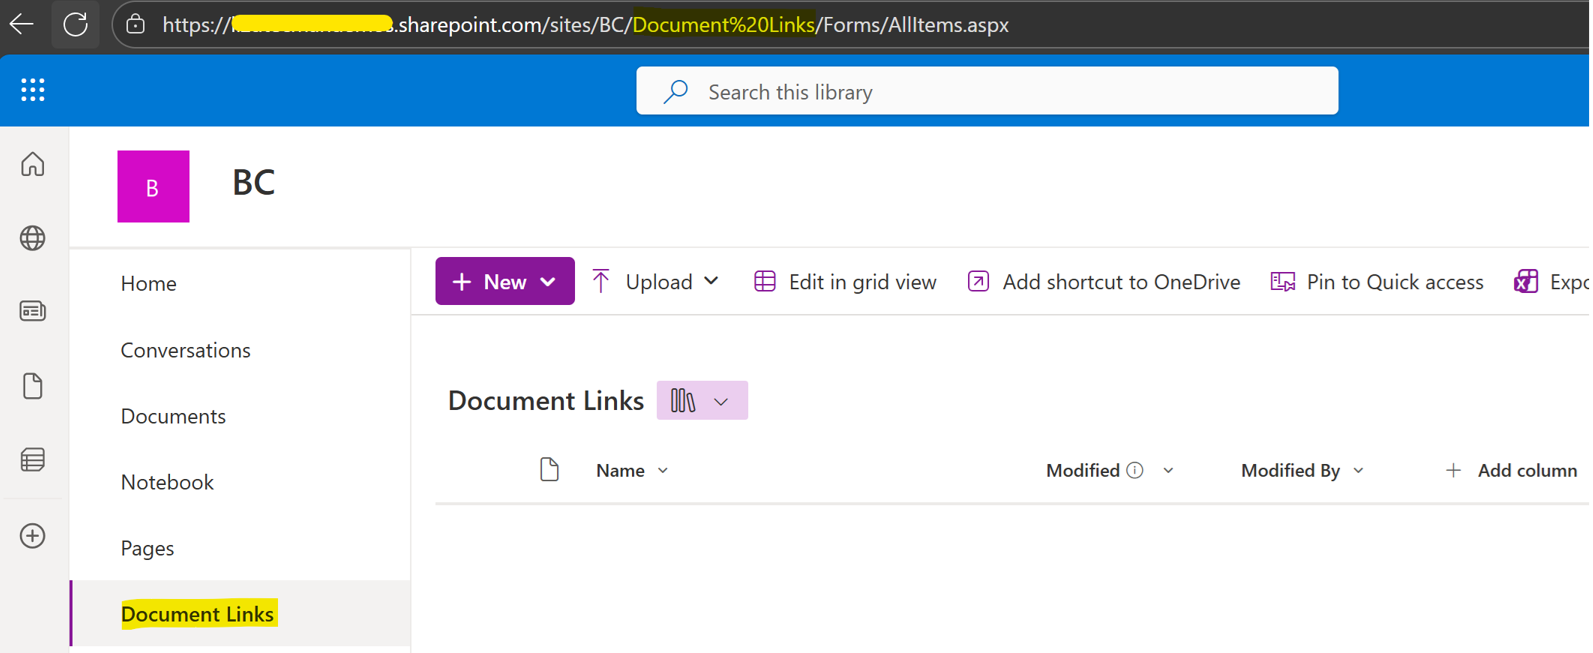
An example of a custom Library such as 'Document Links' is shown below and has 'Document%20Links' in the URL.
When populating the Library Name, enter the name of the library in the format of ‘Shared%20Documents’ if it is a default library, or the name of the custom library as appropriate, e.g. if called ‘Document Links’, then this would be entered as ‘Document%20Links’.
Having entered all of the information, the screen should look similar to the example shown below.

Click Next to continue, where you will see the Folder Name and Folder Structure that have been setup already and are in use for the existing Legacy authentication connection.
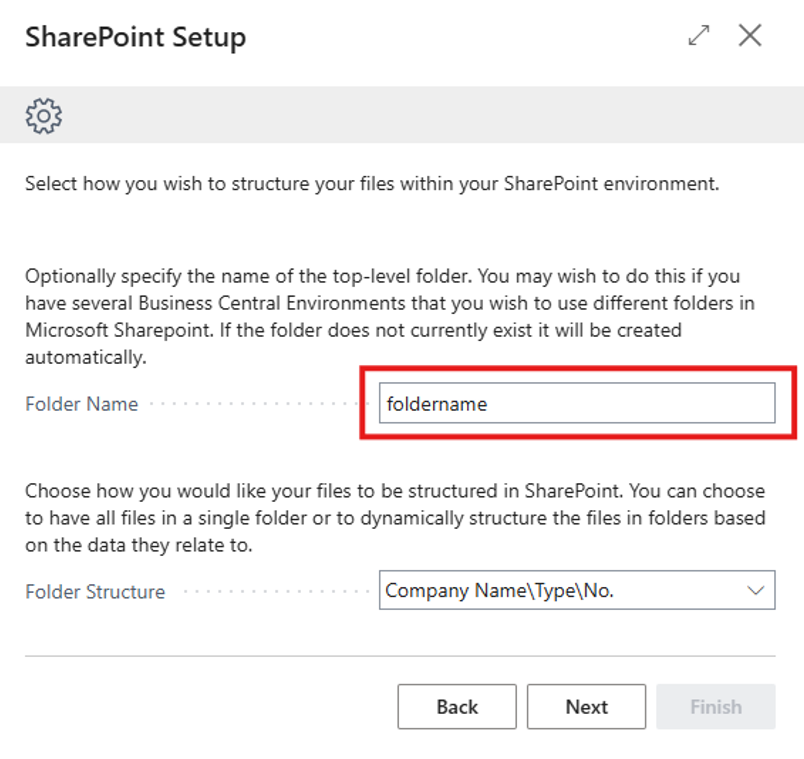
Note: do not change these settings, simply press Next to continue to the following screen, where we can begin to setup the Modern Authentication connection.
For Modern Authentication you can access your SharePoint environment using either Client Secret or Certificate Authentication Types, which you can now select.
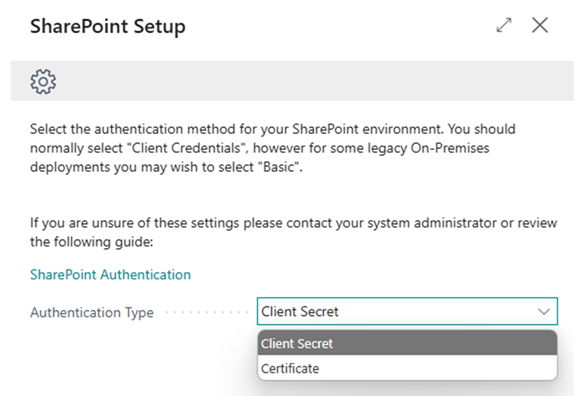
After choosing the Authentication Type, press Next to continue.
Depending on whether you selected Client Secret or Certificate the wizard will require you to enter different setup and will guide you appropriately.
Client Secret Setup
To use a Client Secret, you need to specify the Tenant ID, Client ID and Client Secret information into the screen below.
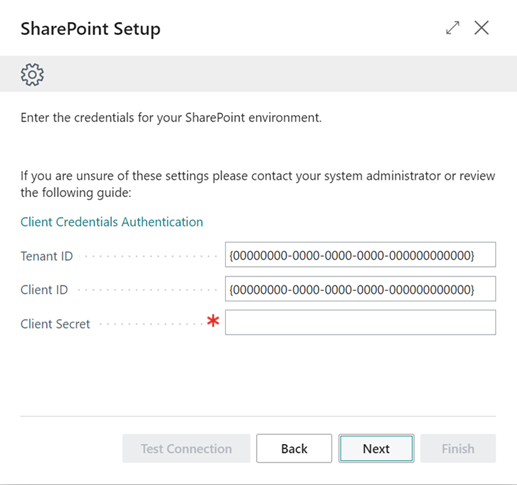
If you do not know what the values are at this stage, to obtain this information, do the following.
-
Open your Microsoft Entra portal
-
Select your App Registration (that you have already created earlier)
-
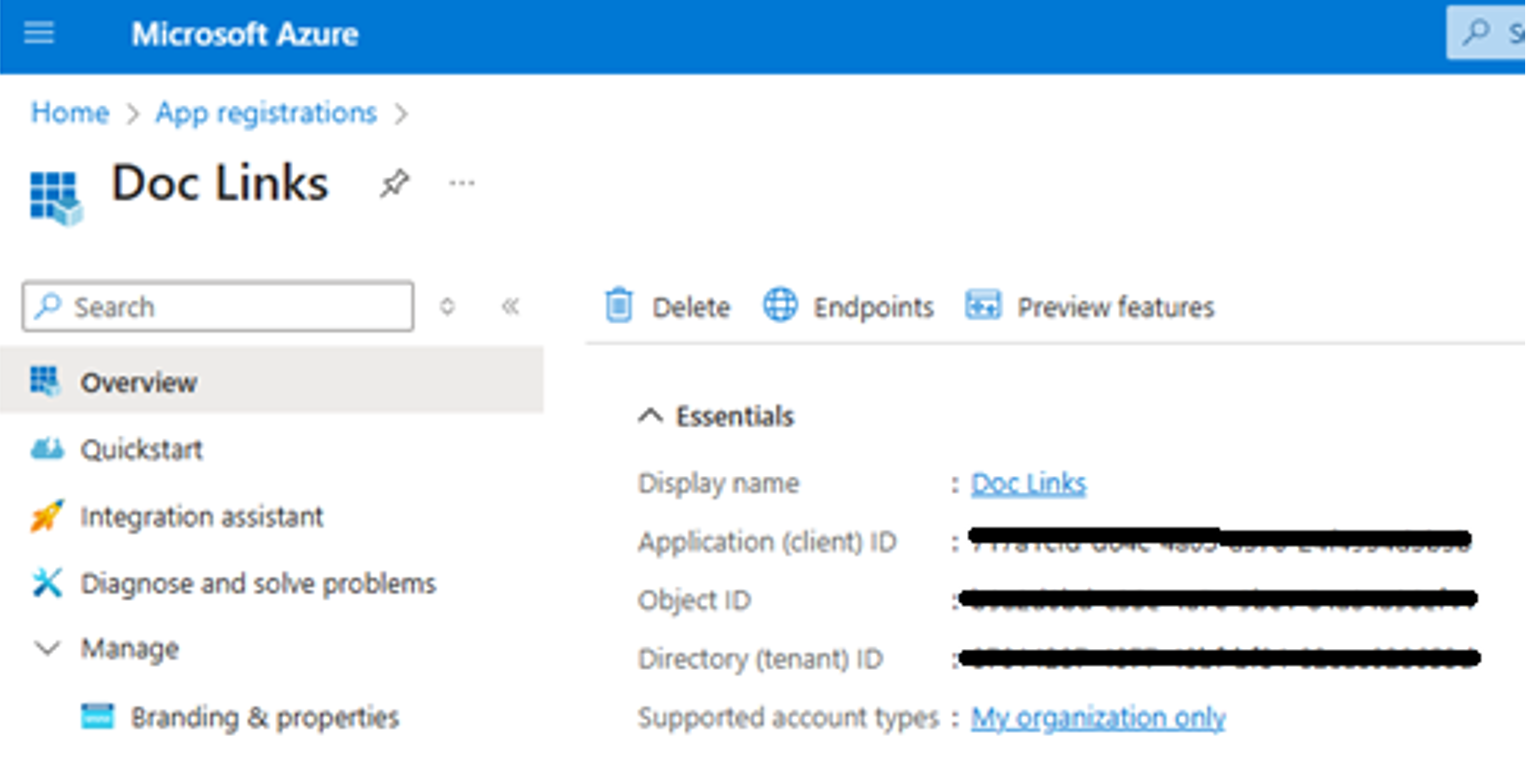
Copy the Directory (tenant) ID value from the Overview section and and paste it as the Tenant ID field in the SharePoint Setup Wizard screen
-
Copy the Application (client) ID value from the Overview section and and paste it as the Client ID field in the SharePoint Setup Wizard screen
-
Finally, retrieve the Value from your Client Secret within Entra and paste that into the Client Secret field in the SharePoint Setup Wizard screen
With all of the information provided you can move onto the Next step.
Certificate Setup
Note: this section can be skipped if you have setup the Client Secret.
To use a Certificate, you need to specify the Tenant ID, Client ID, provide the Certificate and confirm the Certificate Password into the screen below.
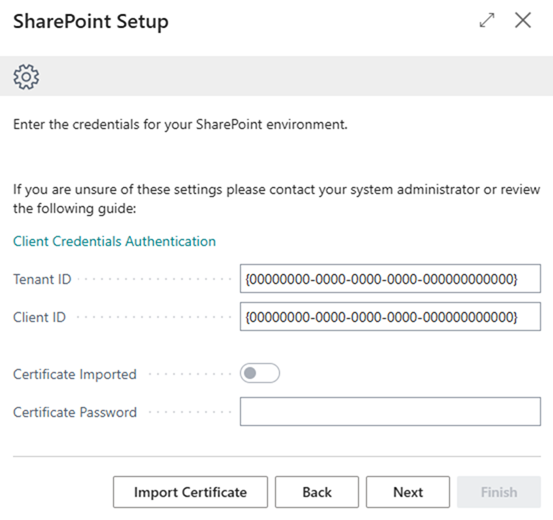
The Tenant ID and Client ID are both values from Entra and if not known can be retrieved as highlighted above from the Overview screen in Entra, as detailed in the Client Secret Setup section above.
Now, press the Import Certificate option and select the .pfx file format for the certificate. With the Certificate Imported being enabled (confirming successful import of the Certificate) you know need to enter the Certificate Password.
Note: when you created and saved the certificate, you would have been asked for a password, which is what you need to enter in the Certificate Password field to complete the setup.
Press Next to continue.
Regardless of whether you are using Client Secret or Certification Authentication, you should now get the below screen where you can run the Test Connection to ensure the setup has been completed successfully.
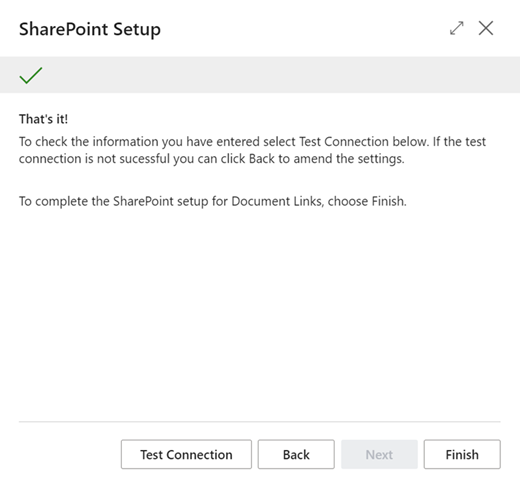
If you receive an error, you may use the Back button to amend the entered settings. If the test was successful select the Finish button to complete the SharePoint setup.
Update File References in Linked Documents within Business Central
When transitioning from SharePoint (legacy) to Modern Authentication in Business Central, it is essential to ensure that all linked documents reference the correct SharePoint library name.
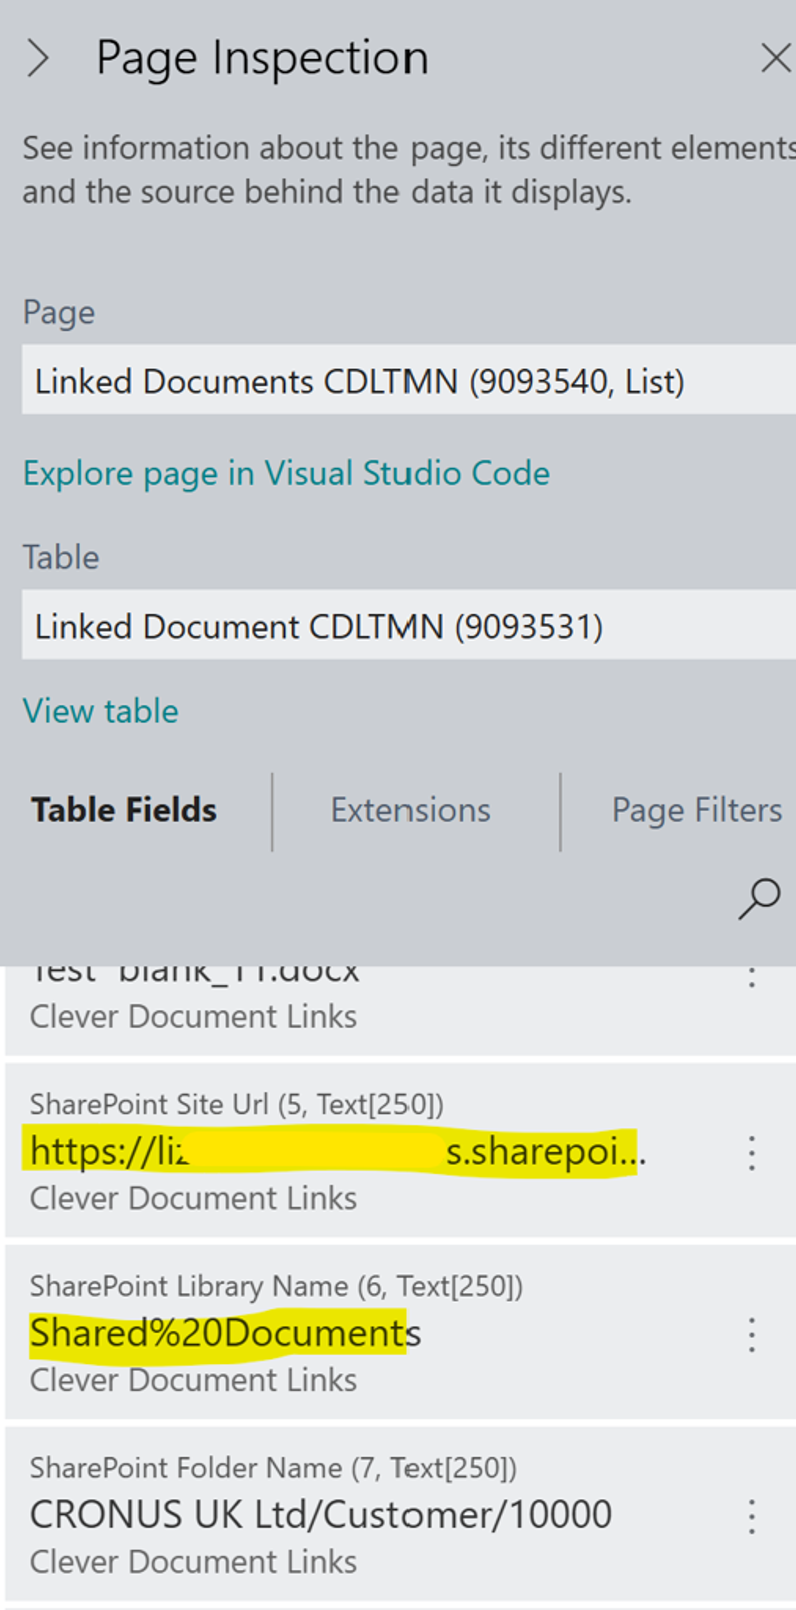
To identify which records need updating, you can use the Business Central Page Inspector.
Start by opening the "Linked Documents" page in BC and activating the Page Inspector (usually by pressing Ctrl+Alt+F1). The Page Inspector allows you to view the underlying table and field values for the current page, including the SharePoint Library Name field for each linked document.
By reviewing these values, you can determine which records still use the legacy "Documents" (or custom name previously used) name and need to be updated to "Shared%20Documents".
Once identified, you can use the "Update Library for All Documents" action to batch update the library name for all affected records, ensuring consistency and compatibility with modern authentication. This process helps maintain accurate document links and prevents access issues after the migration.
The option to update the document library name is hidden by default so needs to be made visible using the Personalize feature within Business Central.
-
Go to Document Links Setup page in BC, then Personalize this page from the Settings menu
-
Click Actions
-
Select Update Library for All Documents and select Show from the context menu
Click Done to save the user interface change and select Update Library for All Documents to update the SharePoint Library Name field for all linked documents from Documents to Shared%20Documents.
If a custom library was used, check and determine if this field needs to be updated before updating this field for all documents.
Note: the path to the uploaded files in SharePoint must match the path formed by concatenating SharePoint Site URL\SharePoint Library Name\SharePoint Folder Name