Using Payment Links helps provide Users with peace of mind, knowing that no confidential data is being communicated over the phone with the potential for mis-use. Providing a link to the customer, either by email or via the Posted Sales Invoice allows them to update the card details on a screen themselves, which is never transferred to any user or stored in Business Central.
Check out our brief overview video here for a short explanation of how they work.
Firstly, if you are using Scheduled Payments and wish to collect the card details from a Customer in advance and allow for payments to be automatically collected, you'll need to create a payment method via the cardholder. More information can be found here but you'll need to create a Cardholder against the customer and send them an email via the "Register Payment" screen. This will send an email to the customer with a link for them to click into and submit their card details. This means when the same cardholder is against an order or invoice, those same card details are used and you do not need to re-enter them.
For transacting Sales Orders or Invoices, you have a couple of options for Payment Links.
1 - Create a link on Release of the document. This can be copied and pasted or have an email sent directly from Business Central using Clever Payment Gateway so that the customer can receive the email and enter their card details.
2 - Create a barcode and link that can be accessed on the Posted Sales Invoice. This means that if a payment was not taken at order level, the customer can receive the invoice and scan the barcode or click the link on the invoice to enter their card details to make payment.
Creating a link
Open the "Payment Methods" screen, select the Payment method you are editing (i..e Stripe) and click into the Payment Gateway Setting in the ribbon. To have a link created automatically on release of the Sales Order, you need to ensure the Payment Link on Document Release is 'Yes'. If this is 'No', you can still create a link in the sales order but it is a manual process. From the same page, if the link is something you want to email to a Customer, ensure the E-mail Payment Link option is 'Yes'. This will use the 'Bill-To' Email address to send the link to. If you want to double check the amount to be paid prior to emailing the customer (and allow you to edit the value where needed), ensure the Show Payment Page" is also 'Yes'. Where this is 'No', the email screen will immediately open but you will not have the visibility of the Payment value or allow you to make changes to it.
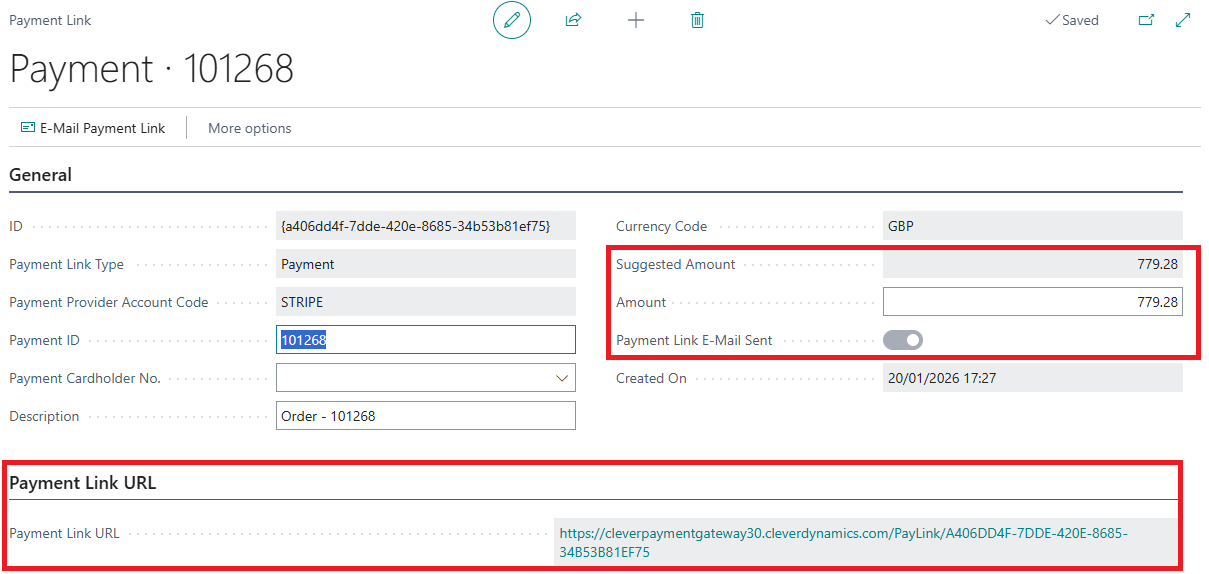
From a "sales order" or "Sales Invoice", when you then Release the document, if you had Show Payment Page as 'Yes', you'll see the below screen. This gives you the opportunity to see the Suggested Amount as well as edit the Amount value. You'll also see the Payment Link that has been created. In the ribbon, select E-Mail Payment Link.
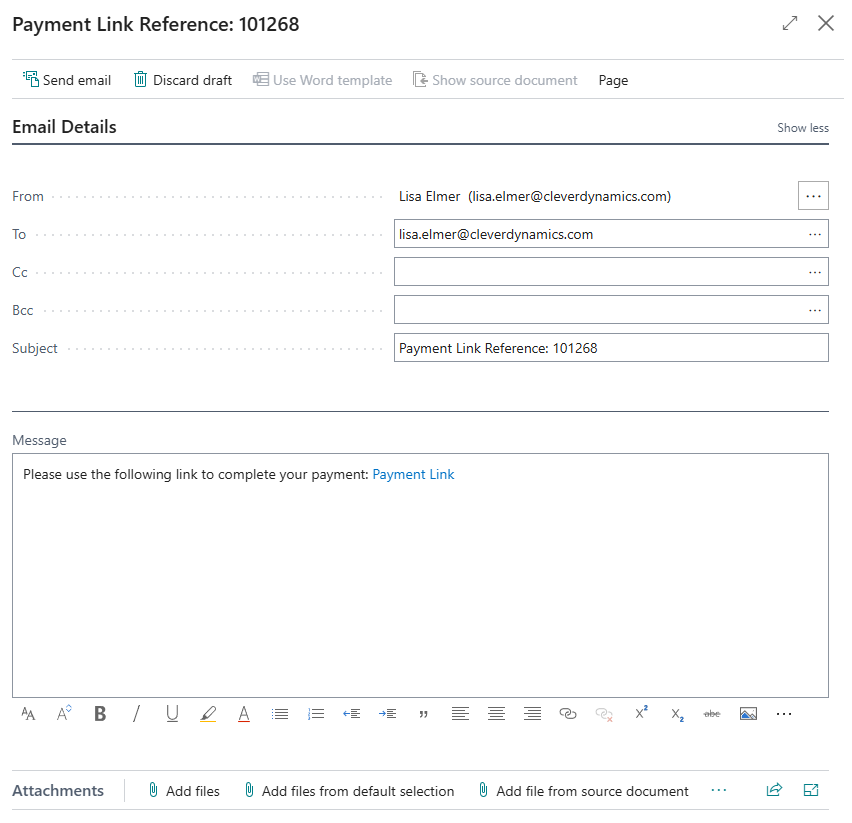
This opens a screen similar to below, with the To field already populated from the Bill-To email address, the Subject automatically defaulted to the Source Document reference and the email body with a pre-populated message and link. This can be sent immediately by choosing Send Email in the ribbon or can be edited before sending. You'll notice you can also add attachments at the bottom of the screen if required.
To delete this, simply either Close or Discard Draft. This will ensure the Payment Link E-mail sent Status is not marked as 'Yes' in the Payment Link page. If the email is sent, this is marked as 'Yes' to confirm the link has been issued. You can re-access this page from the Sales Order or Invoice by clicking into the Payment Gateway: Payment Link action in the ribbon.

This page is useful because here you can also see Statistics based on the Source document, i..e how many No of Payments have been made using links. What the Total Payment Amount has been paid and the No of Refunds and Total Refund Amount. This is a great place to easily access the history.

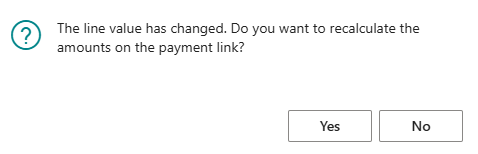
It's also worth noting here that you can make multiple payments using Payment Links. If you take a payment but then increase the value on the sales document, you will get the below warning. Clicking 'yes' will change the Suggested Amount and Amount fields to reflect the new amount (remaining amount to be paid) and the link is updated so that when the Customer makes a payment, it is for the new amount. Any additional payments are acknowledged in the Statistics under No of Payments and Total Payment Amount is also updated.
Barcode and Link on Posted Sales Invoice
For instances where you want to include a scannable barcode and link on the PDF invoice, go to the "Payment methods" screen, select the Payment Provider you wish to update the settings for and click Payment Gateway Setting in the ribbon. Ensure the Payment Link on Invoice post option is 'Yes'. This means on posting the invoice, the payment link will be created and a barcode will appear on the invoice.
You can create your sales orders/invoices as normal and post them with either no payments made or leaving a balance outstanding. Open the Posted Sales Invoice.
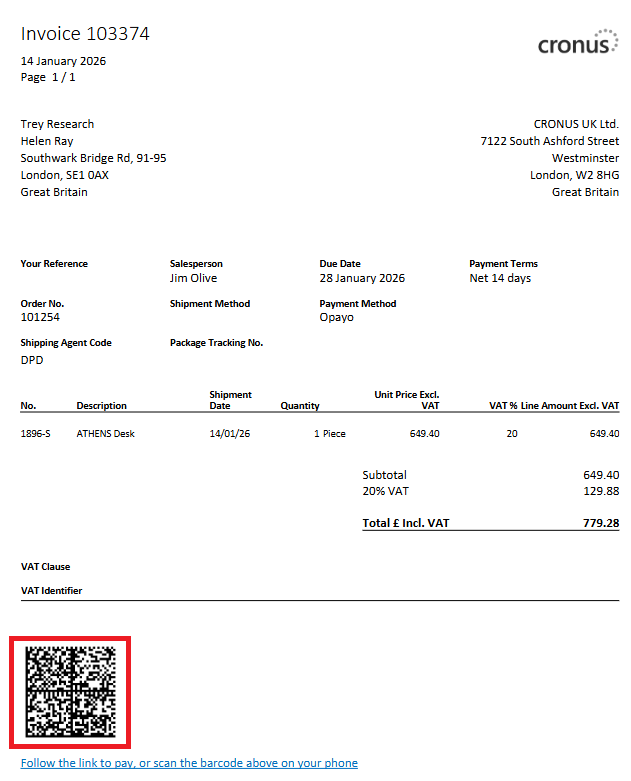
Here, you will see both a barcode that can be scanned and a link that can be clicked. Both will take the User to a payment screen for them to enter their card details. Once submitted, the payment will be classed as Paid in Clever Payment Gateway and the "Payment Gateway Log" updated to reflect this.
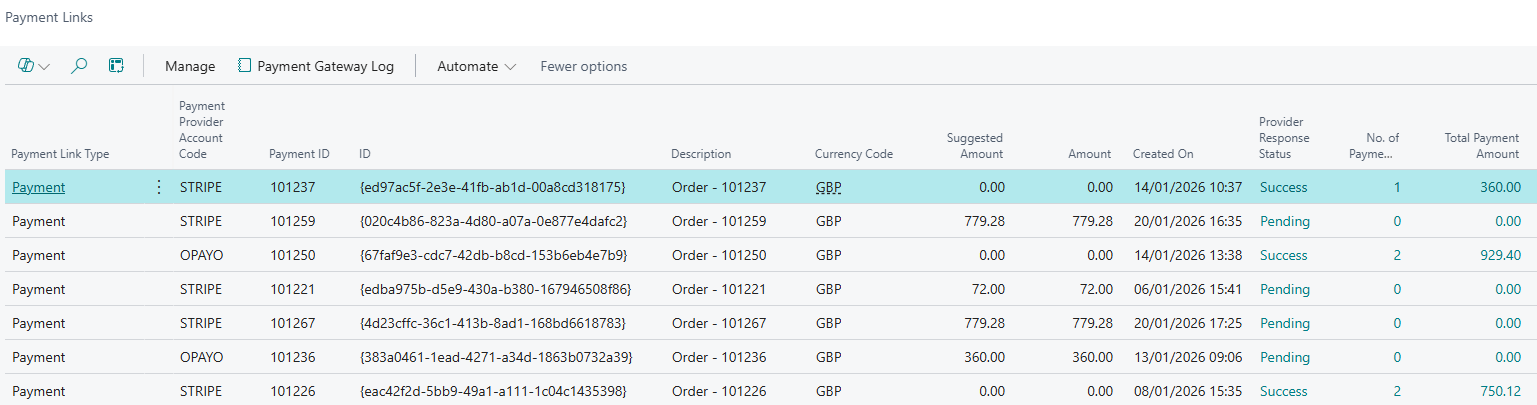
Payment Links
When a Payment Link is created, it is stored in the "Payment Links" screen. This screen shows you the source document reference, Suggested and Actual amounts, when it was created, the Status, how many payments have been made as well as much more. This is therefore a great reference point to come and check the status of open Links. Where No of Payments is shown, the entry can be selected, taking you to the related "Payment Gateway Log" entry for the payment.
These do not automatically get deleted, so you must ensure you set up a Retention Policy for them. You can do that via the "Payment Gateway Setup".