If you wish to use Document Links with SharePoint integration and modern authentication, you must first setup an App Registration within Microsoft Entra.
Note: if not using SharePoint to store your Document Link files, then this section can be ignored or if you have already created an App registration then for Document Links to access SharePoint, you can go straight to Business Central and configure your connection, using the SharePoint Setup Wizard.
Creating the Application Registration
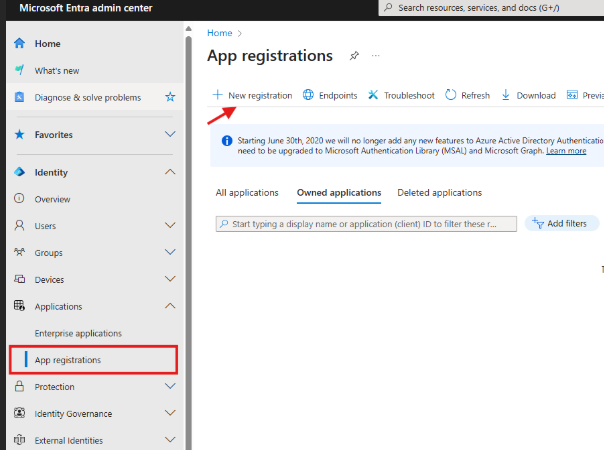
Log in to Entra using Global Administrator credentials. After logging in, go to Applications > App Registrations in the left menu and click 'New Registration'.
Enter a name for the app, in this case, Document Links.
Next, under 'Supported Account types', select 'Accounts in this organisation directory only'.
Then, under 'Redirect URL', select 'Web' from the drop down and then enter https://businesscentral.dynamics.com/OAuthLanding.htm.
Note: for On-premise deployments of Business Central, please use the Web Base Client URL appended with Oauthlanding.htm e.g. https://businesscentral.mycompany.com/Production/OAuthlanding.htm.
Once the above has been completed, hit 'Register'.

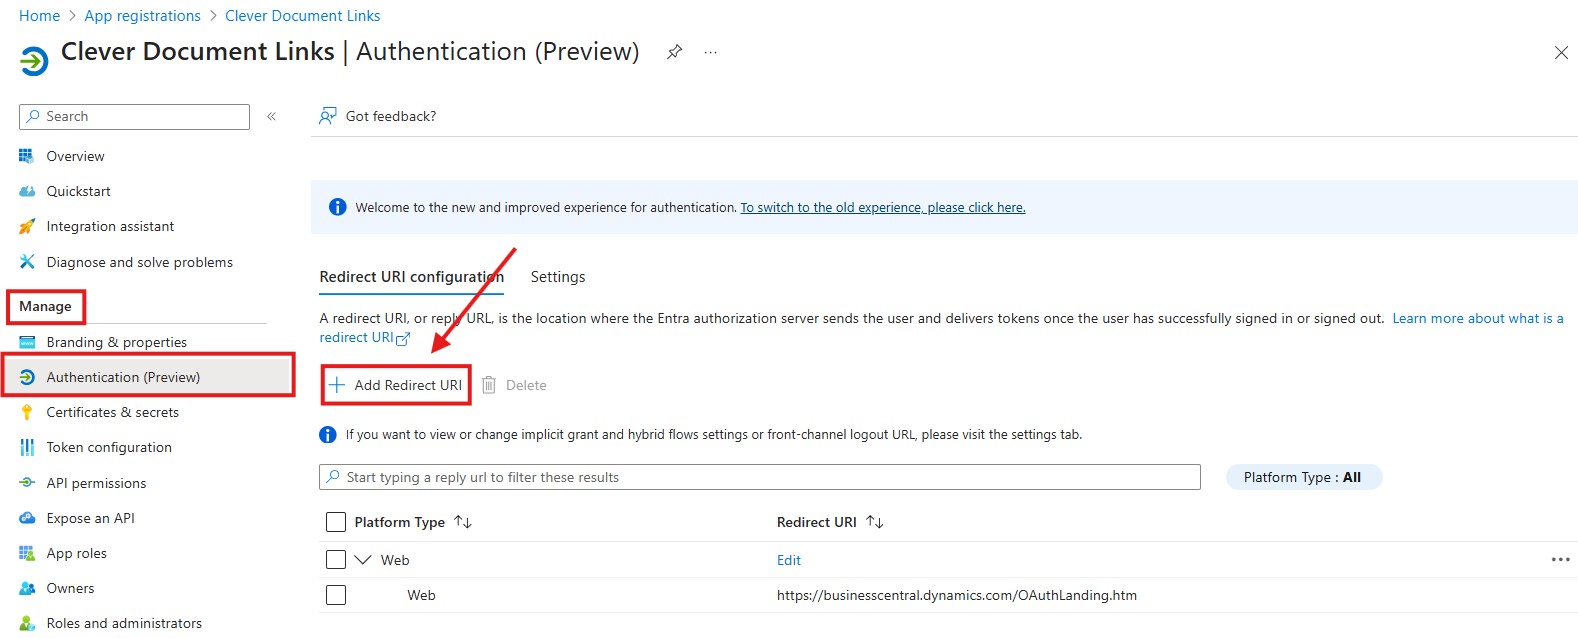
Now you have an App registration, you need to add in an additional Redirect URI. To do this, click into the 'Manage' menu on the left-hand side of the screen and select 'Authentication' and then under 'Web Redirect URI's', click 'Add Redirect URI'.
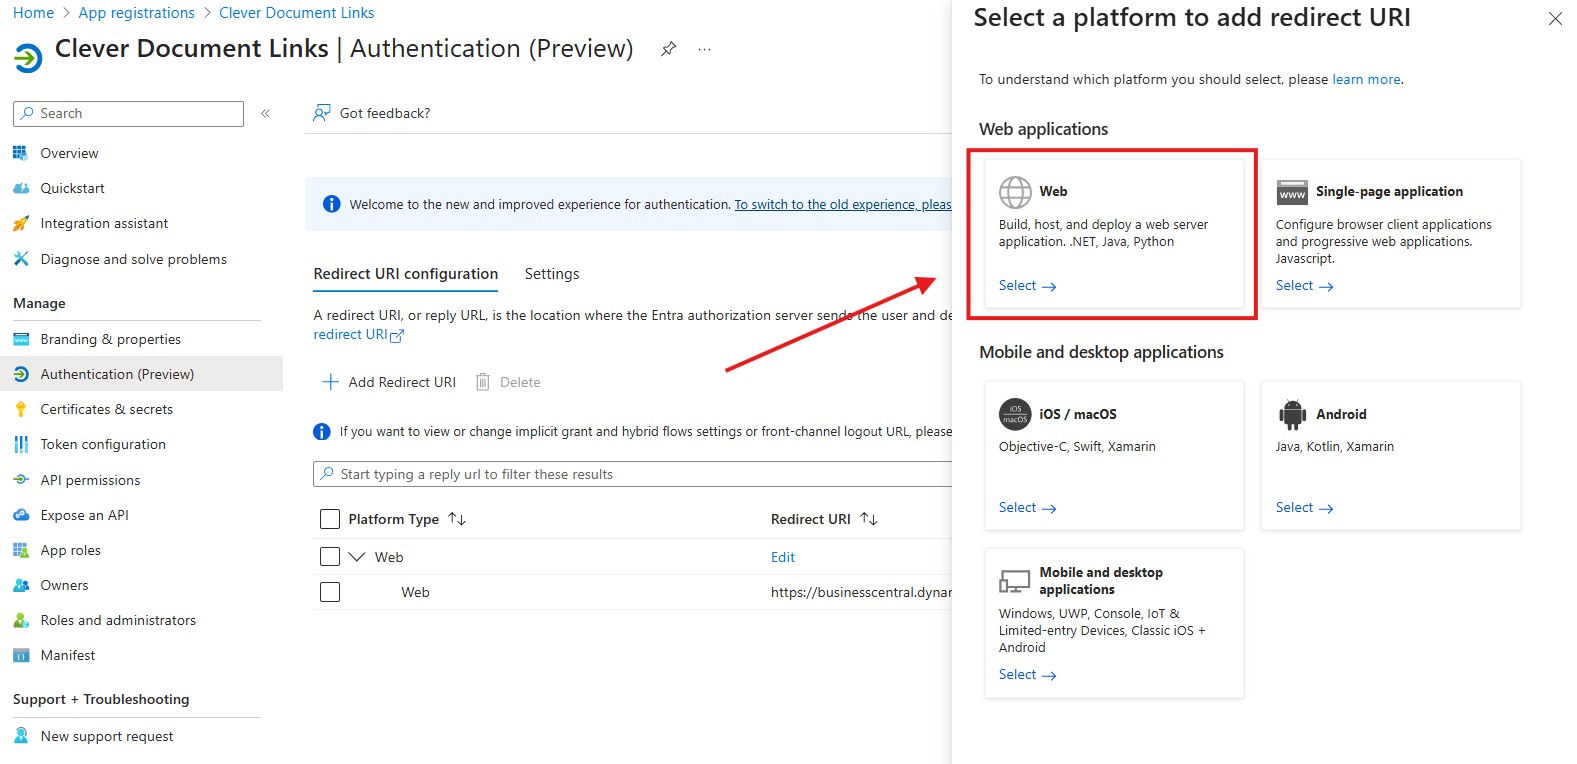
You now need to select 'Web' from the 'Select a platform to add redirect URI' screen.
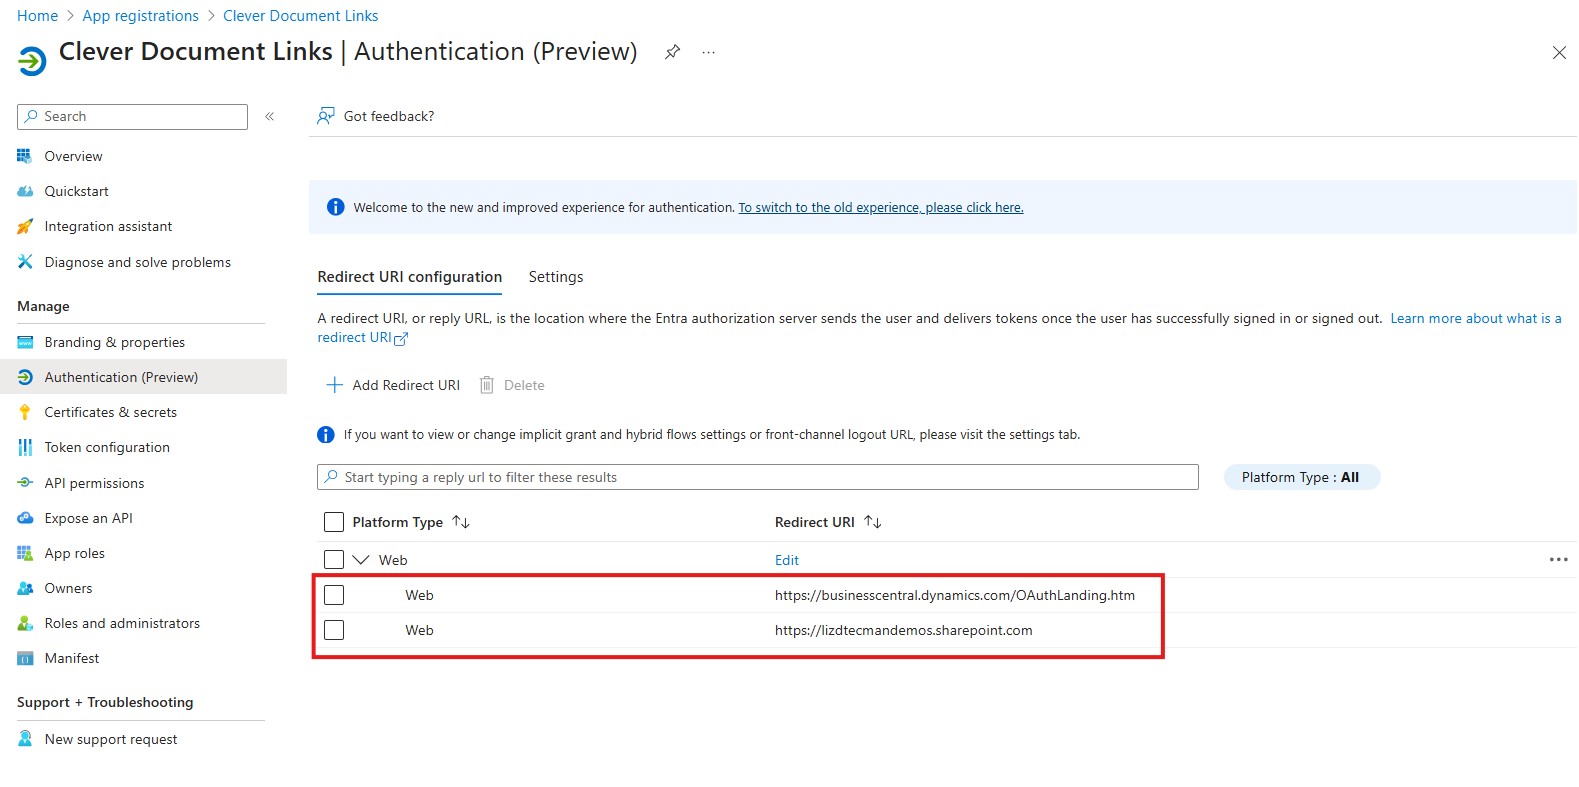
You now need to add the URL for SharePoint Root Site you will be using for Document Links. Add the URL for your SharePoint site and click 'Configure'.

The 'Redirect URI configuration' on the 'Authentication' page will now look like this.
API Permissions
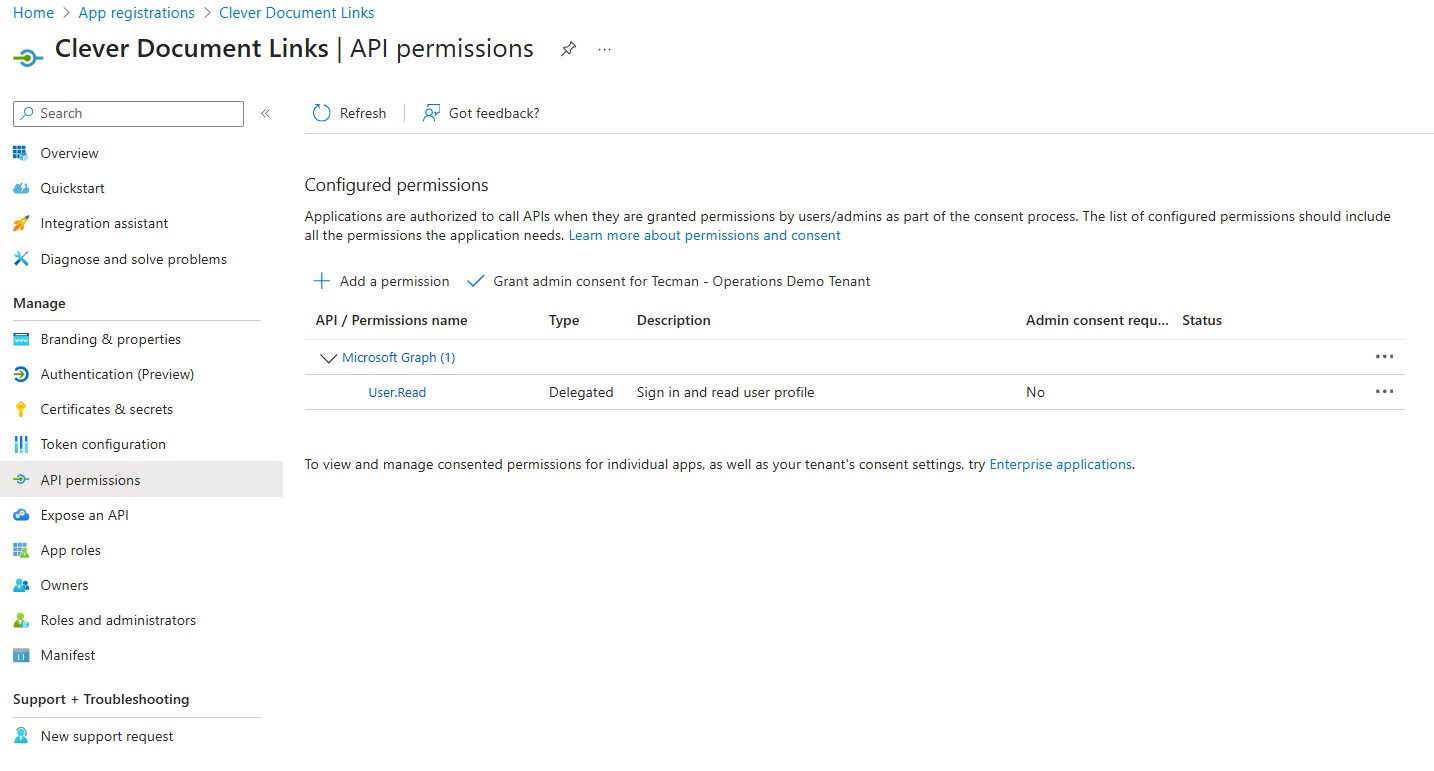
On the left-hand side 'Manage' menu, select 'API Permissions'. The page will initially look like this.
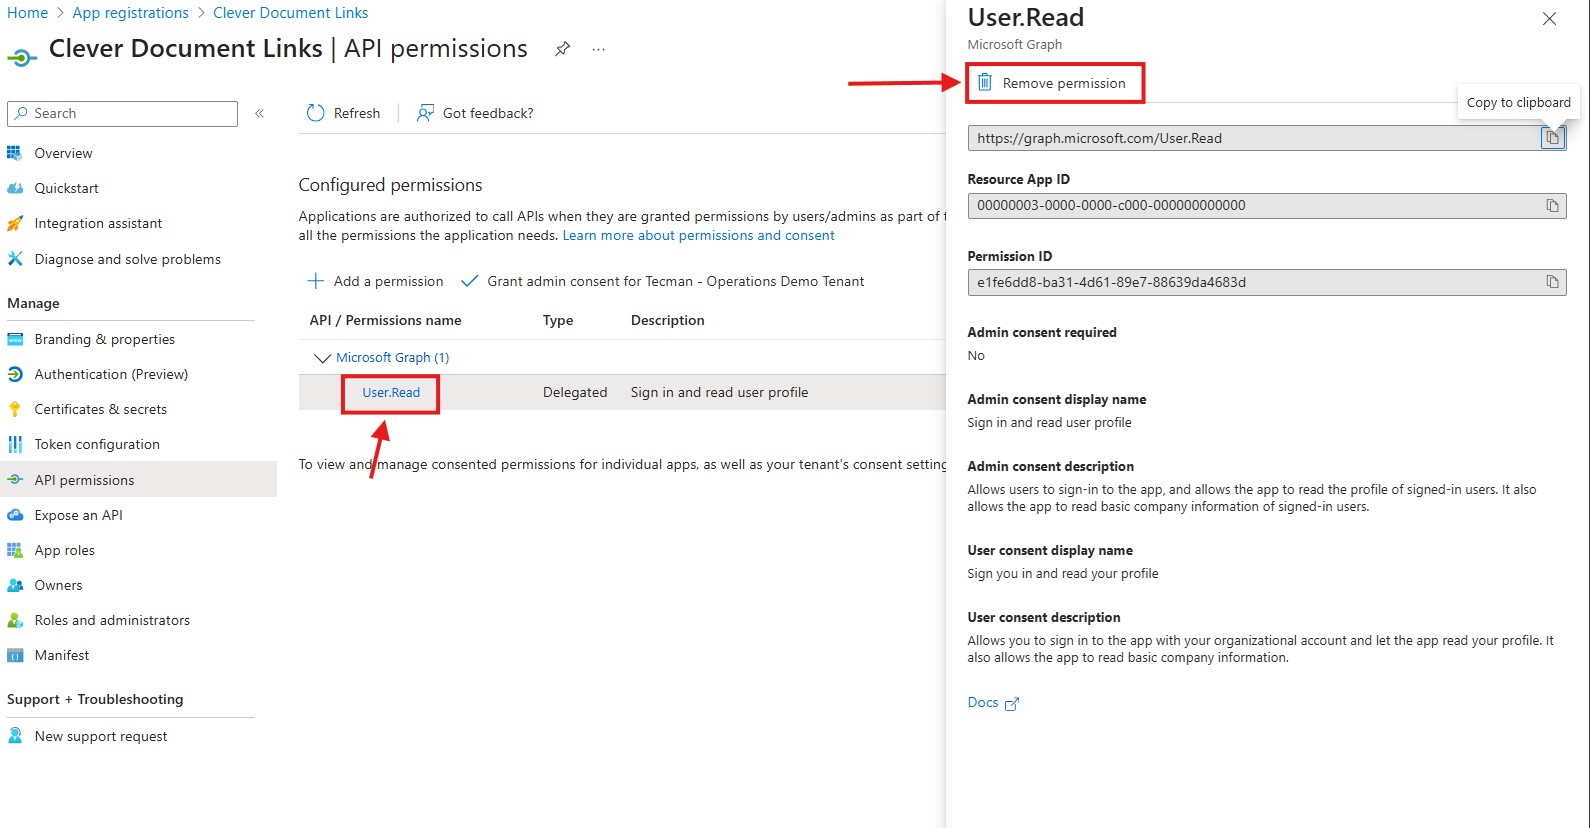
Firstly, you need to remove the 'User.Read' permission under 'Microsoft Graph' that was added by default during the App Registration creation. To do this, click on the 'User.Read' permission. In the window that opens, click 'Remove Permission' at the top.
You now need to add three new permissions.
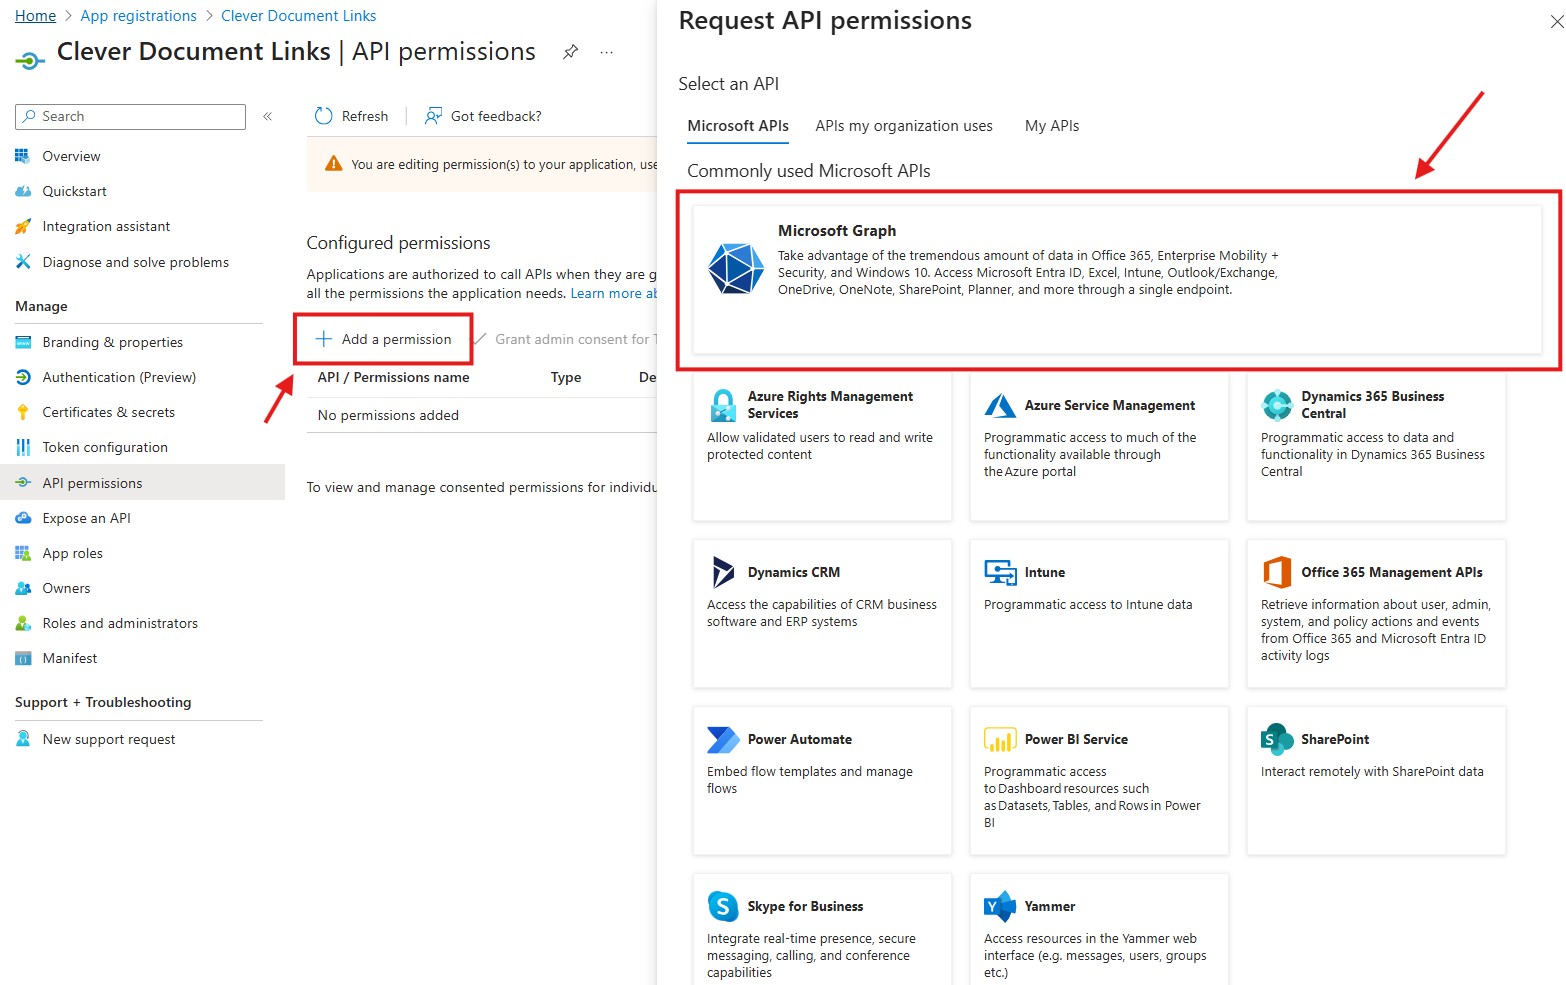
Click the ‘+Add a permission’ button and select the large ‘Microsoft Graph’ banner at the top of the screen.
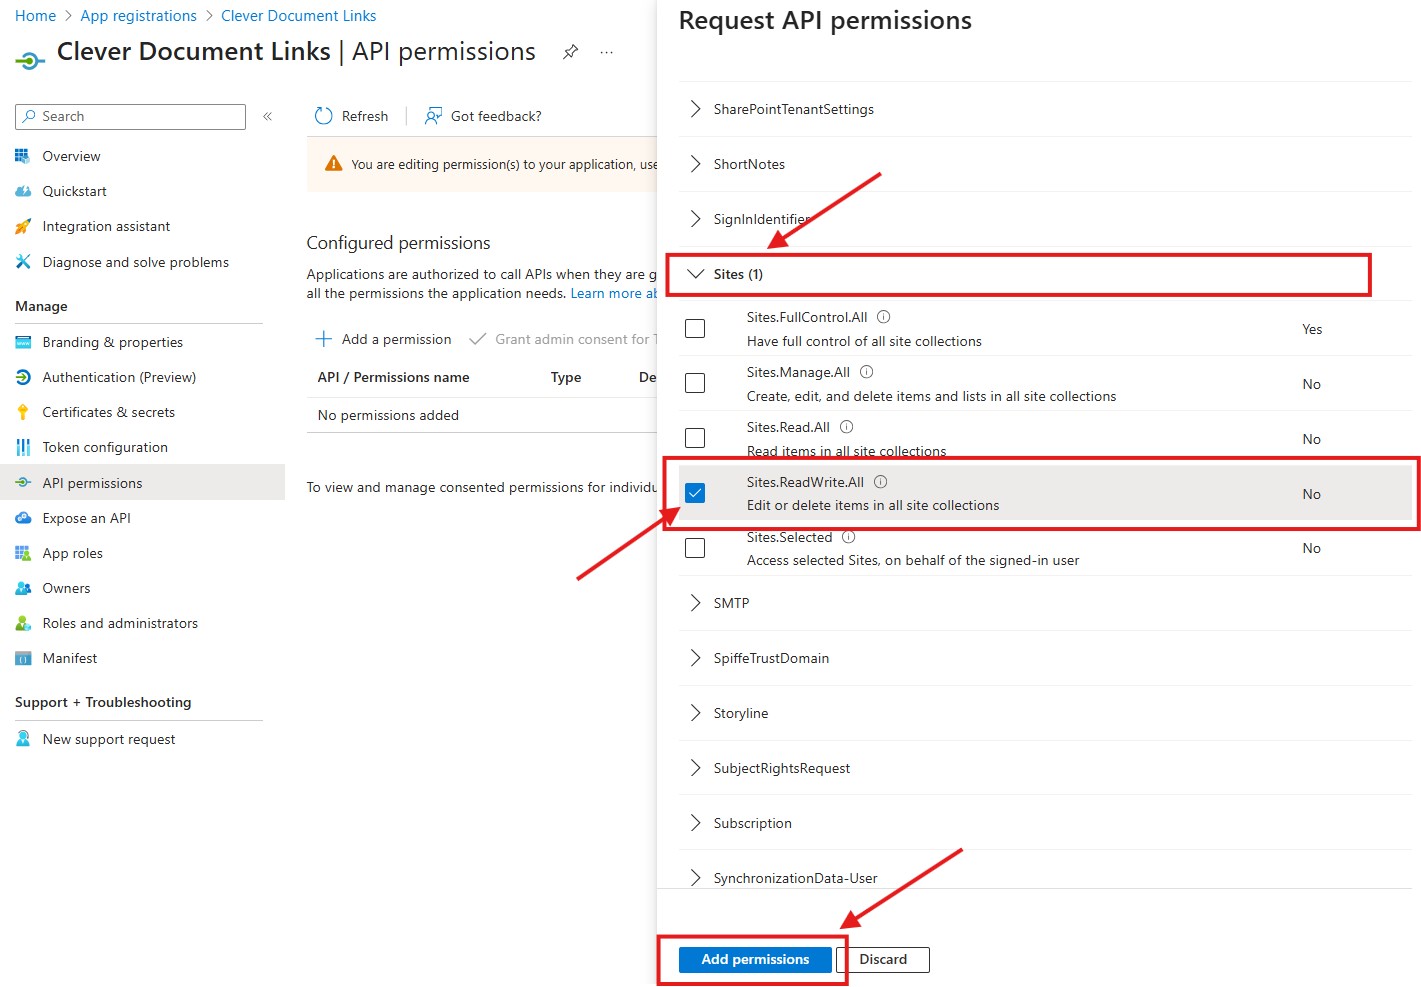
Then select ‘Delegated permissions’ from the options.
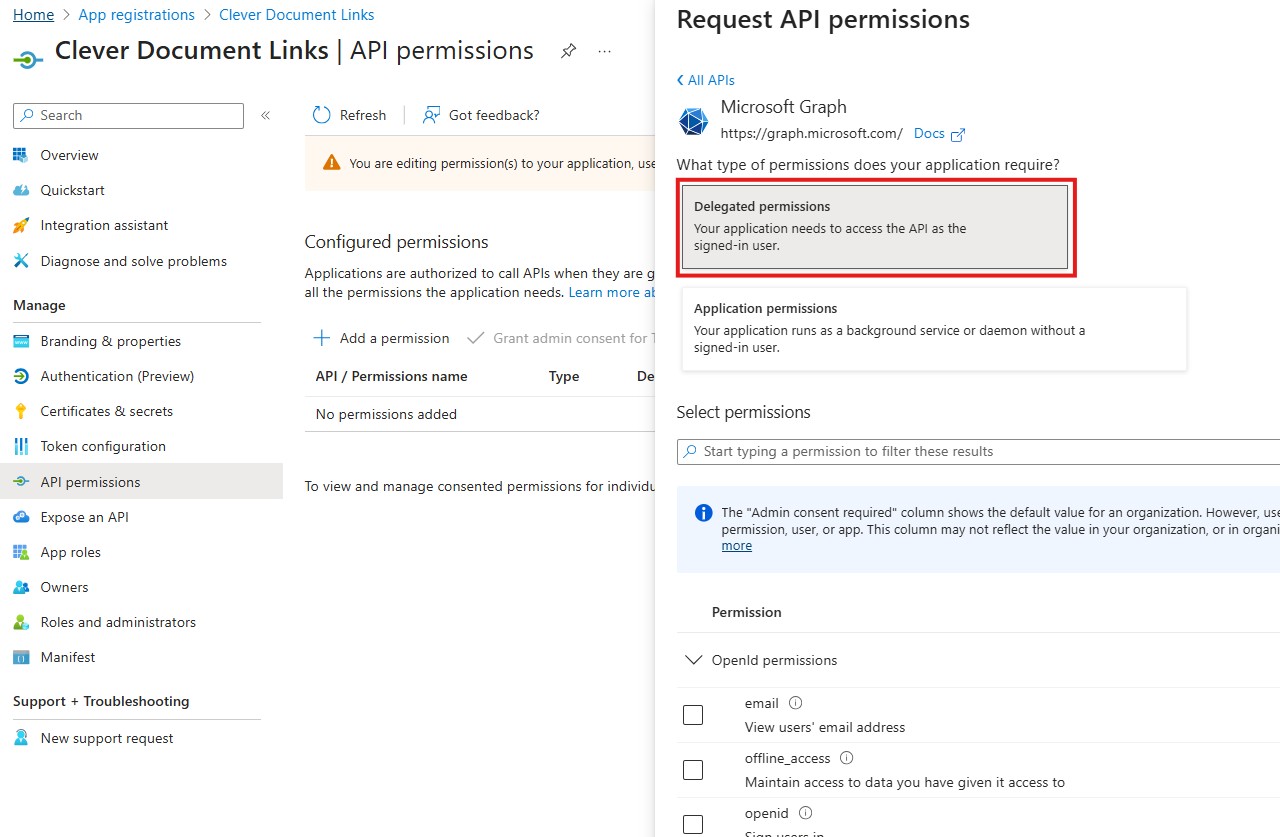
Scroll down to ‘Sites’ and expand this option. Then tick the ‘Sites.ReadWrite.all’ permission. Then click ‘Add permissions’ at the bottom.
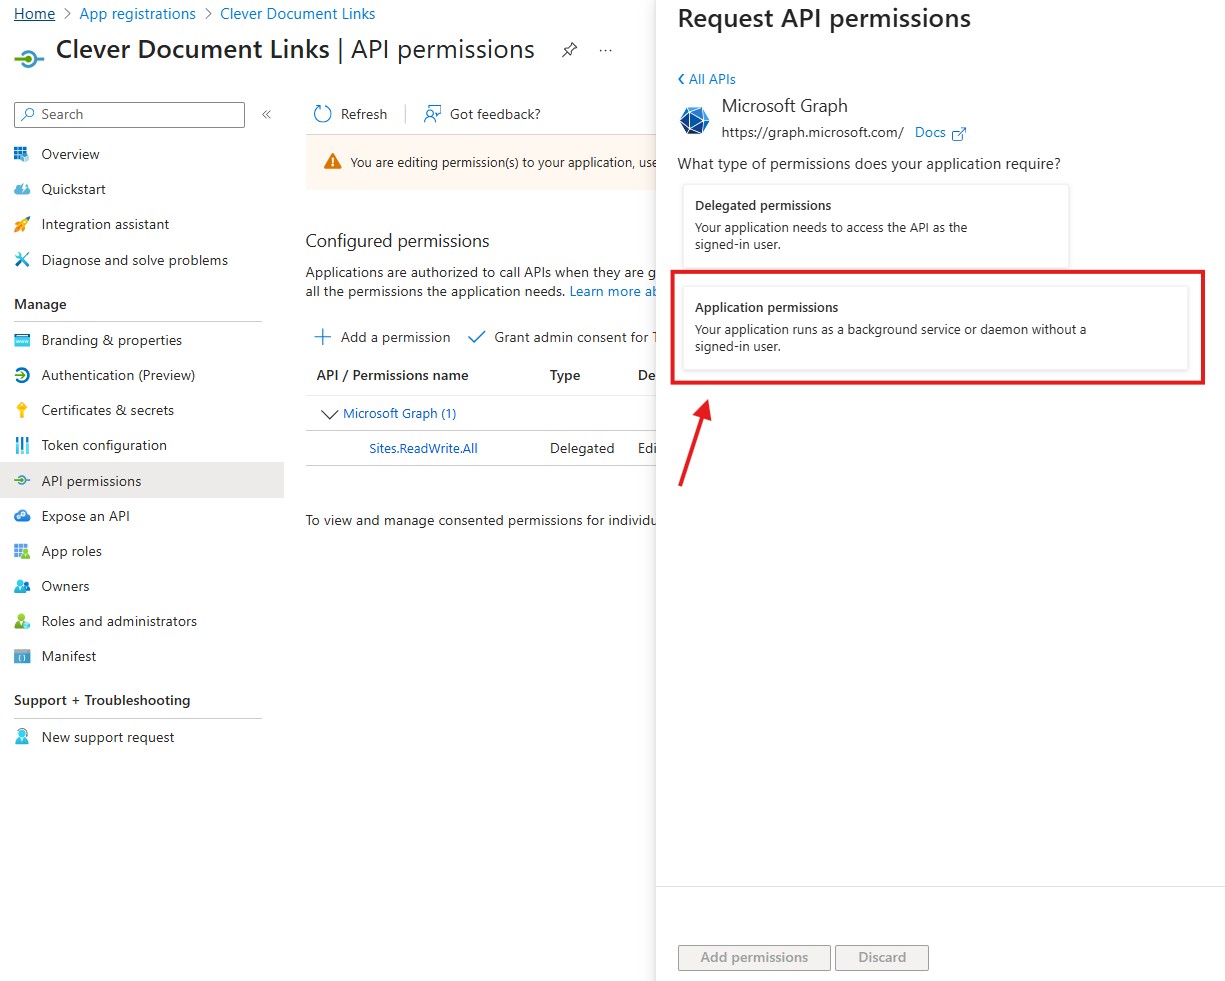
You will need to add a further two permissions.
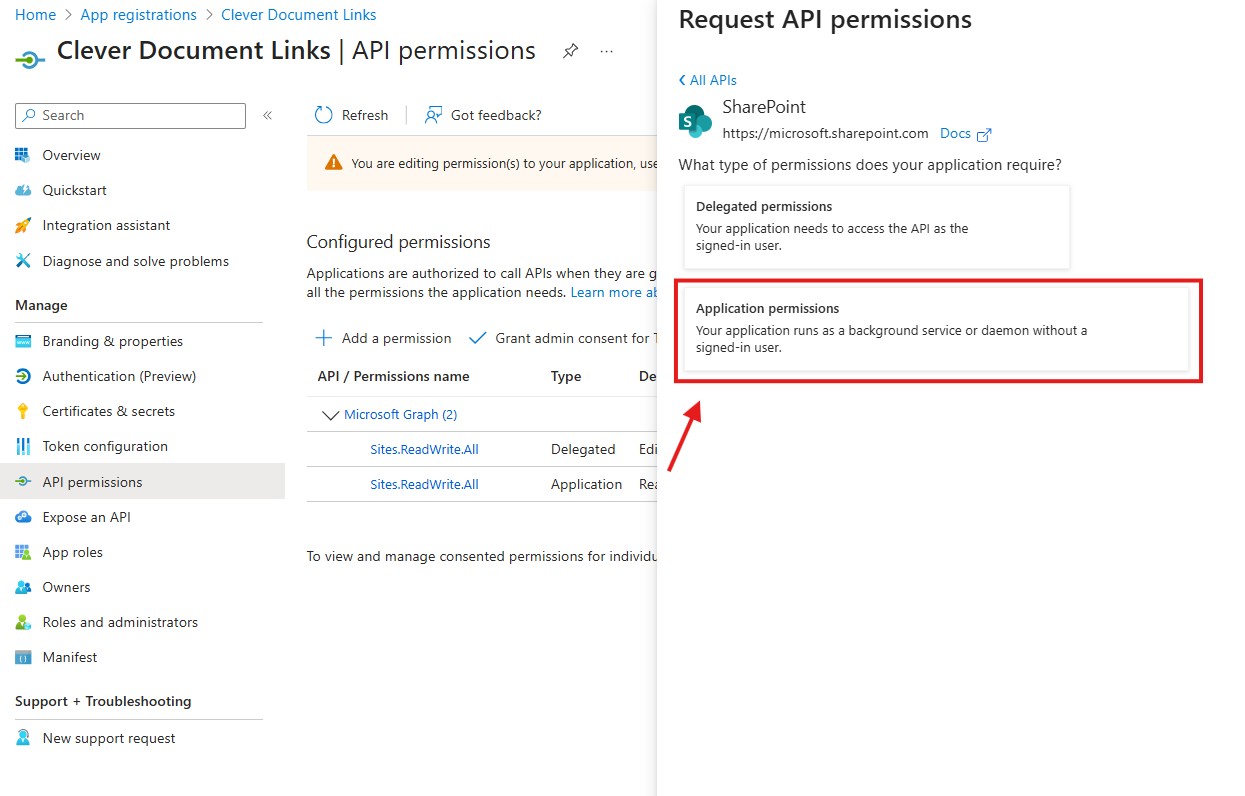
Click on ‘+Add a permission’ and select the large 'Microsoft Graph' banner at the top as before. But this time, choose ‘Application Permissions’ from the options, instead of ‘Delegated permissions’.
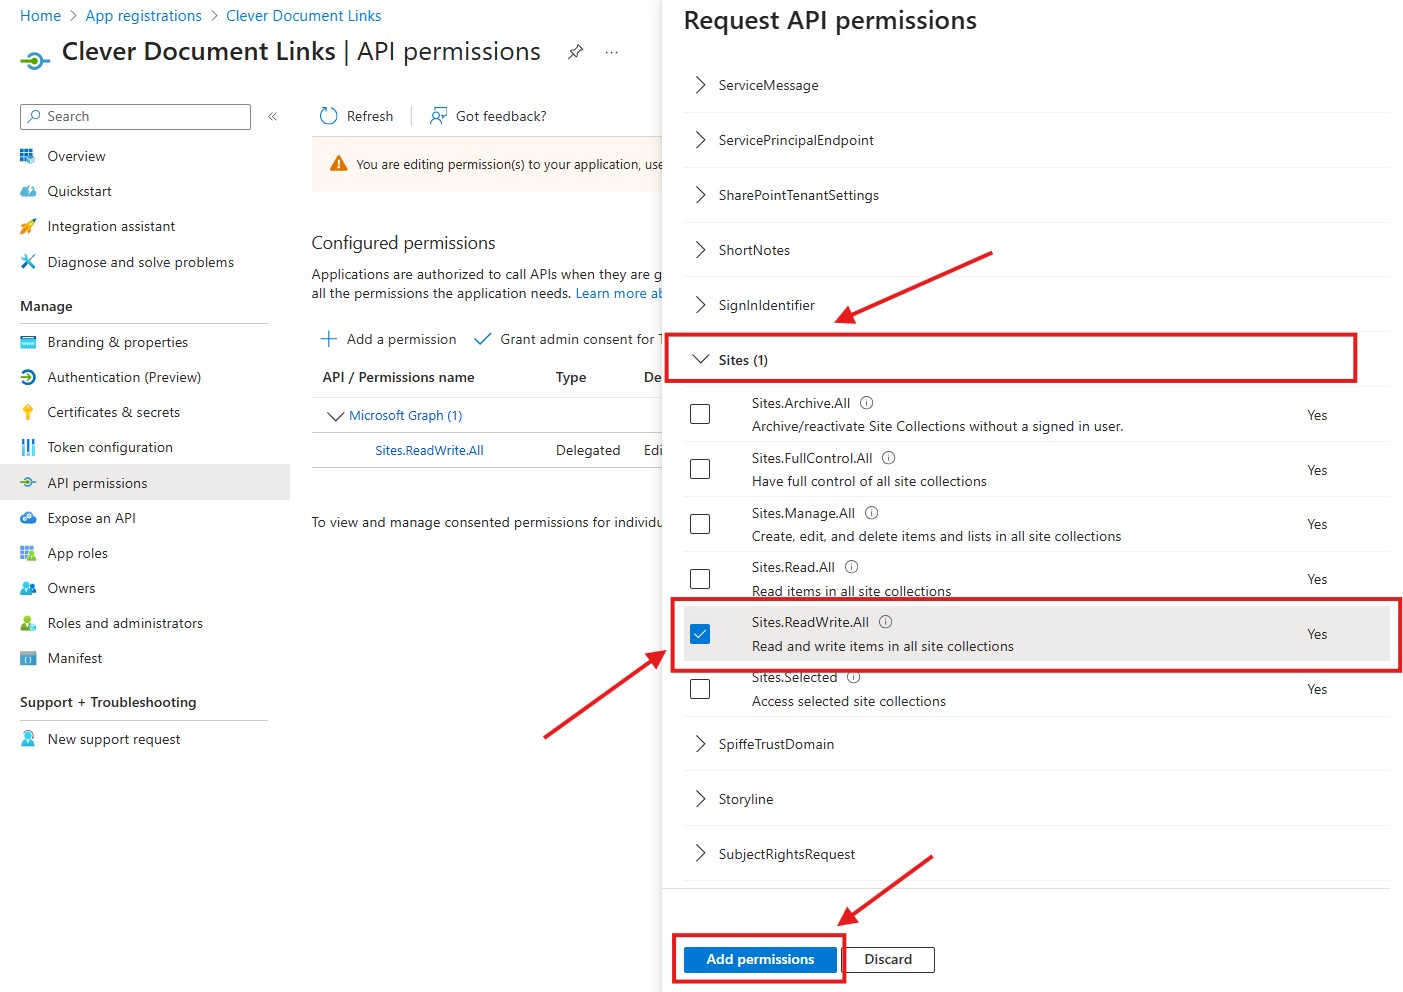
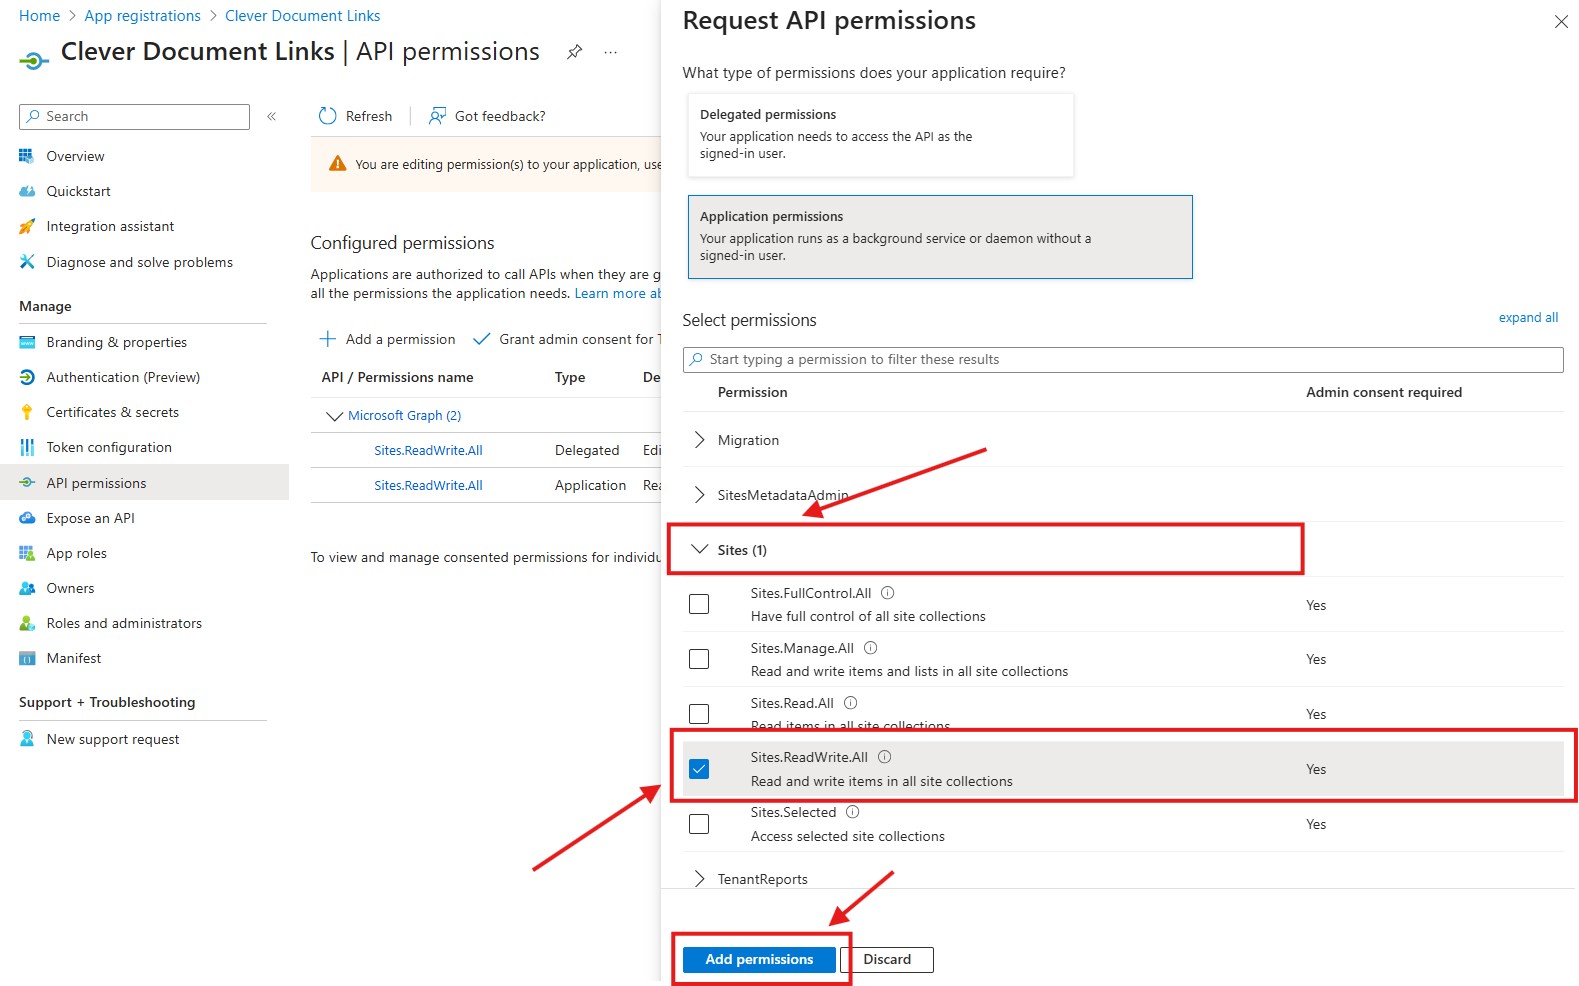
Scroll down to ‘Sites’, expand the list, and tick the ‘Sites.ReadWrite.all’ permission. Then click ‘Add permissions’ to save this choice.
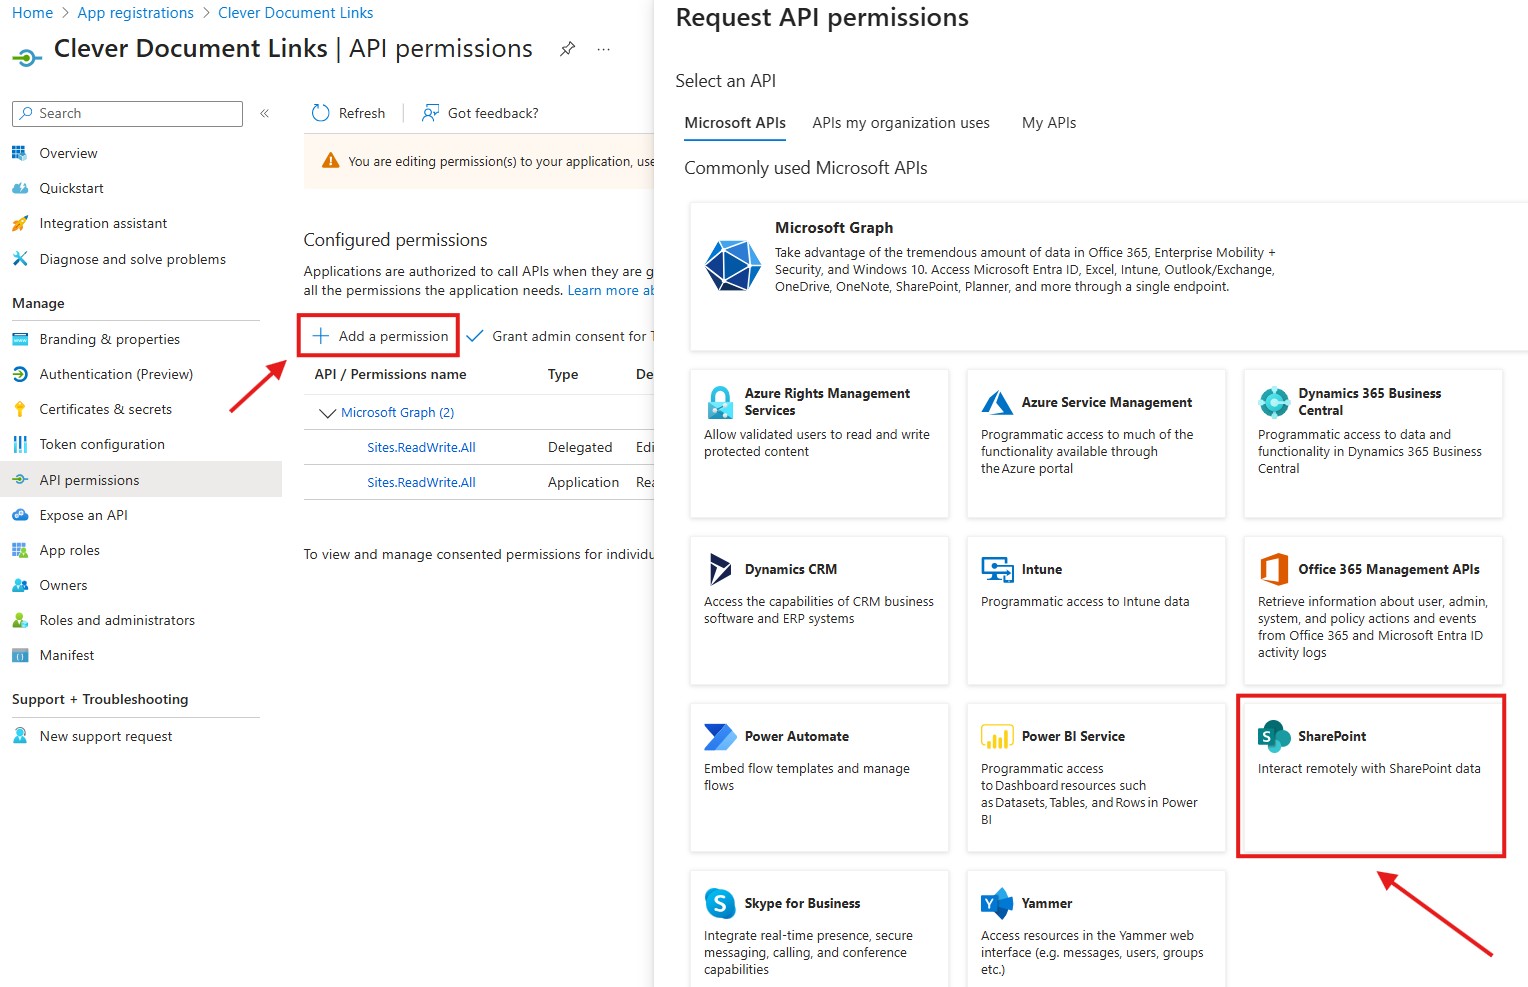
Click on ‘+Add a permission’ a third time, and this time, choose 'SharePoint' from the list of commonly used Microsoft APIs.
Choose ‘Application permissions’.
Scroll down to ‘Sites’, expand the list, and tick the 'Sites.ReadWrite.all' permission. Then click ‘Add permissions’ to save this choice.
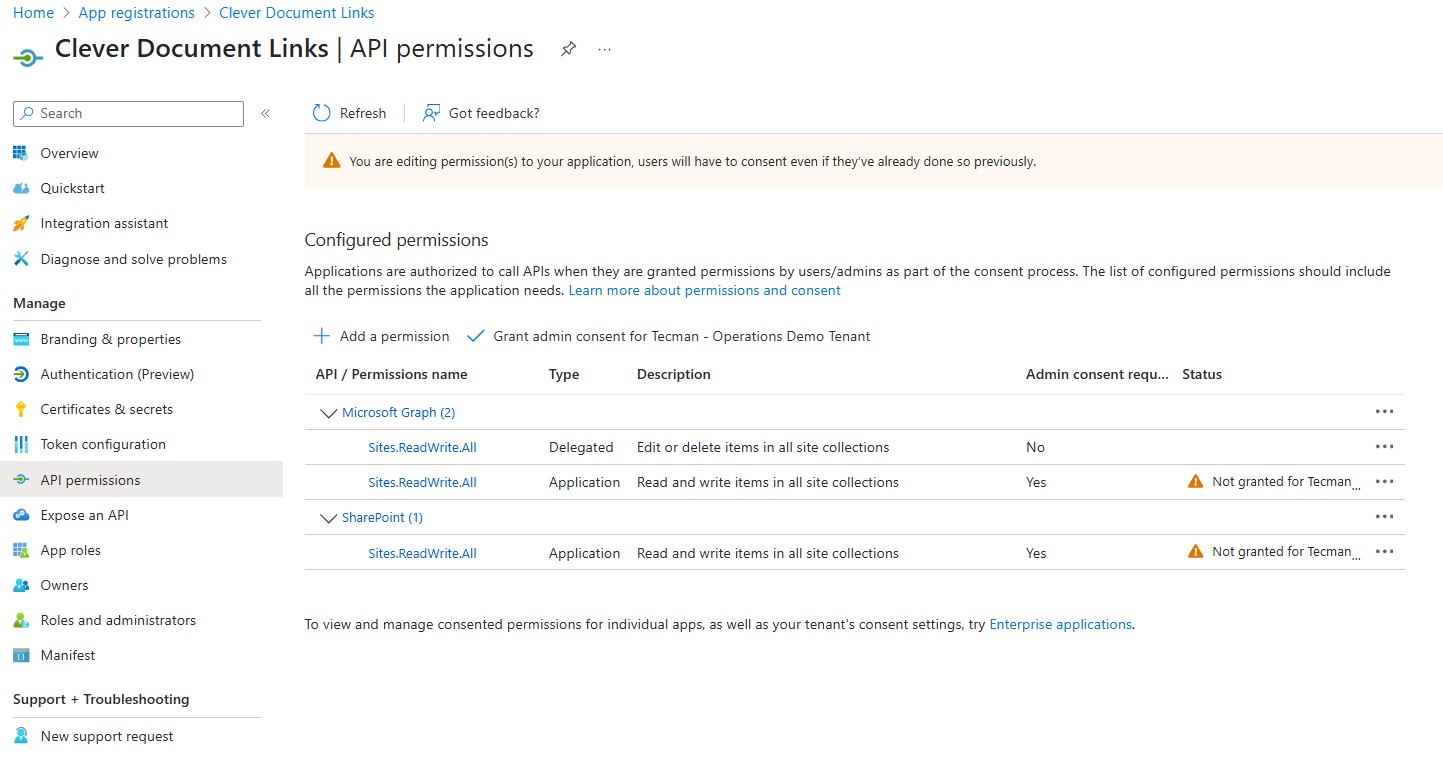
The Permissions screen should now look like this.
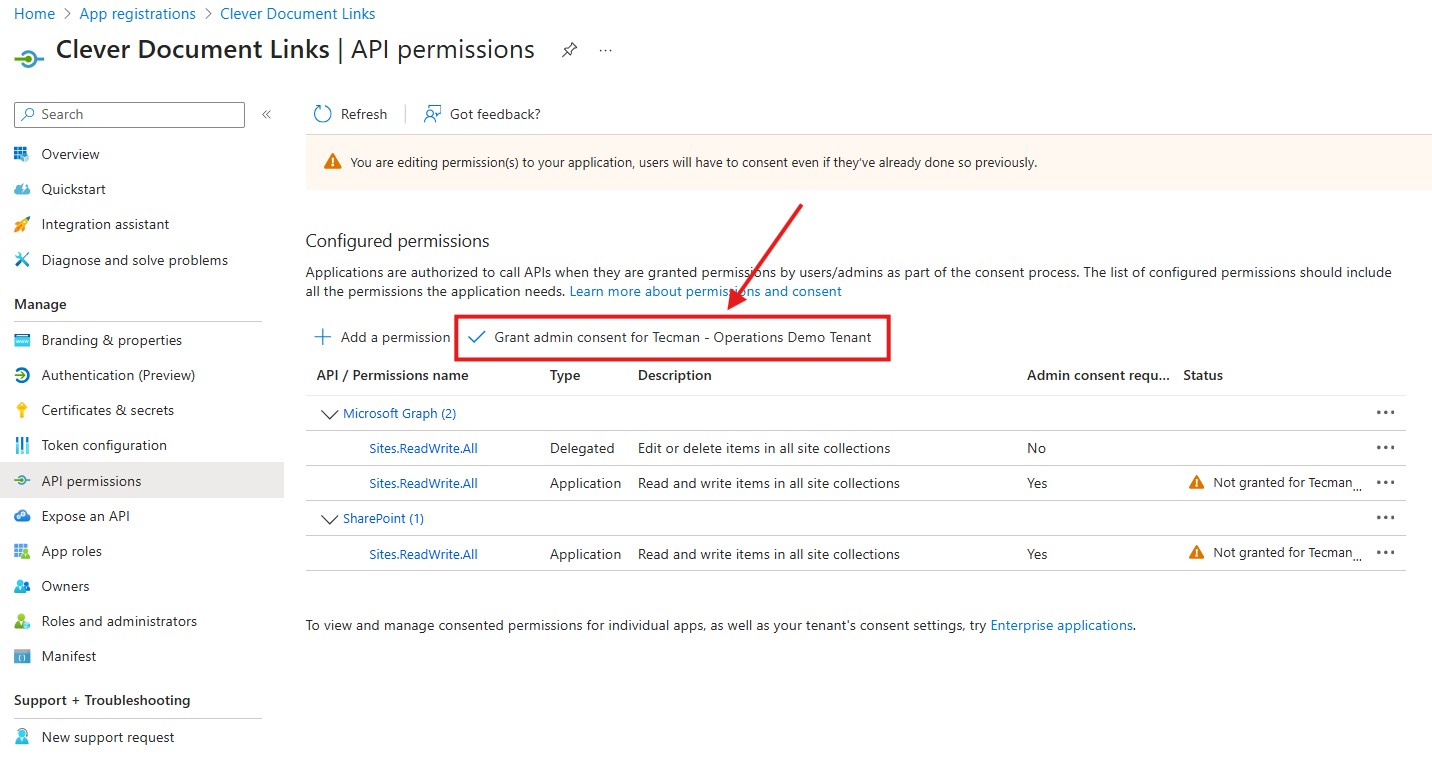
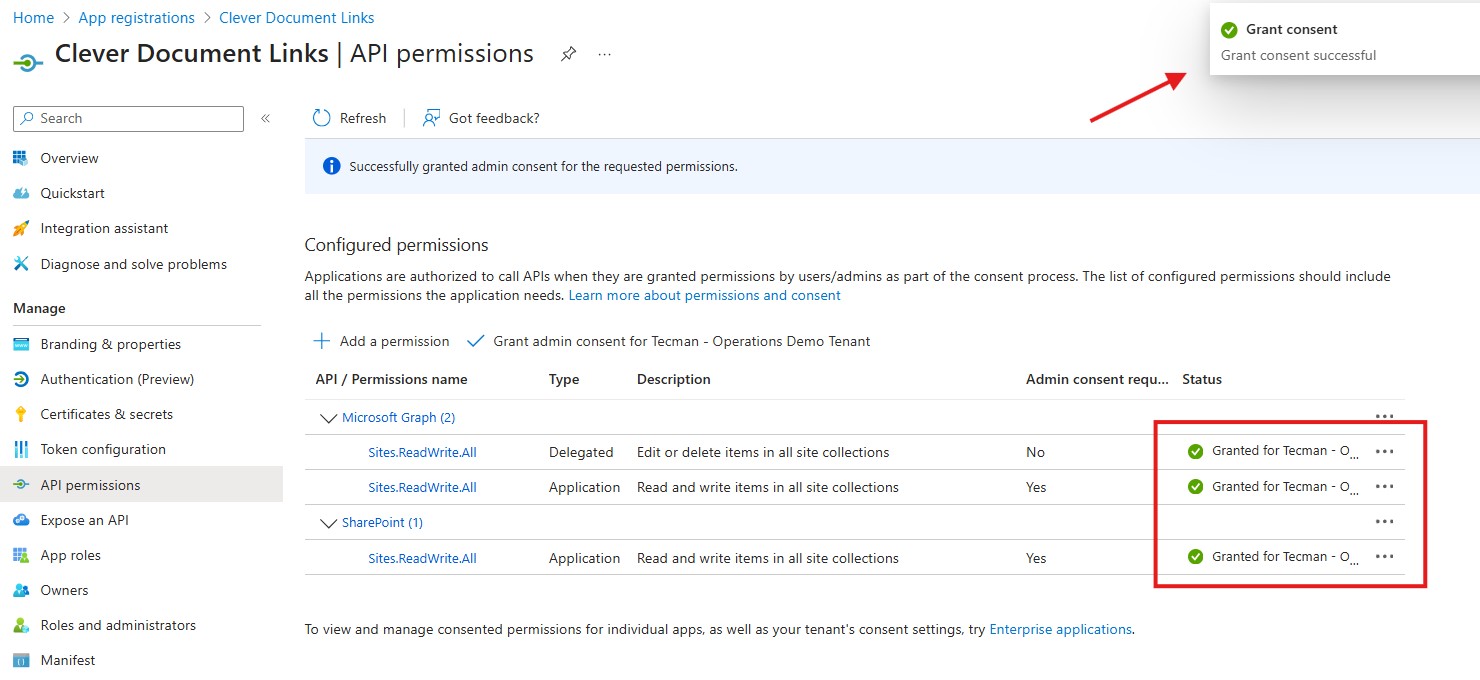
Once all three permissions have been added, click the 'Grant admin consent for mydomainname' button, as below.
The permissions screen should now look like this.
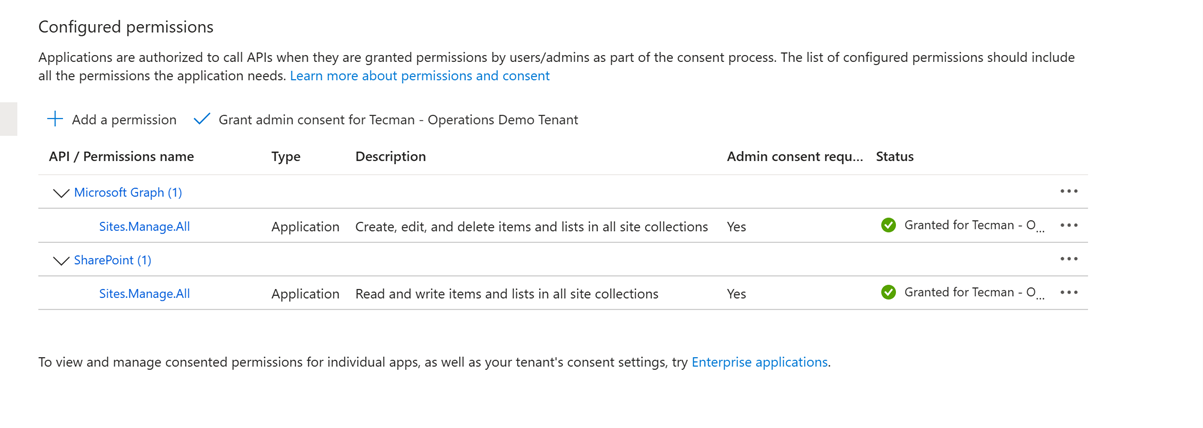
In the next section if you wish to use an SSL certificate rather than a secret then the permissions should be set up as shown in screen shot below:
Certificates and Secrets setup for Clever Document Links
At this point, you can choose to authenticate the app to SharePoint using either a certificate or a Client Secret. This guide covers both methods, though certificate authentication is recommended for production use.
Using an SSL Certificate
Obtain a certificate from a recognized authority. Both a .cer file (for Azure) and a .pfx file (for Business Central) are required.
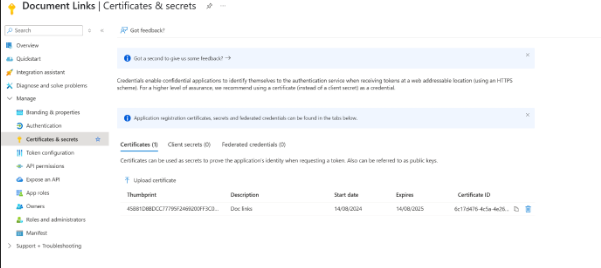
On the left panel, under 'Manage', click 'Certificates & Secrets'.
Click the 'Certificates' tab.
Click 'Upload Certificate'.
In the right-hand window:
Upload the .cer file.
Add a description, e.g., "Doc Links".
Click Add.
Using a Client Secret
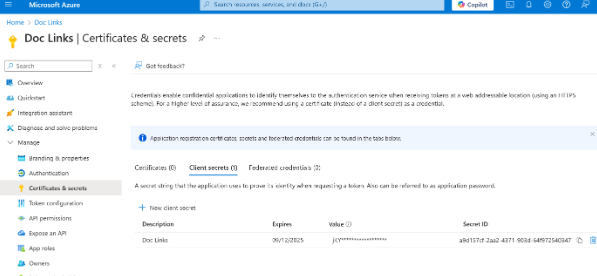
In your App Registration, go to 'Certificates & Secrets' in the left-hand menu.
Click the 'Client Secrets' tab.
Select 'New client secret'.
In the window that opens:
Add a Description (e.g., “Doc Links”).
Set an Expiry period (choose what suits your organization).
Important: After creating the secret, immediately copy the "Value" field, as Entra will hide it shortly and it won't be viewable again.
Then, go to the ‘Overview’ section of the left-hand menu to record the ‘Directory (tenant) ID’ and ‘Application (Client) ID’. You’ll need these values later when selecting the Client Secret option in the Doc Links setup in Business Central.
Applying App Registration details in Business Central
Once your Certificate or Client Secret is set up in Azure, you're ready to continue using the SharePoint Setup Wizard in Business Central.