To use Azure File Storage as the file repository for Clever Document Links it is necessary to setup the Azure File Storage connection, which can be done by using the built-in wizard.
Note: it is assumed that you have already setup an Azure Storage Account and a File Share, as documented here, and have access to the information requested by the wizard.
The wizard can be activated either by changing the File Storage field or selecting the Azure File Storage Setup action on the "Document Links Setup" screen, at which point the following screen will be shown.
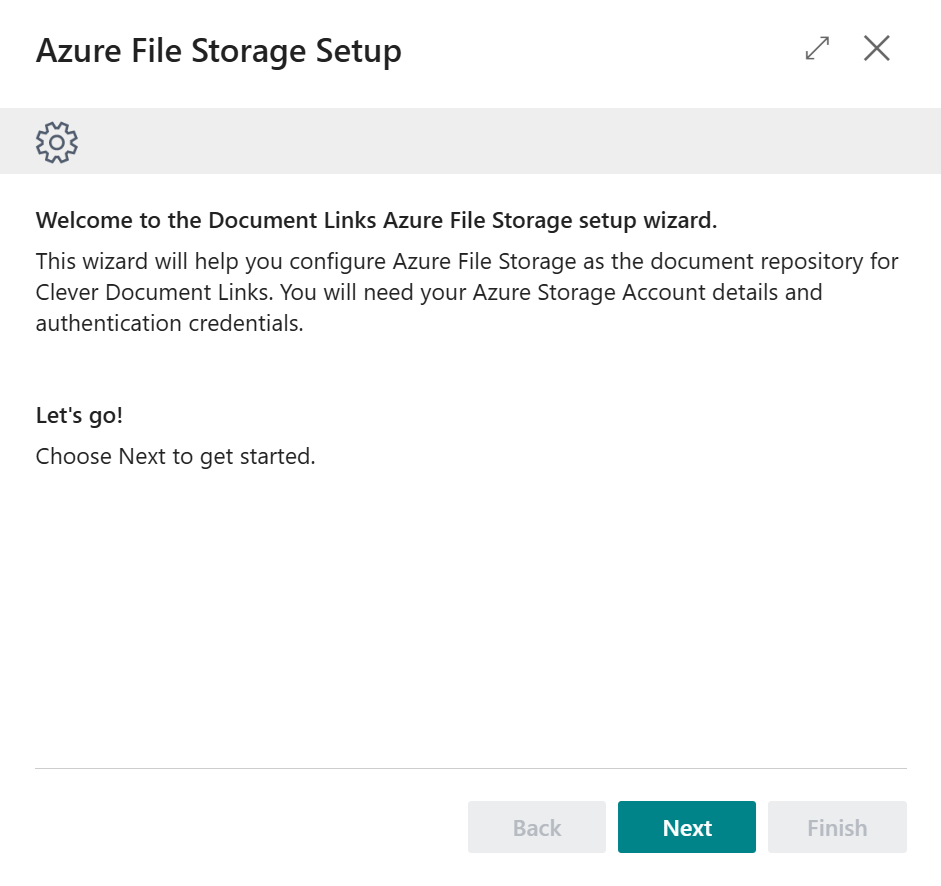
Select Next to start the Azure File Storage setup.
Clever Document Links supports both Shared Key and Shared Access Signature authentication with Azure File Storage.
On the following screen you will need to select which Authentication Type you are using and to populate the Credentials field with the Key value you wish to use - which is available from the Access Keys menu inside of the Azure Storage Account you will have already setup in order to use Azure File Storage.
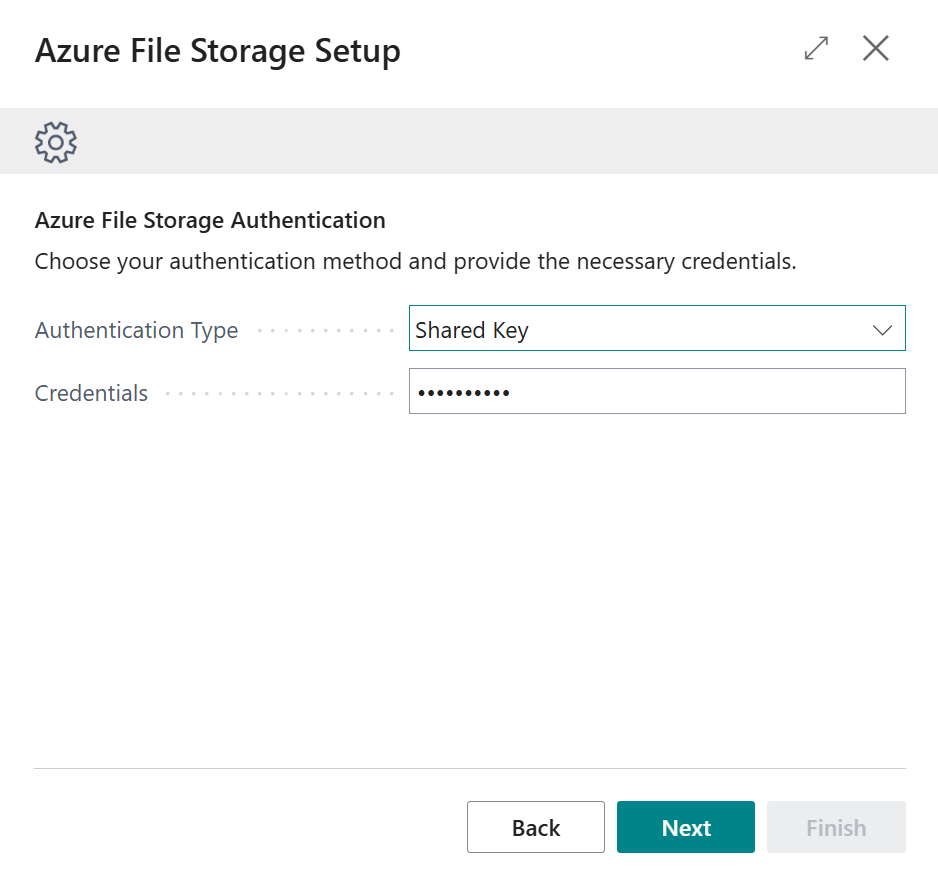
Once you have completed the above setup, press Next to continue.
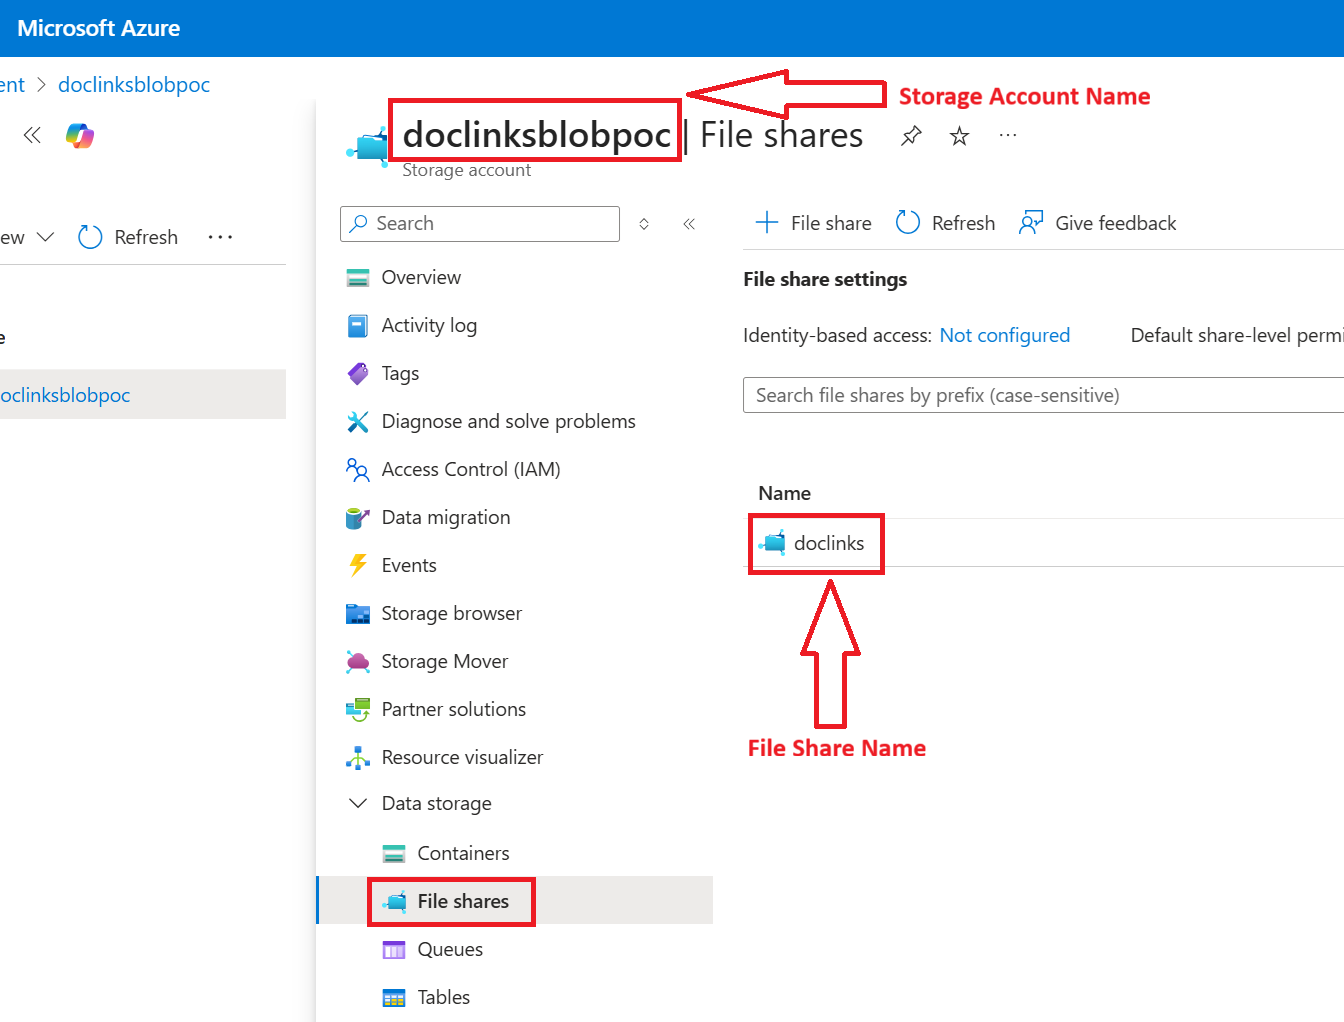
On the following screen you will need to specify the Storage Account Name, the File Share Name and (if applicable) the Base Folder (Optional) settings to identify to Clever Document Links the Azure File Storage directory path that will be used to store files.
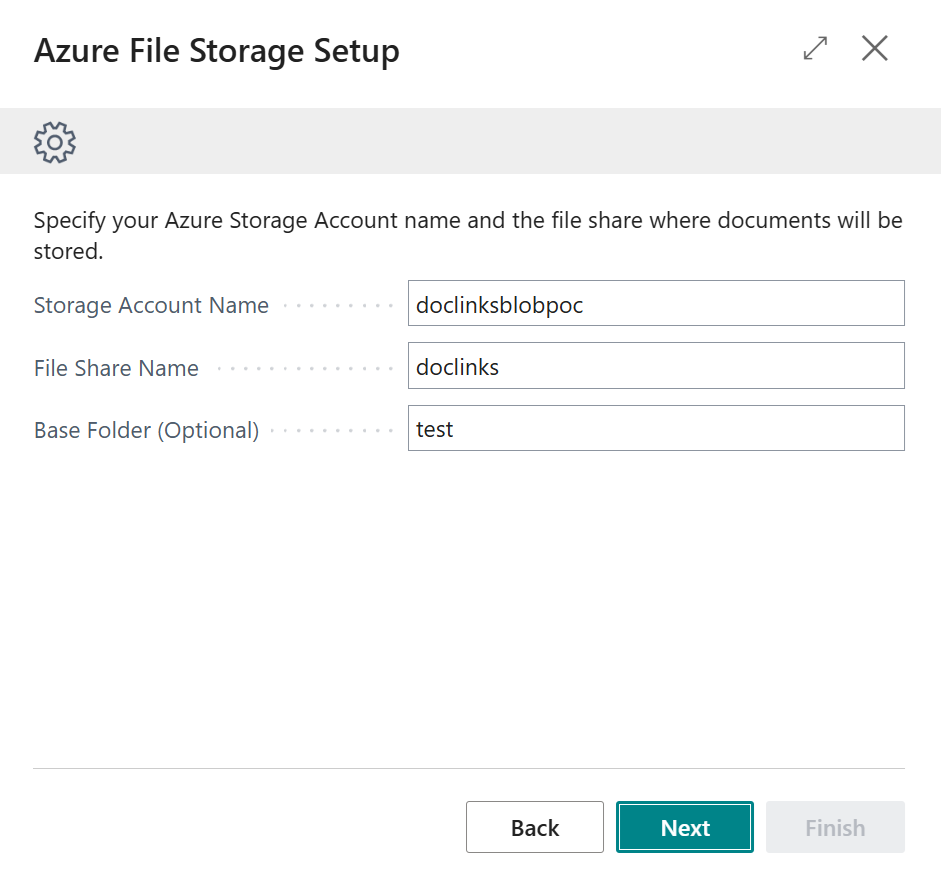
As with the Credentials information, the Storage Account details are available within Azure and must be inputted exactly as they were setup. An example of the Azure setup for Azure File Storage is shown below.
With the Azure File Storage information specified, press Next to continue, which will lead to the following step of the wizard where you are able to decide how you wish files to be organized within the File Share.
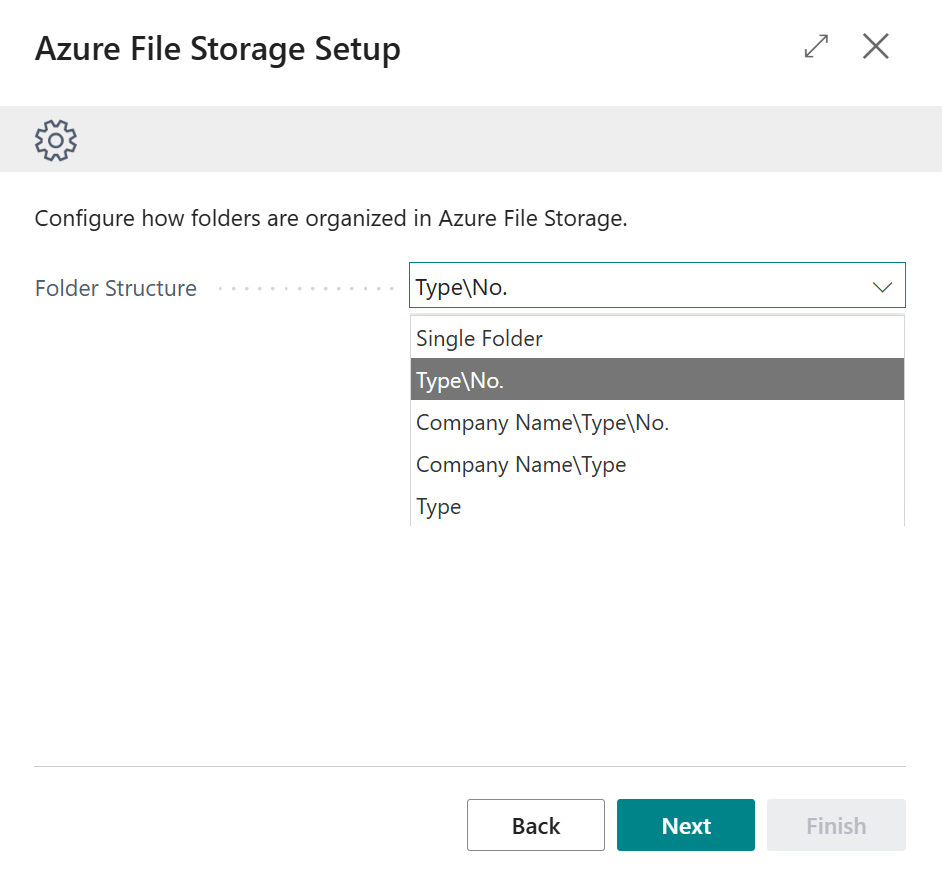
The following options are available:
- Single Folder - Flat structure
- Type/No. - Files stored in a logic structure i.e. Customer\Customer No.\FileName
- Company Name/Type/No. - Files stored in a logic structure for multiple companies i.e. Company Name\Customer\Customer No.\FileName
- Company Name\Type - Files stored in a logic structure for multiple companies i.e. Company Name\Customer\File Name
- Type - Files stored in a logic structure i.e. Customer\FileName
Once you've made your selection, press Next to continue.
Finally, you'll be able to test your connection to ensure that Document Links has been configured successfully.
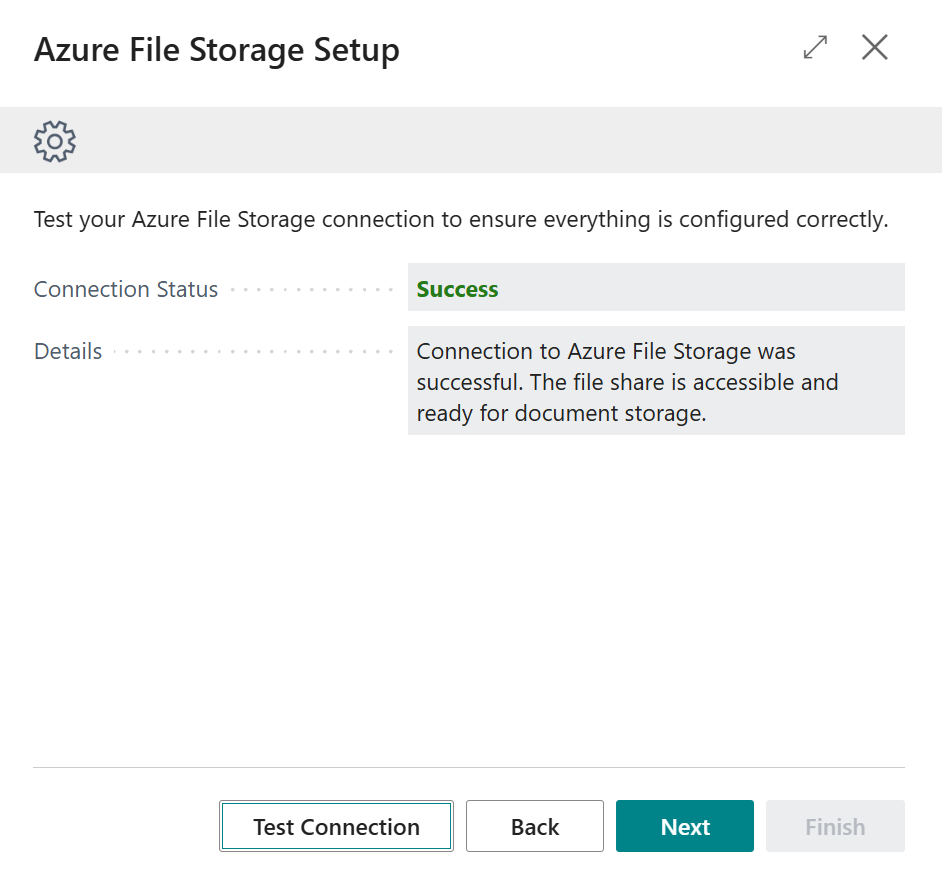
Press the Test Connection button and so long as you have entered the connection details correctly you should see the Connection Status is set to Success.
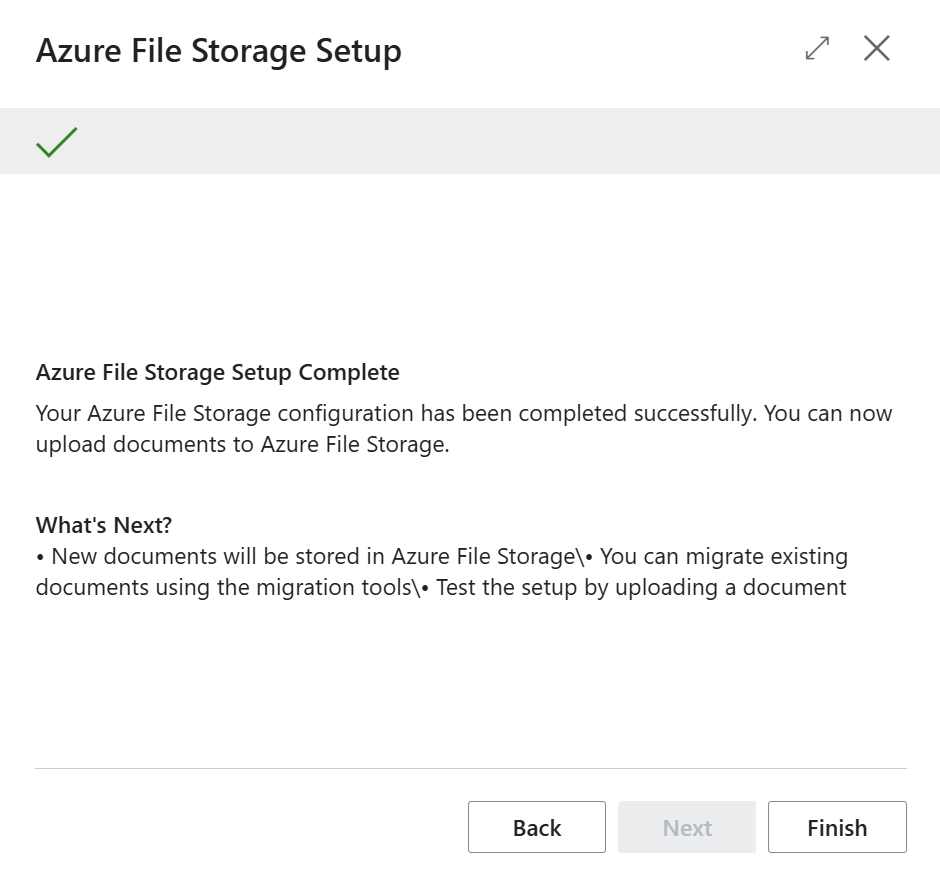
Finally, press Next to continue and you will be shown the following screen. Should you wish to make any changes to the connection you can go Back through the wizard, but if everything is OK then press Finish and you're all good to go with using Document Links with Azure File Storage.