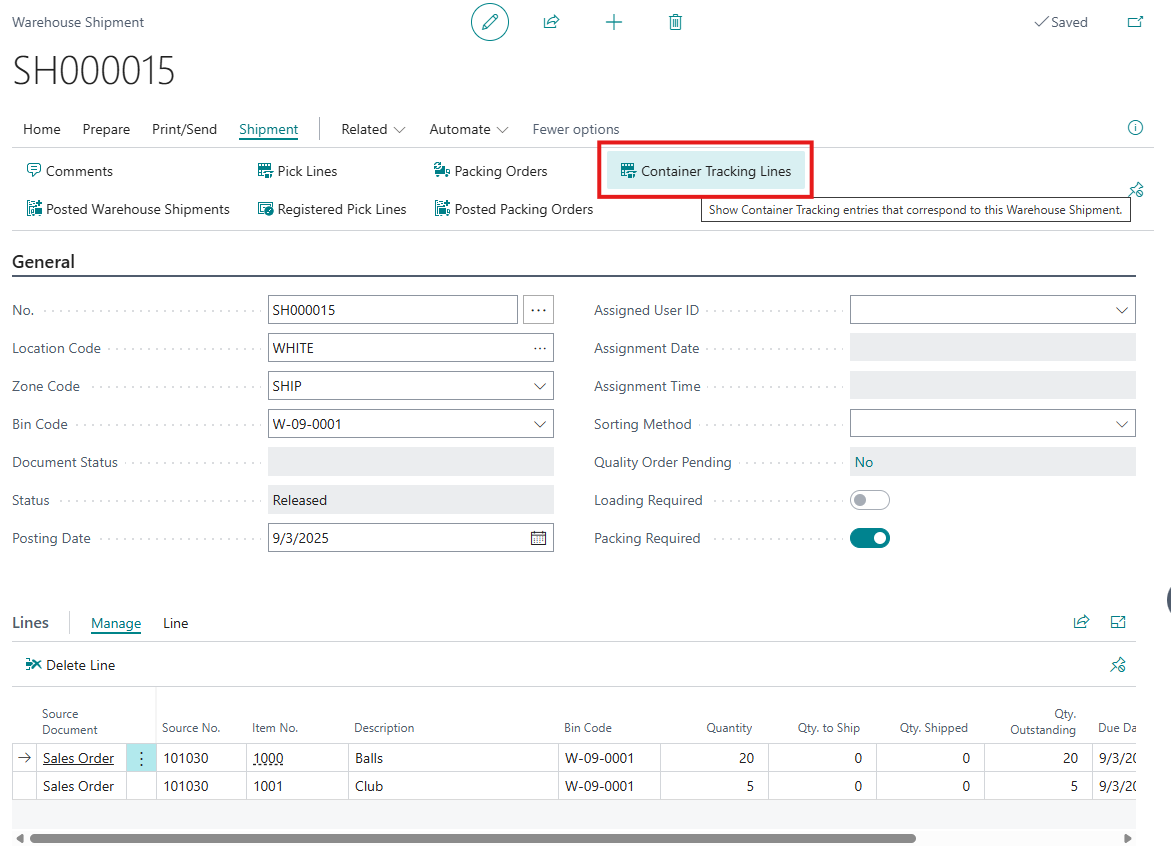
A menu option called Container Tracking Lines has been added to the Ribbon on the "Warehouse Shipment" to allow you to view or setup the Container that the items will be shipped out of the warehouse as part of the shipping process.
The Container information for items being shipped from the Warehouse can be added to the "Warehouse Shipment" document manually prior to shipping, but if using Container functionality through the warehouse processes, then no user intervention is required as the information will then be copied from the originating document (e.g. a warehouse pick) onto to the "Warehouse Shipment".

To create "Container Tracking Lines" manually, you can either enter the information manually or use built in functionality to make the process more efficient.
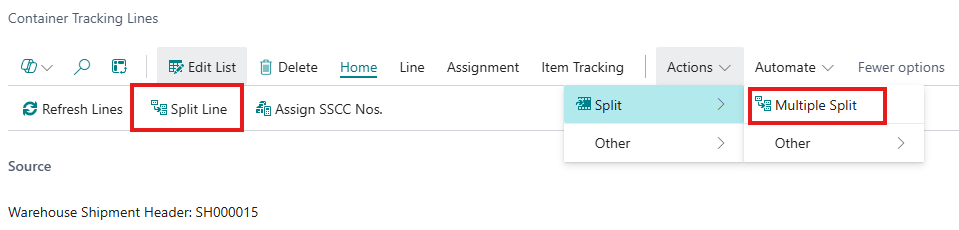
If required, you will then have the option of being able to select the Split Line Function to split the quantity of an item out over more than one line so that they can be placed into different Containers, with two options as shown below.
If you select Split Line then the system will simply use the current line and split it into a new one, but if you use the Actions -> Multiple Split then you will be shown an Options screen whereby you are able to confirm the total number of Containers you want to create (including the currently selected line) and the system will create multiple Container Tracking Lines and will set the Quantity on all Lines to 1, after which you can then update as/if required.
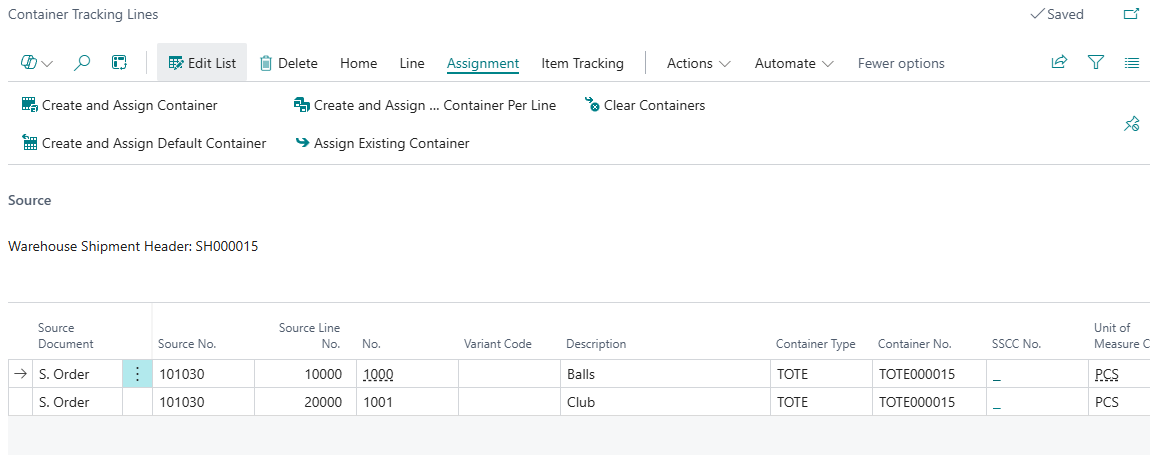
The next step would be to assign the lines to the Container that you would like to use to ship the items out to the customer in. This should be completed by selecting one of the options located under the Assignment menu option. The options work as follows:
|
Assignments |
The options to select are: Create & Assign Container – Assigns the selected lines to a new container of a type that you select from the list of available container types. Create & Assign new container per line – Create and Assign Default Container Per Line. Assigns the selected lines to different new containers of the default type specified on the item card. Clear Containers – Clears the container assignment for the selected lines. Create and Assign Default Container - Assigns the selected lines to a new container of the default type specified in Container Setup. Assign Existing Container - Assign the selected lines to an existing container that you select from a list. |
Once you have selected an option above you will see the lines are now populated with Container Type & Container No.

The last step is optional to complete and would be to assign the Container an SSCC Number if required. This can be done on the Menu Ribbon Selecting Home and Assign SSCC Nos. The SSCC Number functionality has been described previously in this documentation.
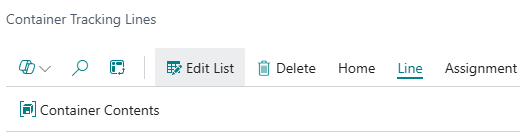
Other options on the Menu Ribbon include:
| Line, Container Contents | Shows the contents of the selected Container |
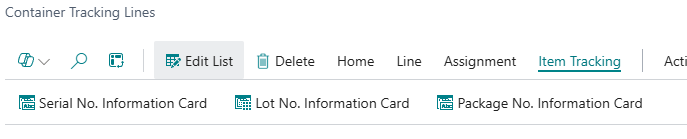
| Item Tracking | |
| Serial No. Information Card | View or Edit detailed information about the serial number |
| Lot No. Information Card | View or Edit detailed information about the Lot number |
| Package No. Information Card | View or Edit detailed information about the Package number |
You can then carry on and process the Warehouse Shipment as you normally would. Once the Warehouse Shipment is posted, the Container Card will be automatically updated to reflect which items are now stored within it as well as the Location and Bin information. Container Entries will also have been created.
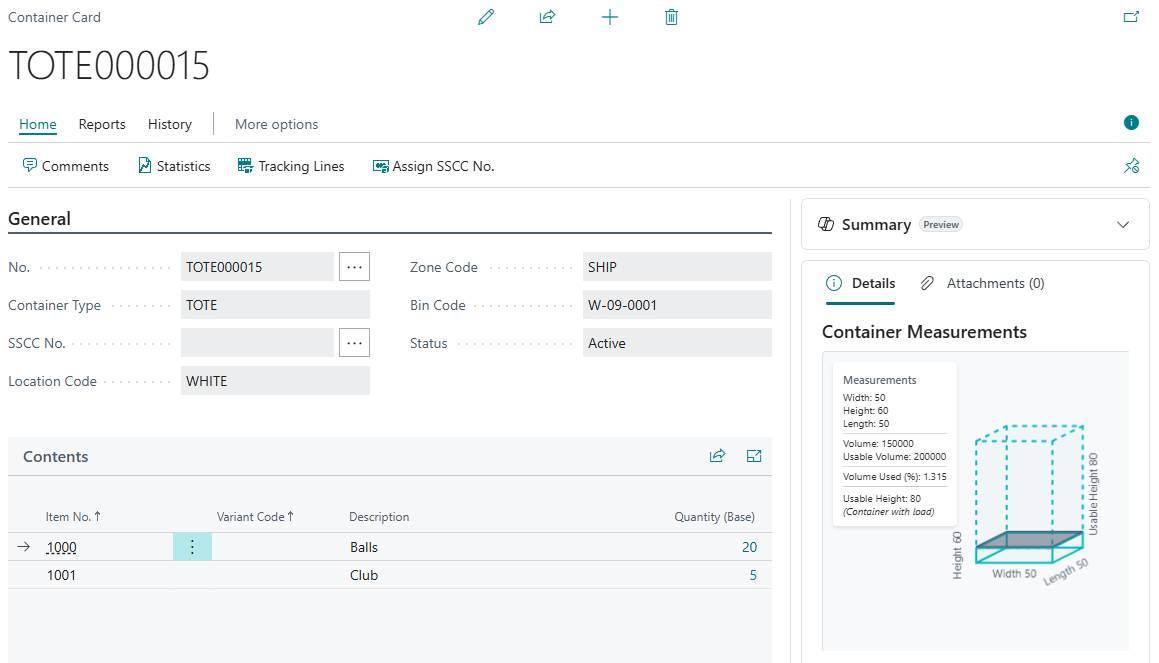

In addition, the Container Tracking details defined will also be recorded against the Posted Warehouse Shipment and the related Warehouse Entries that are created.
