Clever Landed Costs includes an assisted setup wizard that takes you through the main settings one step at a time. Use it when you first install the app, or whenever you want to review the core configuration.
Welcome to Clever Landed Costs
To start, search for the "Assisted Setup" screen and select Set-up Clever Landed Costs from the Clever Dynamics group. This opens the "Welcome to Clever Landed Costs" screen.
From the "Welcome to Clever Landed Costs" screen you can choose from the following options.
| Assisted Setup | Opens the "Clever Landed Costs Assisted Setup" wizard, which guides you through the setup process. |
| Manual Setup | Opens the Landed Cost Setup screen. Use this if you have used the app before or want to fine-tune the setup. |
| Close | Closes the screen without making any changes. |
| User Guide | Opens this user guide. |
| Introduction (Video) | Plays an introductory video about Clever Landed Costs. |
Once you have used either Assisted Setup or Manual Setup from this screen, the welcome screen is marked as viewed.
You can also open the wizard at any time by selecting Assisted Setup from the menu ribbon of the "Landed Cost Setup" screen.
Using the Wizard
Use Next and Back to move between the steps. Each setting you choose is saved straight to the "Landed Cost Setup" screen.
-
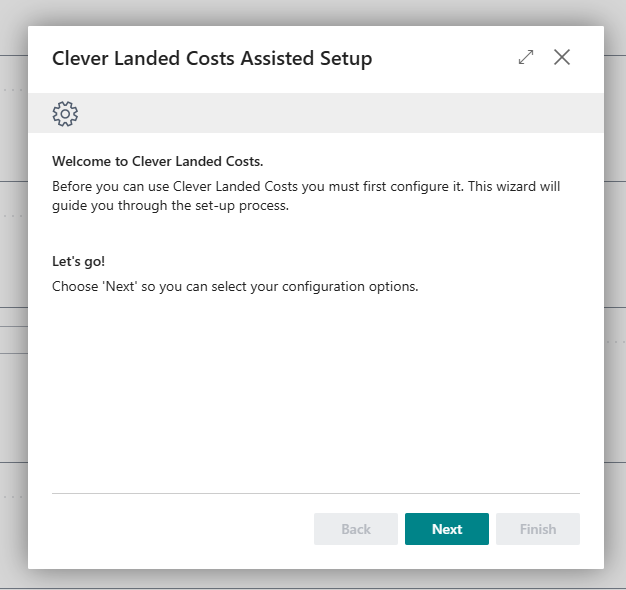
Welcome - an introduction to the wizard. Choose Next to start choosing your configuration options.
-
Containers - complete these options if you want to use Landed Cost Containers.
-
Cost Treatment defaults - choose how new Landed Cost Types post costs.
-
Options - choose your Invoice Wizard, Fixed Cost, Incoterm and cost calculation options.
-
Finish - save your settings and close the wizard.
Step 2 - Containers
If you wish to use the Landed Cost Container functionality, complete the following fields. See Landed Cost Containers.
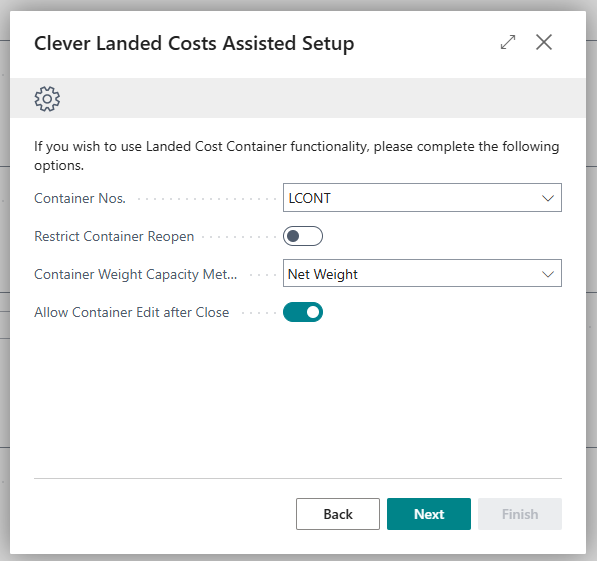
| Container Nos. | The No. Series used to number new Landed Cost Containers. |
| Restrict Container Reopen | Stops a Landed Cost Container from being reopened once a Warehouse Receipt has been created for it. |
| Container Weight Capacity Metric | Specifies whether the Assigned Weight on a Landed Cost Container is calculated using Net Weight or Gross Weight. |
| Allow Container Edit after Close | Allows informational fields on a closed Landed Cost Container, such as Seal No., Job No. and port information, to be updated without reversing any postings. |
| Bypass Auto Update Container Qty. Lines | Bypasses the automatic Reduce or Move prompt when the Landed Cost Container Qty. is changed on a document line. When enabled, you can update several lines and then process all the changes together using the Validate Landed Cost Container Qty. action. |
Step 3 - Cost Treatment defaults
Landed Cost Types post expected and actual costs to your Inventory, and the Cost Treatment controls how those costs are posted to Inventory and the General Ledger. If you are not sure which option to choose, see Choosing the Cost Treatment Method.
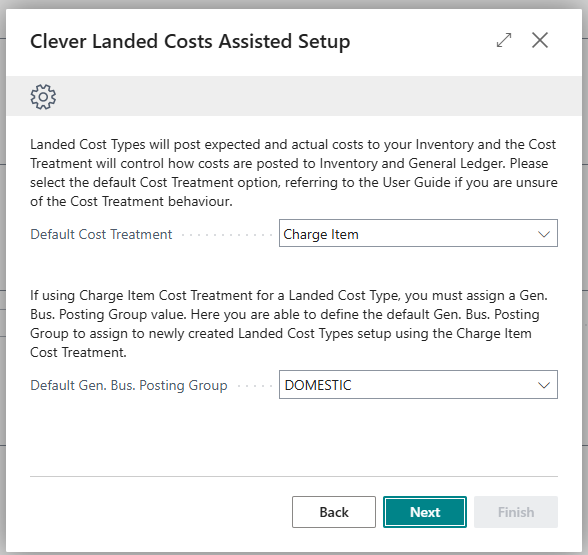
| Default Cost Treatment | The Cost Treatment given to new Landed Cost Types, either Default or Charge Item. |
| Default Gen. Bus. Posting Group | The Gen. Bus. Posting Group given to new Landed Cost Types that use the Charge Item Cost Treatment. A Landed Cost Type that uses Charge Item must have a Gen. Bus. Posting Group. |
Step 4 - Options
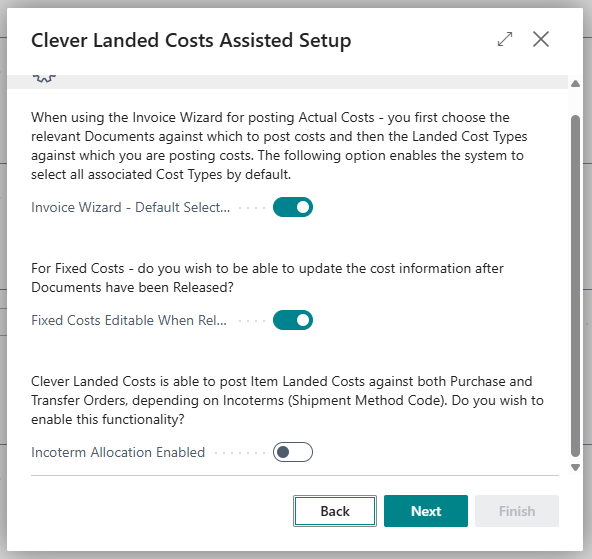
| Invoice Wizard - Default Select All Cost Types | When you post actual costs with the Invoice Wizard, you first choose the documents to post costs against and then the Landed Cost Types. Enable this field to have all related Landed Cost Types selected by default. |
| Fixed Costs Editable When Released | Enable this field if you want to be able to update Fixed Cost information after a document has been Released. |
| Incoterm Allocation Enabled | Enable this field to post Item Landed Costs against Purchase Orders or Transfer Orders, depending on the Incoterm (Shipment Method Code). See Incoterm Allocation. |
| Re-calculate Rates on Receipt | Re-calculates landed cost rates when the receipt is posted, using the posting date to determine the applicable rate instead of the expected receipt date. |
| Use Net Purchase Price | Calculates Percentage and Duty Landed Cost Types from the net purchase price (after Line Discount and Invoice Discount) instead of the gross Direct Unit Cost. |
Note: when you enable Incoterm Allocation Enabled in the wizard, you are asked whether you want to initialise the "Landed Costs Incoterms" matrix with default values. If you choose Yes, you select a default allocation type (Not Applied, Purchase or Transfer) and the matrix is filled in for every Landed Cost Type and Shipment Method combination, then opened for review. You can amend it at any time by selecting Landed Cost Incoterms from the Setup menu on the "Landed Cost Setup" screen.
Step 5 - Finish
Select Finish to close the wizard and start using Clever Landed Costs. If you started the wizard from the welcome screen, you can instead select Finish and Review to close the wizard and open the "Landed Cost Setup" screen, so you can check and amend your settings. If you started the wizard from the "Landed Cost Setup" screen, selecting Finish returns you to that screen.